How to View Your GPU Information in Windows 11/10
Your graphics card (GPU) is a critical component of your computer, responsible for rendering images, videos, and games. Whether you’re troubleshooting, upgrading, or just curious about your system’s hardware, knowing how to check your GPU in Windows 11/10 is essential. This guide will walk you through several methods to identify and check the status of your GPU.
1. Check Your GPU Using Task Manager
Task Manager is a built-in tool in Windows that provides detailed information about the hardware and software running on your system, including your GPU.
Steps:
- Open Task Manager:
- Press Ctrl + Shift + Esc to open Task Manager directly, or right-click the Taskbar and select Task Manager.
- Go to the Performance Tab:
- Click on the Performance tab at the top of the Task Manager window.
- Select GPU:
- On the left-hand side, you’ll see a list of performance metrics. Scroll down and click on GPU.
- Here, you can view the name of your GPU, along with real-time usage statistics like utilization, memory usage, and driver version.

2. Check Your GPU Using Device Manager
Device Manager provides a more detailed view of your system’s hardware, including your graphics card.
Steps:
- Open Device Manager:
- Press Win + X and select Device Manager from the menu.
- Expand Display Adapters:
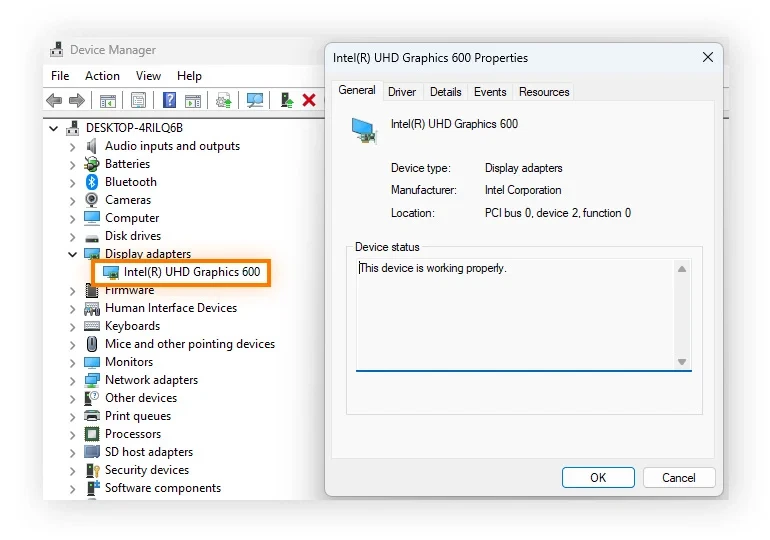
- In the Device Manager window, expand the Display adapters section by clicking the arrow next to it.
- Identify Your GPU:
- Under Display adapters, you’ll see the name of your GPU. This could be an integrated graphics chip (like Intel HD Graphics) or a dedicated GPU (like NVIDIA or AMD).
- Check Properties:
- Right-click on your GPU and select Properties to view additional details, including driver information and hardware IDs.

3. Check Your GPU Using DirectX Diagnostic Tool (DxDiag)
The DirectX Diagnostic Tool (DxDiag) provides comprehensive information about your system’s hardware and software, including your GPU.
Steps:
- Open the Run Dialog Box:
- Press Win + R to open the Run dialog box.
- Run DxDiag:
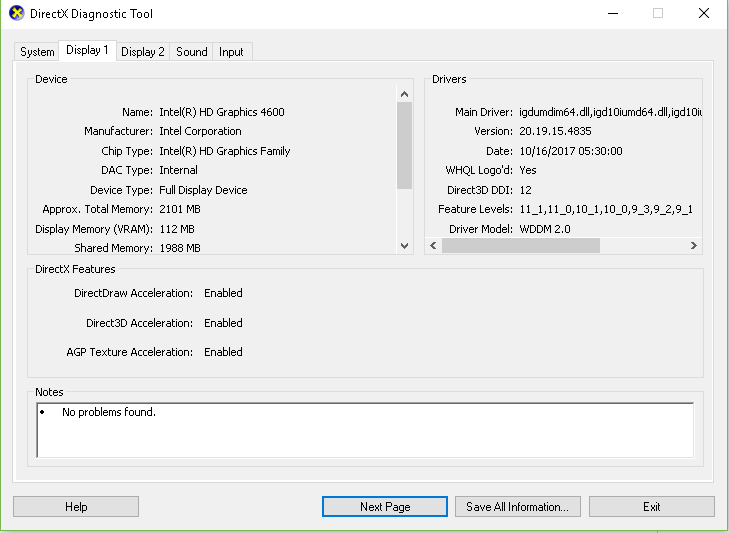
- Type dxdiag and press Enter. This will open the DirectX Diagnostic Tool.
- Go to the Display Tab:
- Click on the Display tab (or Display 1 if you have multiple displays). Here, you’ll find detailed information about your GPU, including its name, manufacturer, chip type, and the amount of video memory (VRAM).
- Save Information:
- If you need to save the information for later, you can click on Save All Information and save the details as a text file.

4. Check Your GPU Using System Information
System Information is another built-in tool that provides a detailed overview of your computer’s hardware, including the GPU.
Steps:
- Open System Information:
- Press Win + R to open the Run dialog box, then type msinfo32 and press Enter.
- Navigate to Components:
- In the System Information window, expand the Components section on the left-hand side.
- Select Display:
- Click on Display. Here, you’ll find information about your GPU, including its name, manufacturer, and driver version.
5. Check Your GPU Using Third-Party Software
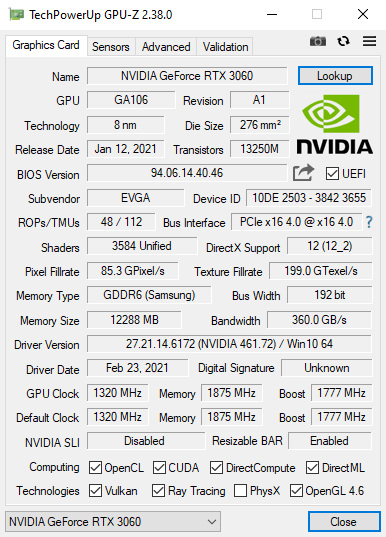
If you need more detailed information about your GPU, including temperatures, clock speeds, and more, third-party software like GPU-Z or HWMonitor can be very helpful.
Steps:
- Download and Install GPU-Z:
- Visit the TechPowerUp website and download GPU-Z.
- Run the Software:
- Launch GPU-Z, and it will immediately display detailed information about your GPU, including specifications, memory type, clock speeds, and more.
- Monitor GPU Performance:
- You can also use GPU-Z to monitor your GPU’s performance in real-time, including temperature, load, and power usage.

Conclusion
By following these steps, you can easily check your graphics card (GPU) in Windows 11/10 using built-in tools like Task Manager, Device Manager, and DxDiag, or through third-party software for more detailed information. Whether you’re troubleshooting, planning an upgrade, or just curious about your system’s specs, these methods provide a comprehensive way to access the information you need.
