How to Fix the Memory Management Stop Code on Windows 10
The “Stop Code Memory Management” error is a Blue Screen of Death (BSOD) issue in Windows 10 that can be caused by various factors, including hardware failures, corrupted system files, or driver issues. This error can be frustrating as it often results in a sudden crash and restart of your computer. Fortunately, there are several steps you can take to troubleshoot and resolve this issue.
Understanding the Memory Management Error
The Memory Management error typically indicates a problem with your computer’s RAM (Random Access Memory) or a conflict in how your system manages memory. This error can be triggered by anything from a faulty RAM module to corrupted system files or outdated drivers.
1. Restart Your Computer
The first and simplest step is to restart your computer. A restart can clear temporary issues that might be causing the error.
Steps:
- Click on the Start menu.
- Select the Power icon and choose Restart.
- After the computer restarts, check if the error reoccurs.
2. Run the Windows Memory Diagnostic Tool
The Windows Memory Diagnostic Tool is a built-in utility that can help detect and diagnose memory-related issues.
Steps:
- Press Win + R to open the Run dialog box.
- Type mdsched.exe and press Enter to open the Windows Memory Diagnostic tool.
- Select Restart now and check for problems (recommended).
- Your computer will restart, and the diagnostic tool will run automatically. Once it completes, your computer will restart again, and the results will be displayed.

3. Update Device Drivers
Outdated or incompatible drivers can cause memory management errors. Updating your drivers to the latest versions can help resolve this issue.
Steps:
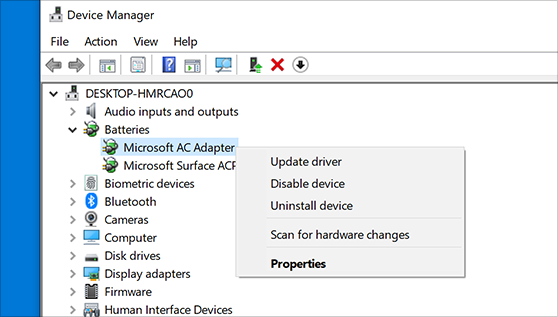
- Press Win + X and select Device Manager.
- Expand the categories (e.g., Display adapters, Network adapters) to find the devices you want to update.
- Right-click the device and select Update driver.
- Choose Search automatically for updated driver software.
- Follow the prompts to install any available updates.
4. Run the System File Checker (SFC) and DISM
Corrupted system files can trigger the Memory Management error. Running the System File Checker (SFC) and Deployment Imaging Service and Management Tool (DISM) can help repair these files.
Steps:
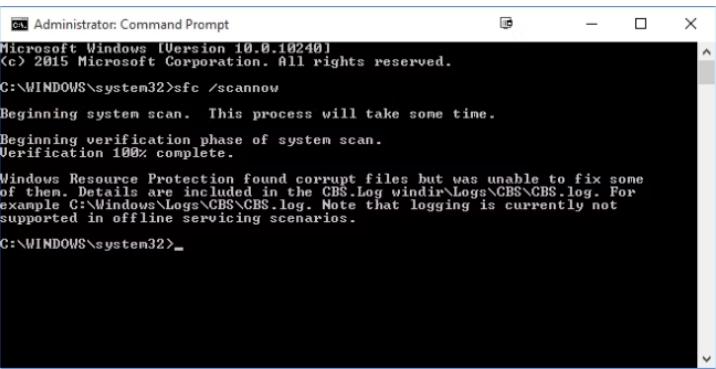
- Open Command Prompt as an administrator: Press Win + X and select Command Prompt (Admin).
- Type
sfc /scannowand press Enter. This will scan and repair any corrupted system files. - After the SFC scan is complete, type the following command and press Enter:
mathematica
DISM /Online /Cleanup-Image /RestoreHealth
- Once the DISM process completes, restart your computer.
5. Check for Windows Updates
Keeping your Windows operating system up to date ensures that you have the latest bug fixes and improvements, which can resolve issues like the Memory Management error.
Steps:
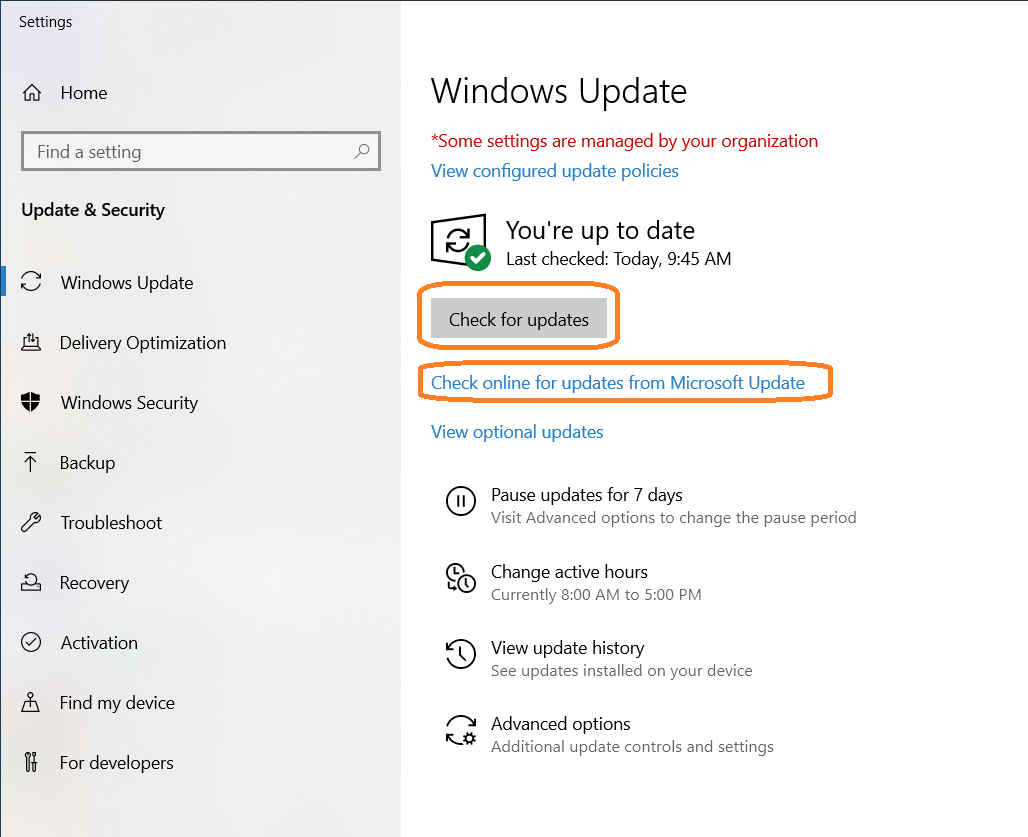
- Go to Settings by pressing Win + I.
- Navigate to Update & Security > Windows Update.
- Click Check for updates and install any available updates.
- Restart your computer if necessary.
6. Check for Hardware Issues
Faulty hardware, particularly RAM, can cause the Memory Management error. If you suspect that your RAM might be faulty, consider testing it or replacing it.
Steps:
- Turn off your computer and unplug it from the power source.
- Open the computer case and check the RAM modules. Ensure they are properly seated.
- If you have multiple RAM sticks, try removing one and restarting the computer to test each stick individually.
- If the issue persists, you may need to replace the faulty RAM module.
7. Perform a Clean Boot
A clean boot can help you identify if third-party applications or services are causing the Memory Management error.
Steps:
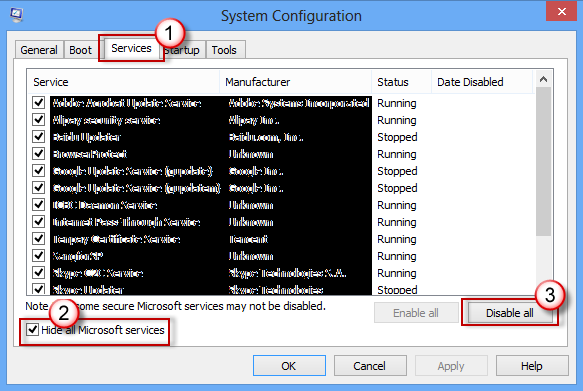
- Press Win + R, type msconfig, and press Enter to open the System Configuration window.
- Go to the Services tab, check Hide all Microsoft services, and click Disable all.
- Go to the Startup tab and click Open Task Manager.
- Disable all startup items.
- Close Task Manager and return to the System Configuration window. Click Apply and OK, then restart your computer.
Conclusion
By following these steps, you should be able to fix the “Stop Code Memory Management” error in Windows 10 and restore your system’s stability. Regularly updating drivers, checking for system updates, and monitoring your hardware can help prevent this issue from occurring in the future. If the problem persists, it may be necessary to seek professional help to diagnose and repair any underlying hardware issues.
