Fixing Error 0xC1900101 in Windows 11
Encountering the error code 0xC1900101 while attempting to upgrade to Windows 11 can be frustrating, as it prevents you from experiencing the latest features and security updates. This error often indicates a driver incompatibility issue, but it can also be caused by other factors. Fortunately, there are several troubleshooting steps you can take to resolve this error and successfully upgrade to Windows 11.
Troubleshooting Guide:
-
Check for System Requirements:
Ensure your computer meets the minimum system requirements for Windows 11. These requirements include a 64-bit processor, at least 4 GB of RAM, and 64 GB of storage space. You can check your system specifications by opening Settings > System > About.
-
Verify Internet Connection:
A stable internet connection is crucial for downloading and installing the Windows 11 update. Ensure you have a reliable internet connection before attempting the upgrade.
-
Free Up Disk Space:
Sufficient disk space is essential for the upgrade process. Make sure you have at least 64 GB of free disk space on the drive where your operating system is installed. You can free up space by deleting temporary files, uninstalling unused programs, or moving files to an external drive.
-
Update Drivers:
Outdated or incompatible drivers can cause issues during the upgrade process. Update your graphics card drivers, network drivers, and other essential drivers to the latest versions. You can manually update drivers from the manufacturer’s website or use a driver update tool.
-
Run Windows Update Troubleshooter:
Windows includes a built-in troubleshooter that can detect and fix common update-related issues. To run the troubleshooter:
-
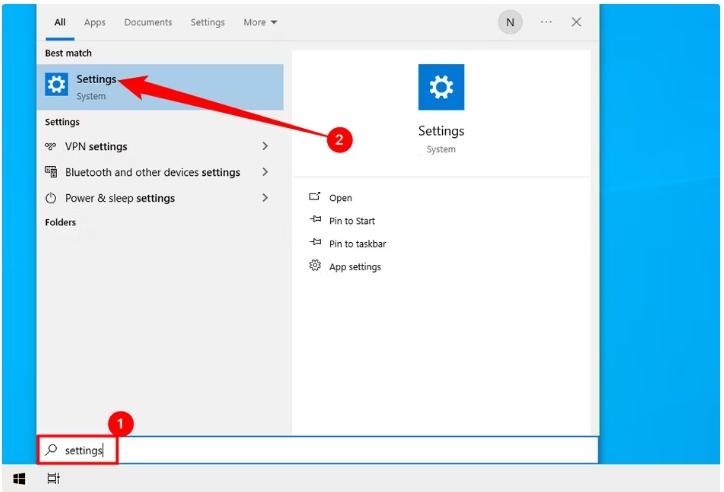
Open the Settings app (Win + I).
-
Go to Update & Security > Troubleshoot.
-
Select Additional troubleshooters.
-
Scroll down and click on Windows Update.
-
Click on Run the troubleshooter.
-
Follow the on-screen instructions to complete the troubleshooting process.
-
-
Check for Third-party Antivirus Software:
In some cases, third-party antivirus software can interfere with the upgrade process. Try temporarily disabling your antivirus software and see if the upgrade proceeds without errors. If the upgrade is successful, re-enable your antivirus and check for updates.
-
Run System File Checker (SFC) and DISM:
System File Checker (SFC) and Deployment Image Servicing and Management (DISM) are tools that can scan and repair corrupted system files. To run SFC and DISM:
-
Open Command Prompt as administrator. You can do this by right-clicking the Start button and selecting Command Prompt (Admin).
-
In the Command Prompt window, type the following command and press Enter:
sfc /scannow- Once the SFC scan is complete, type the following commands and press Enter after each one:
DISM.exe /Online /Cleanup-image /Scanhealth DISM.exe /Online /Cleanup-image /Restorehealth- Restart your computer after the DISM commands finish.
-
-
Perform a Clean Boot:
A clean boot starts Windows with a minimal set of drivers and startup programs. This can help identify and eliminate any conflicting software that might be causing the upgrade error.
-
Open System Configuration. You can do this by pressing Win + R, typing msconfig, and pressing Enter.
-
In the System Configuration window, go to the Services tab.
-
Check the box next to Hide all Microsoft services.
-
Click on Disable all.
-
Go to the Startup tab.
-
Click on Open Task Manager.
-
In the Task Manager window, go to the Startup tab.
-
For each startup item, right-click and select Disable.
-
Close Task Manager and System Configuration.
-
Restart your computer.
-
Try upgrading to Windows 11 again.
-
-
Create a New User Profile:
If the issue is related to your current user profile, creating a new user profile can help determine if it’s a profile-specific problem. To create a new user profile:
Additional Tips:
-
If you’re using a virtual machine, check with the virtual machine software provider for any specific upgrade instructions or compatibility requirements.
-
If you’ve tried all these troubleshooting steps and the error persists, it might be a more serious hardware or software issue. Consider contacting Microsoft support or a qualified computer technician for further assistance.
Important Note:
Before making any significant changes to your system, such as modifying the registry or performing a clean boot, it’s highly recommended to create a backup of your important files and system settings. This will help you restore your system if something goes wrong.
By following these troubleshooting steps and considering the additional tips, you should be able to resolve the error code 0xC1900101 and successfully upgrade your computer to Windows 11. Remember, patience and careful execution are key to troubleshooting these types of issues.


