SAAC's Team
July 4, 2024
The Ultimate Guide to Text Formatting in Microsoft Word
Microsoft Word offers a vast array of tools for formatting text, allowing you to create visually appealing and professional documents. Whether you’re crafting a simple letter or a complex report, mastering text formatting is essential for effective communication. This comprehensive guide will walk you through the various ways to enhance your text in Word.
1. Basic Formatting: The Foundation of Readability
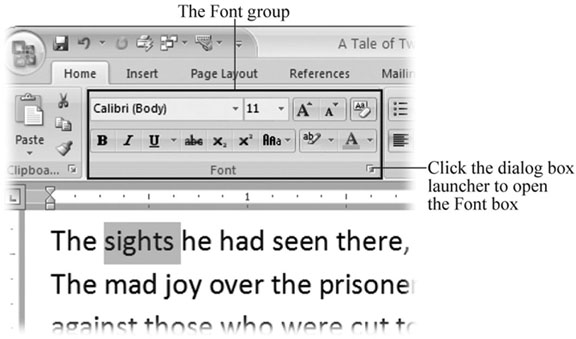
- Font Styles: Choose from a variety of fonts (e.g., Arial, Times New Roman, Calibri) to match your document’s tone and purpose.
- Font Sizes: Adjust font sizes to create hierarchy and emphasis. Use larger fonts for headings and smaller fonts for body text.
- Bold, Italic, Underline: These basic formatting options can be used to emphasize specific words or phrases.
- Font Color: Change the color of your text to add visual interest or highlight important information.
- Highlight: Use the highlighter tool to mark important passages or sections of text.
- Alignment: Align text left, center, right, or justify to create a clean and organized look.
- Line Spacing: Adjust the space between lines to improve readability.
- Indentation: Indent paragraphs to create visual separation and structure.
2. Advanced Formatting: Take Your Text to the Next Level
- Strikethrough: Draw a line through text to indicate deletion or revision.
- Superscript and Subscript: Create superscript (e.g., for footnotes) or subscript (e.g., for chemical formulas) text.
- Small Caps: Format text in capital letters that are slightly smaller than regular capitals.
- Text Effects: Apply special effects like shadows, outlines, or reflections to your text.
- Character Spacing: Adjust the space between individual characters.
- Drop Cap: Create a large, decorative initial letter at the beginning of a paragraph.
3. Styles: Consistent Formatting with Ease
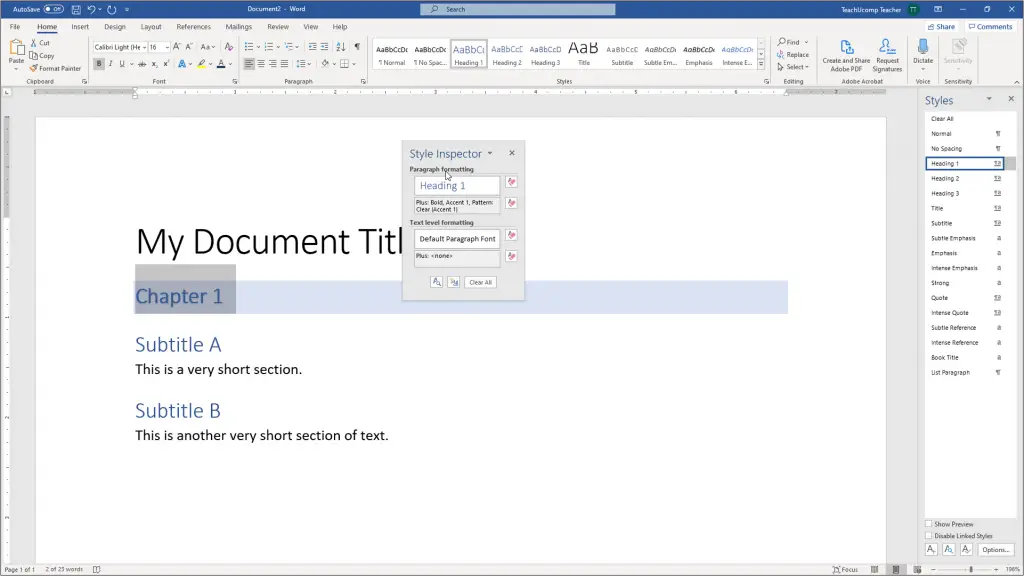
- Heading Styles: Apply heading styles (Heading 1, Heading 2, etc.) to create a clear document structure.
- Paragraph Styles: Use paragraph styles (Normal, Body Text, etc.) to maintain consistent formatting throughout your document.
- Create Custom Styles: Tailor styles to your specific needs and preferences.
- Modify Styles: Easily update the formatting of all text using a particular style by modifying the style itself.
4. Lists: Organize Your Thoughts
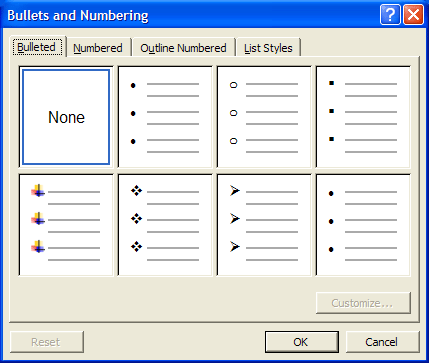
- Bulleted Lists: Use bullet points to create unordered lists of items.
- Numbered Lists: Use numbers to create ordered lists of items.
- Multilevel Lists: Create lists with multiple levels of hierarchy.
- Customize List Styles: Change the appearance of your lists by choosing different bullet or number styles.
5. Tables: Structure Your Data
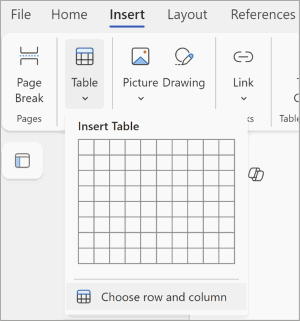
- Insert Table: Easily insert a table into your document and customize its size and appearance.
- Table Styles: Apply pre-designed table styles or create your own.
- Merge and Split Cells: Combine or divide cells to create the desired layout.
- Add Borders and Shading: Enhance the visual appearance of your table.
Additional Tips:
- Clear Formatting: Remove all formatting from selected text by pressing Ctrl+Spacebar.
- Format Painter: Copy formatting from one section of text and apply it to another.
- Show/Hide Formatting Marks: Toggle the display of formatting marks (e.g., spaces, tabs, paragraph marks) to troubleshoot formatting issues.
- Use the Ruler: The ruler at the top of the document allows you to easily adjust margins, tabs, and indents.
By mastering these text formatting techniques in Microsoft Word, you’ll be able to create polished, professional documents that effectively communicate your message.
Subscribe
Login
0 Comments
Oldest

