Installation Guide for SQL Server 2019
SQL Server 2019 is a robust relational database management system (RDBMS) that empowers businesses to store, manage, and analyze data efficiently. Whether you’re a developer, database administrator, or IT professional, this comprehensive guide will walk you through the installation process of SQL Server 2019 on your Windows system.
Why Choose SQL Server 2019?
- Enhanced Performance: SQL Server 2019 boasts significant performance improvements, including faster query processing and improved memory management.
- Intelligent Query Processing: Leverage intelligent query processing features for optimized query performance and efficient data processing.
- Advanced Security: Protect your sensitive data with enhanced security features like Always Encrypted and Transparent Data Encryption.
- High Availability: Ensure business continuity with features like Always On Availability Groups and Failover Cluster Instances.
- Scalability: Easily scale your database to accommodate growing data volumes and workloads.
Prerequisites
Before you begin the installation, ensure your system meets the following requirements:
- Supported Operating Systems: Windows 10, Windows Server 2016, or Windows Server 2019.
- Hardware Requirements: Minimum 4 GB RAM, 6 GB of available hard disk space.
- .NET Framework: .NET Framework 4.6 or later.
Installation Steps
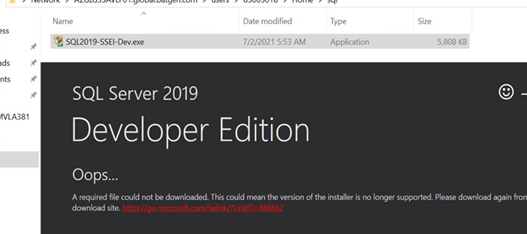
- Download SQL Server 2019: Download the SQL Server 2019 installation media from the Microsoft website. You can choose between the Express, Developer, Standard, or Enterprise edition based on your requirements.
- Launch the Installer: Run the downloaded executable file to launch the SQL Server Installation Center.
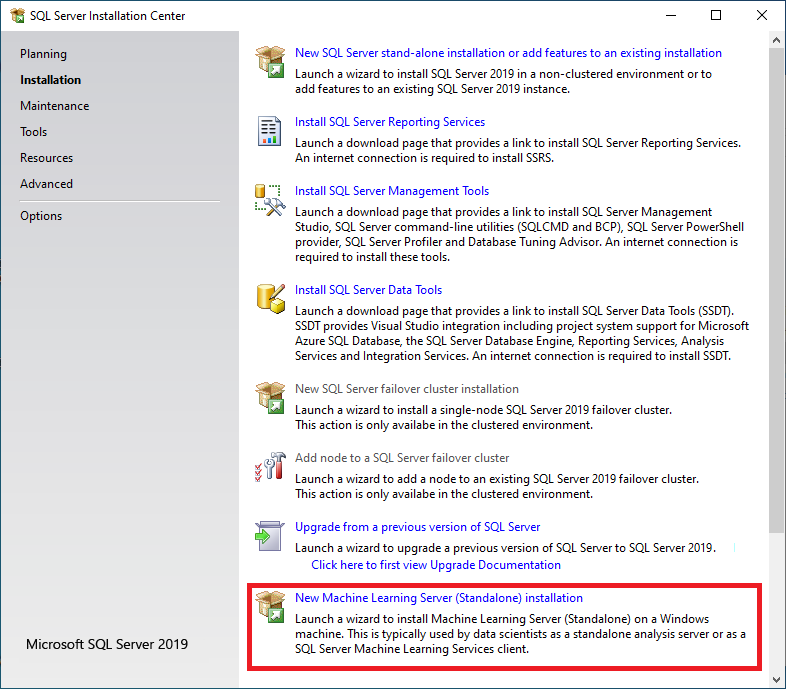
- Choose Installation Type: Select “New SQL Server stand-alone installation or add features to an existing installation.”
- Accept License Terms: Read and accept the license terms and conditions.
- Feature Selection: Choose the features you want to install, such as Database Engine Services, Analysis Services, Reporting Services, or Integration Services.
- Instance Configuration: Configure the instance ID and installation directory.
- Server Configuration: Specify the service accounts and collation settings.
- Database Engine Configuration: Choose the authentication mode (Windows or Mixed Mode) and configure the data directories.
- Analysis Services Configuration: Configure the Analysis Services mode (Multidimensional or Tabular) and specify the data directories.
- Installation Progress: Monitor the installation progress as the selected features are installed.
- Complete: Once the installation is complete, you can launch SQL Server Management Studio (SSMS) to connect to your SQL Server instance and start managing your databases.
Install SQL Server 2019
Windows Directory
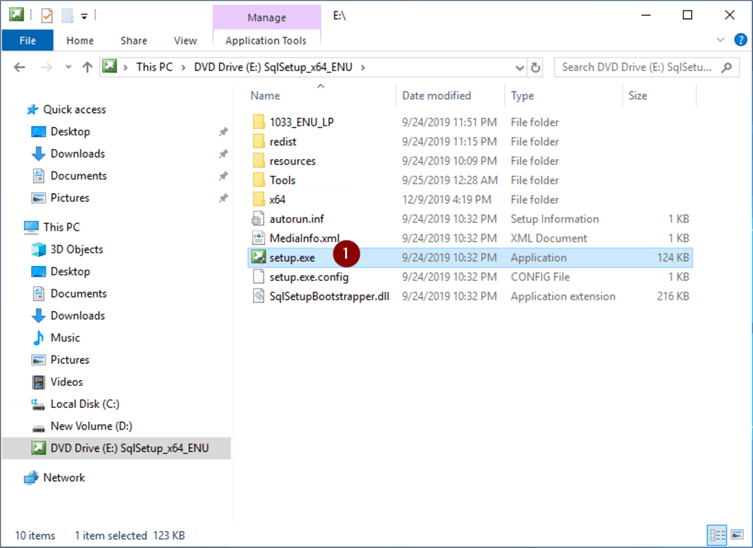
- To start the install, double click on setup.exe and the first screen will open
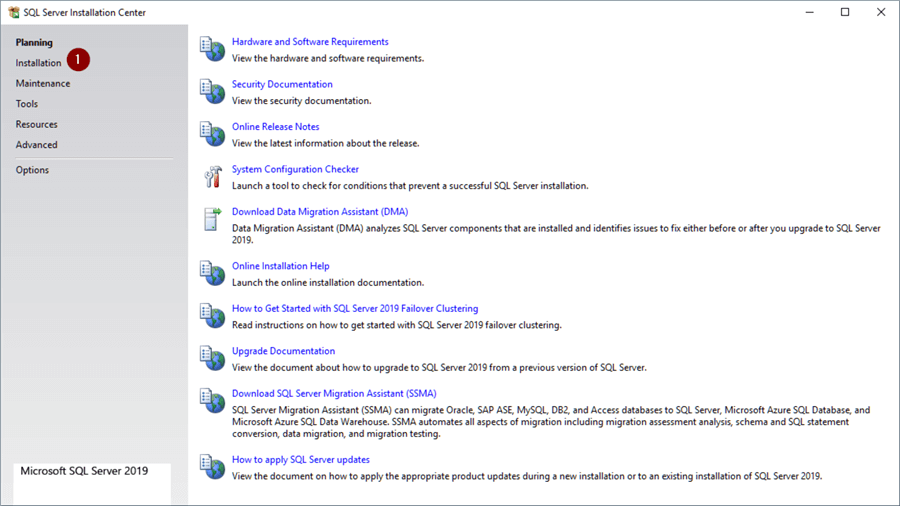
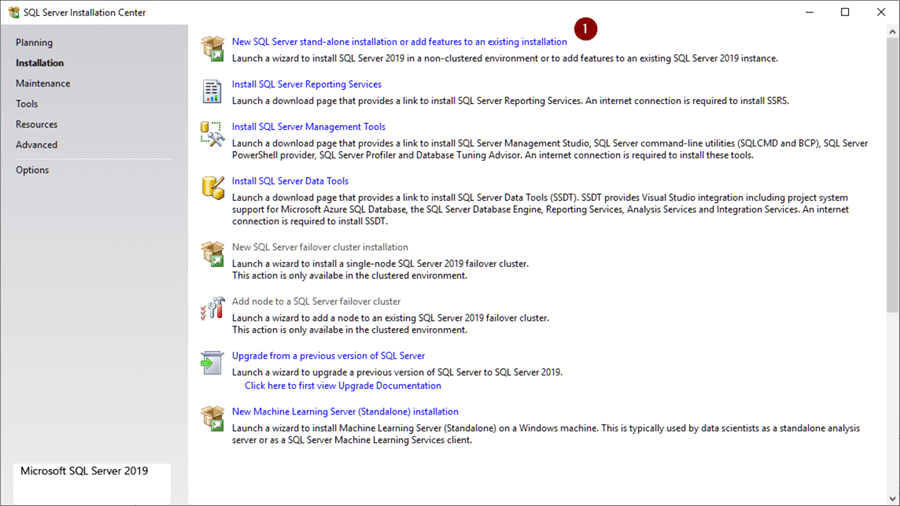
SQL Server Installation Center
- Choose ‘Installation’ from the list on the left side to go to the next screen
Installation
- Choose ‘New SQL Server stand-alone installation or add features to an existing installation’ from the list on the right side
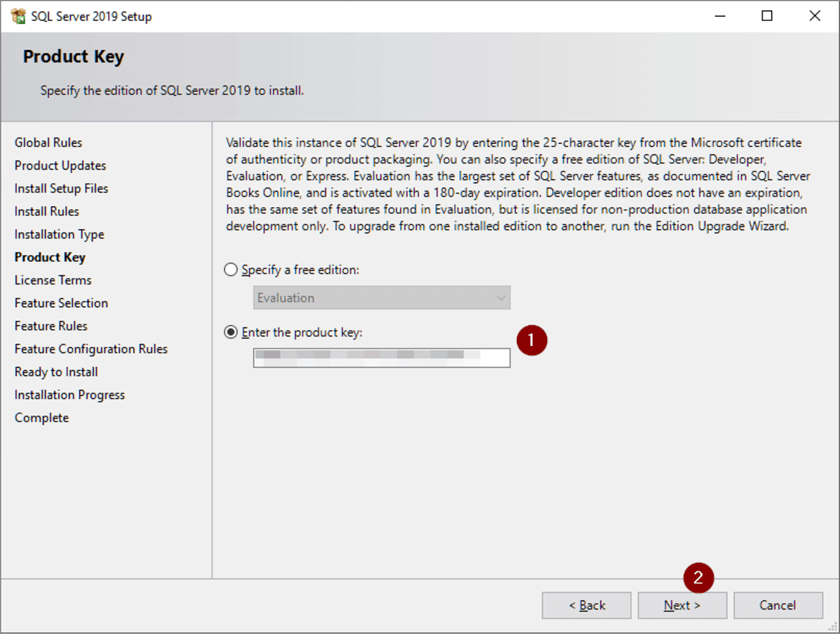
Product Key
- Enter SQL Server 2019 product key or use the free edition
- Next
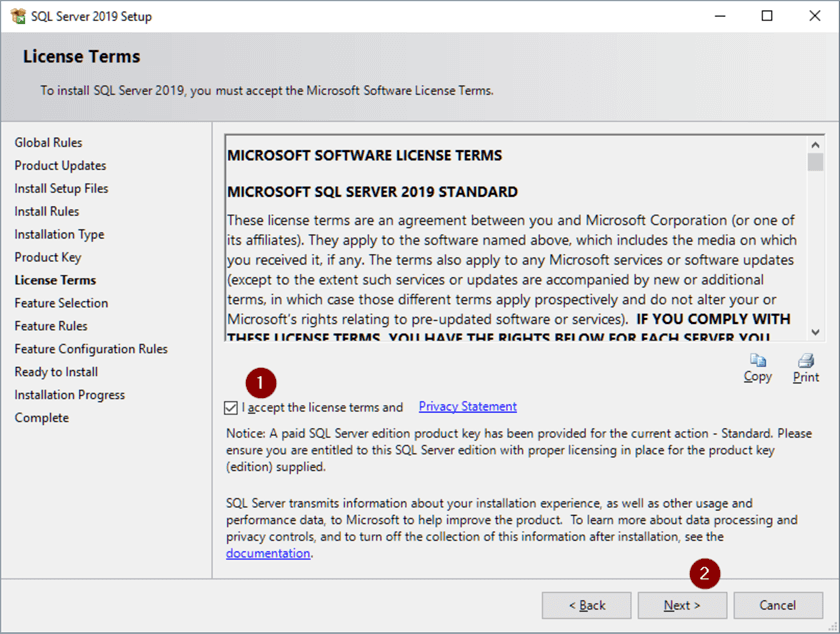
License Terms
- Check ‘I accept the license terms…’
- Next
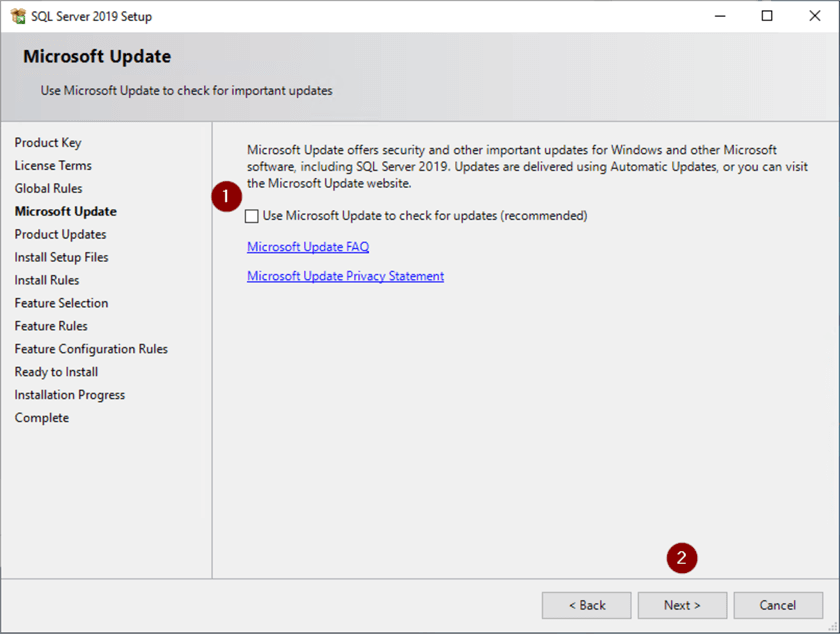
Microsoft Update
- Check ‘Use Microsoft Update to check for updates’ if you want to automatically check, otherwise leave unchecked
- Next
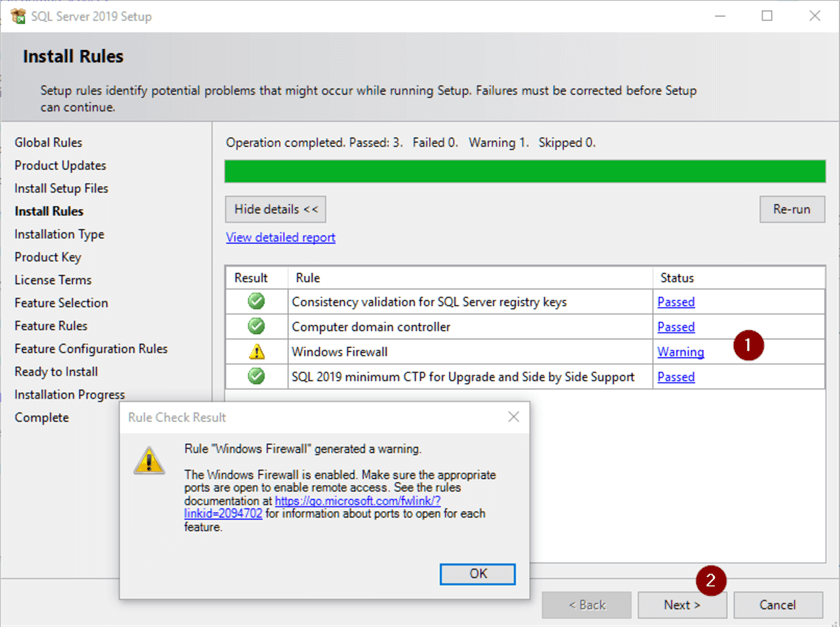
Install Rules
- If there are any issues, click on Warning to get more information. Below the Warning provides a link to what ports need to be open if the Windows Firewall service is running on the machine that you’re installing the SQL Server on
- Next
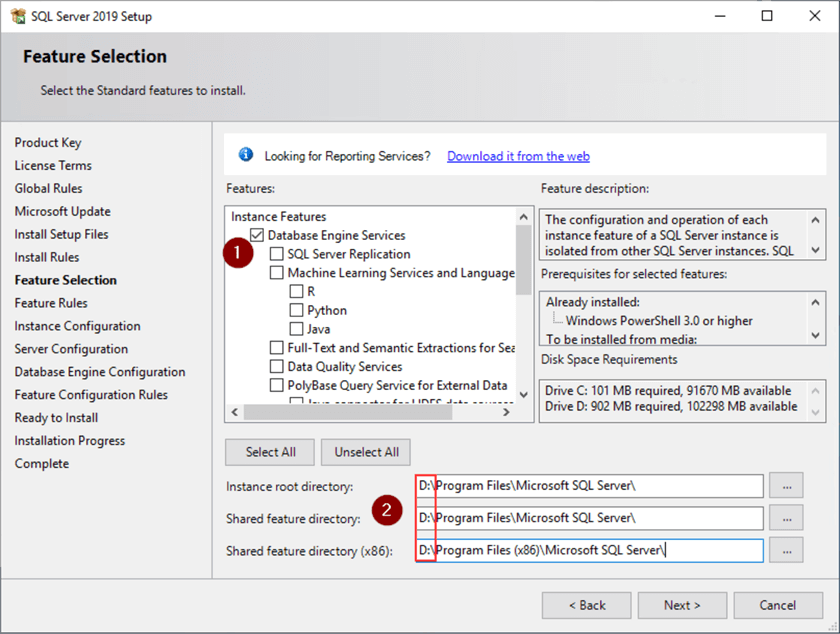
Feature Selection
- Check off ‘Database Engine Services’ (you would check off any additional features you’re installing here but to keep it simple for this tip we’ll only be installing the database engine)
- Change drives from the default of C:\ otherwise you’ll end up installing everything on C:\
- Next
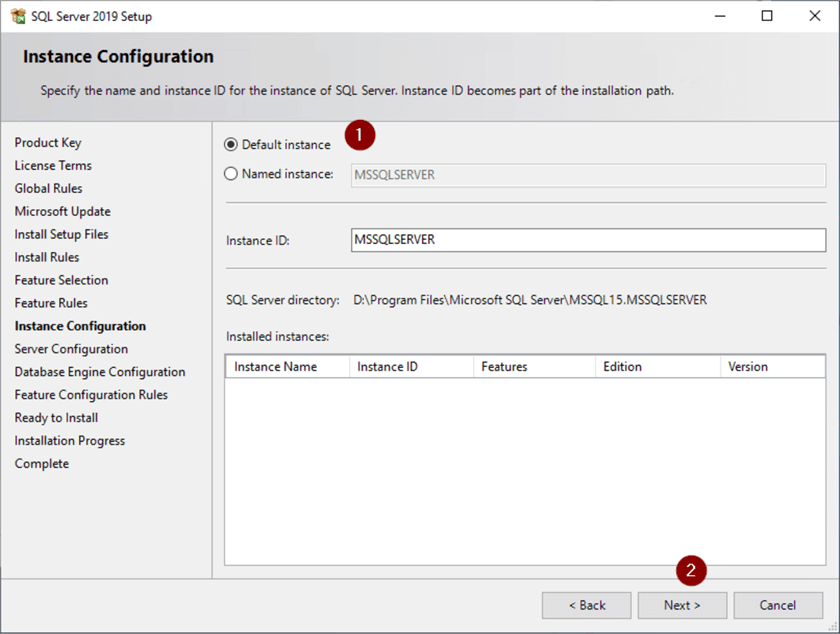
Instance Configuration
- Leave ‘Default instance’ radio button selected to install as the primary instance
- Next
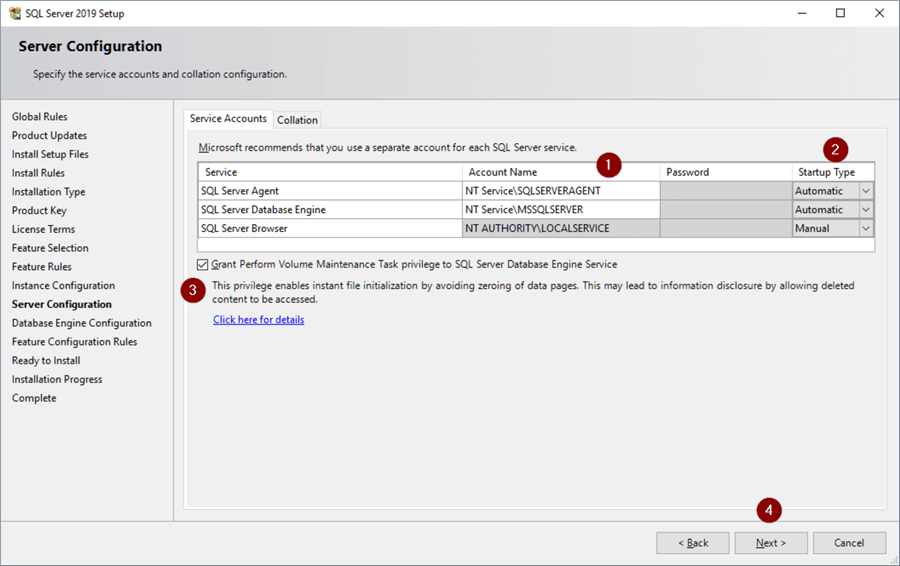
Server Configuration
- Enter Windows Active Directory service account names you want to run the services as
- Set SQL Server SQL Agent and SQL Server Database Engine Startup Type to Automatic to avoid the services not starting on a reboot
- Check on ‘Grant Perform Volume Maintenance Task privilege to SQL Server Engine Service’ – Instant File Initialization (IFI) speeds up file writes by reclaiming disk space without filling that space with zeros – further information on IFI can be found here: Database Instant File Initialization, here: Check SQL Server Instant File Initialization for all Servers and here: Enable SQL Server Instant File Initialization for Time Saving
- Next
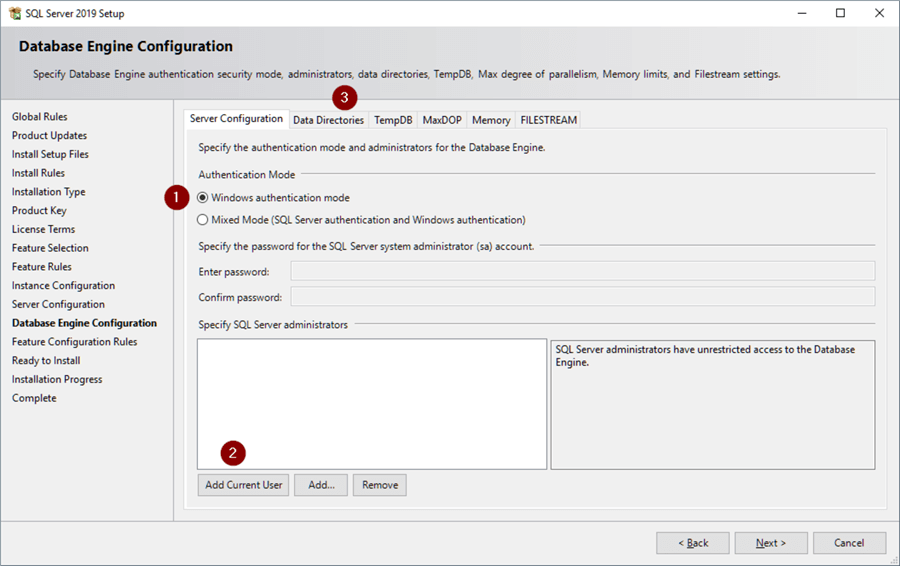
Database Engine Configuration
- Leave the ‘Windows authentication mode’ radio button checked unless you’re sure you need SQL Authentication logins, otherwise select ‘Mixed Mode’ and enter and confirm strong password for the sa login – if in doubt, changing to ‘Mixed Mode’ is easily done after the install – additional information on SQL Server authentication can be found here: Choose an Authentication Mode and here: How to check SQL Server Authentication Mode using T SQL and SSMS
- ‘Add Current User’ to make the current Windows account a SQL Server Administrator – Use ‘Add…’ to add additional logins to the sysadmin security group judiciously as anyone in this group has full rights over the SQL Server and this should not be granted without thought
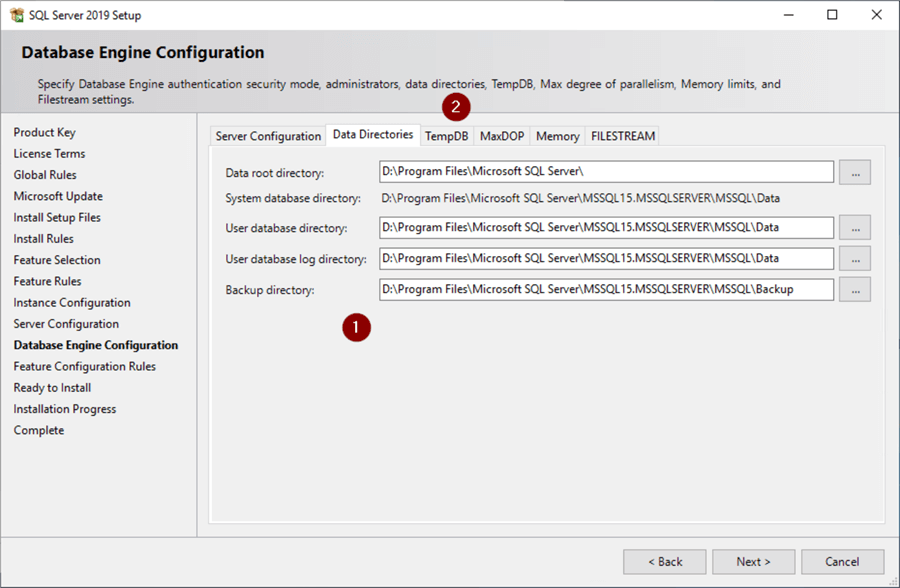
- Click ‘Data Directories’ tab
Data and Backup Directories
- Configure your database and backup directories – ideally these are all on separate drives
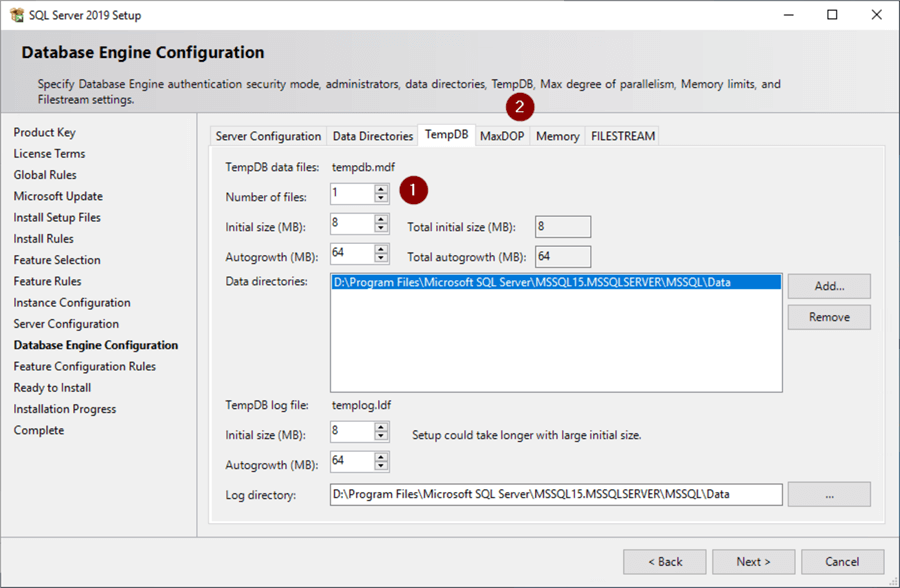
- Click TempDB tab
TempDB Configuration
- User defined database file sizes are somewhat dependent on workload and as in previous steps we’re installing this on a laptop, but we would normally want Tempdb data and log files on their own volume
- Verify ‘Number of files’ = number of CPU cores in machine up to 8
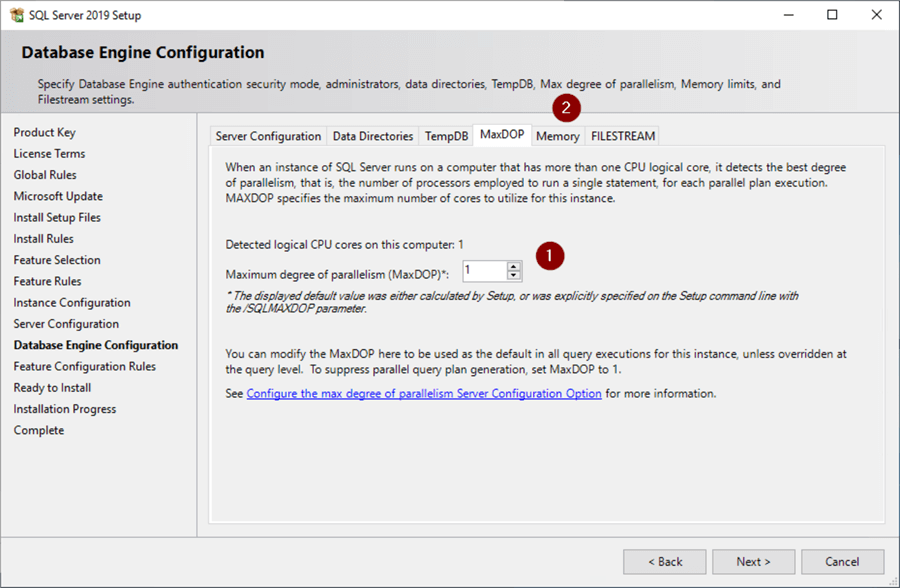
- Click MaxDOP tab
MAXDOP Configuration
- Verify ‘Maximum degree of parallelism (MaxDOP)’ = number of CPU cores in machine – additional information on MaxDOP can be found here: Configure the max degree of parallelism Server Configuration Option and here: What MAXDOP setting should be used for SQL Server
- Click Memory tab
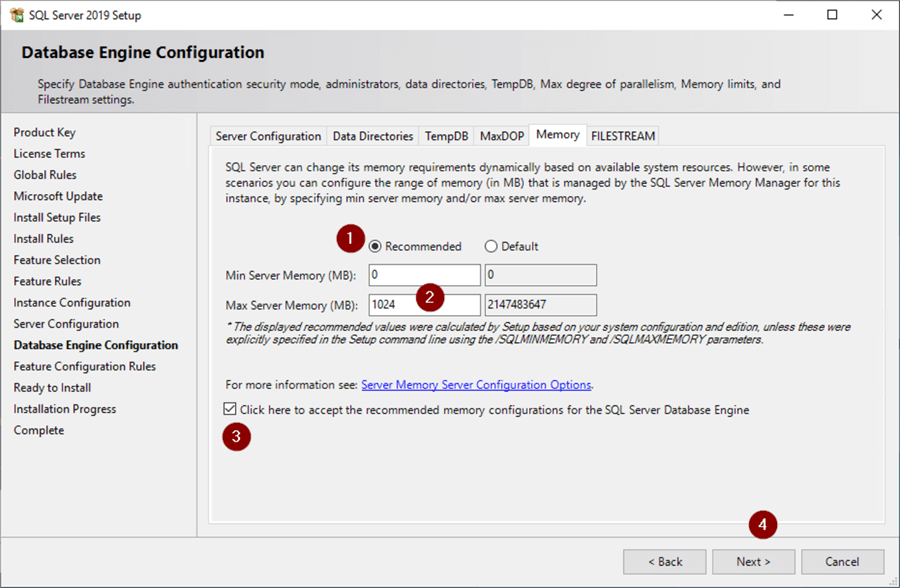
Memory Configuration
- Select ‘Recommended’ radio button
- The machine we’re installing this on only has 5,120 MB (5 GB) of memory and the general rule of thumb is to leave 4096 MB (4 GB) for the operating system – 5,120 MB – 4,096 MB = 1,024 MB so we enter 1024 in the ‘Max Server Memory (MB)’ box – SQL Server will try to get as much memory as it thinks it needs and setting this limit on it ensures the operating system won’t starve for memory
- Check ‘Click here to accept the recommended memory configurations for the SQL Server Database Engine’ box
- Next
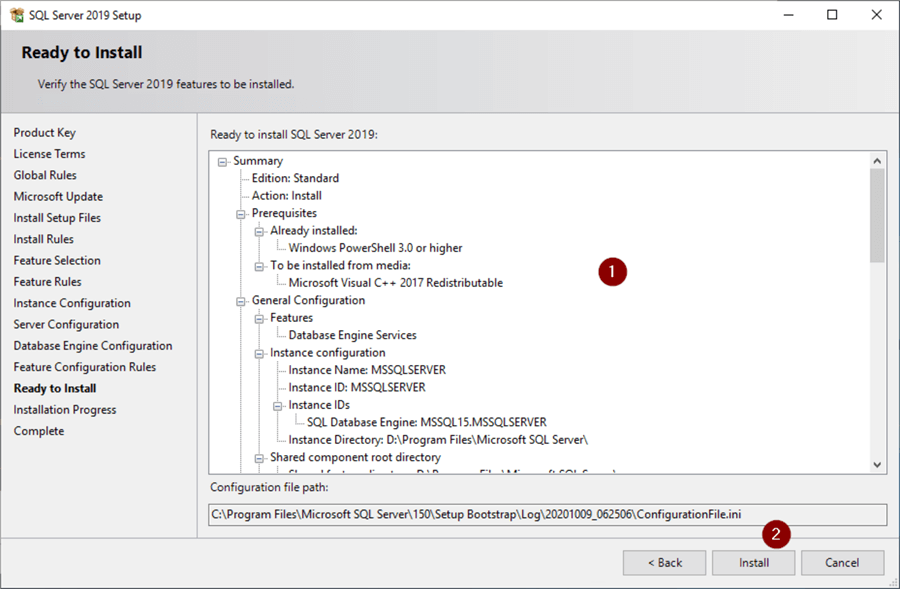
Ready to Install
- Verify configuration
- Install
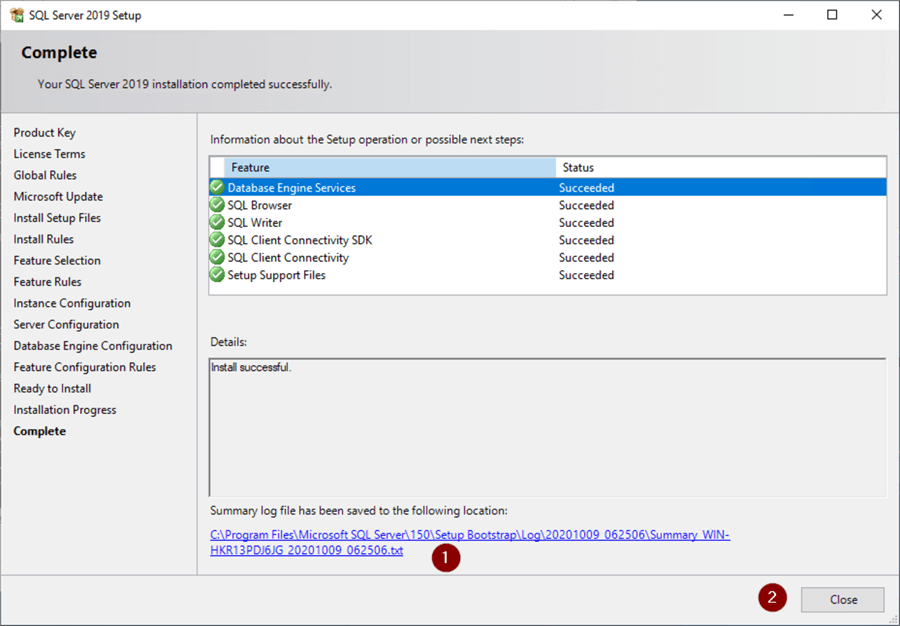
Complete
- Click link to open setup log file and review for any issues
- Close
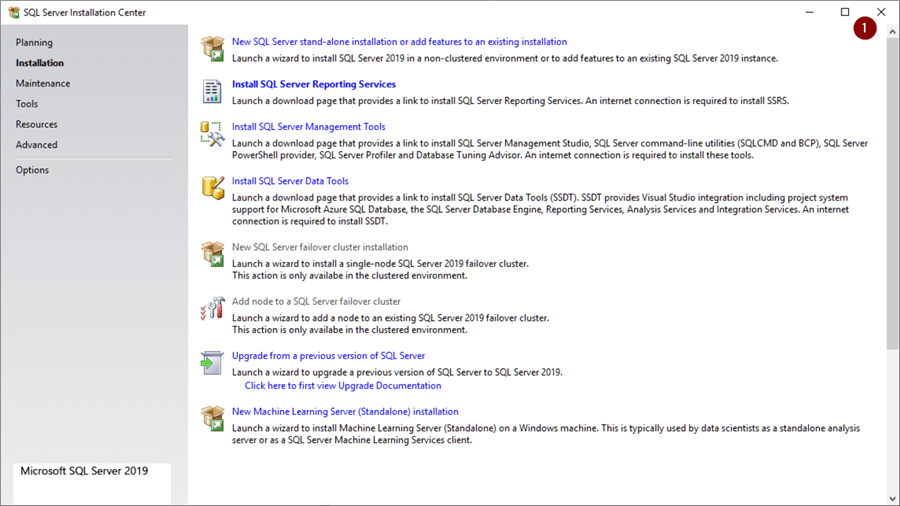
Close SQL Server Installation Center
- Click the X to close setup screen
Apply Latest SQL Server Cumulative Update
At this point we now have an installed and working SQL Server. However, we are only at the ‘Release to Manufacturing’ (RTM), or basically unpatched patch level. There have been updates since RTM that need to be installed. Previously SQL Server updates consisted of Service Packs (SP) and Cumulative Updates (CU) that had fixes since the latest Service Pack was of SQL Server 2017 there are no more Service Packs, just GDRs (security patches) and CUs applied to the RTM level SQL Server which makes patching a bit easier.
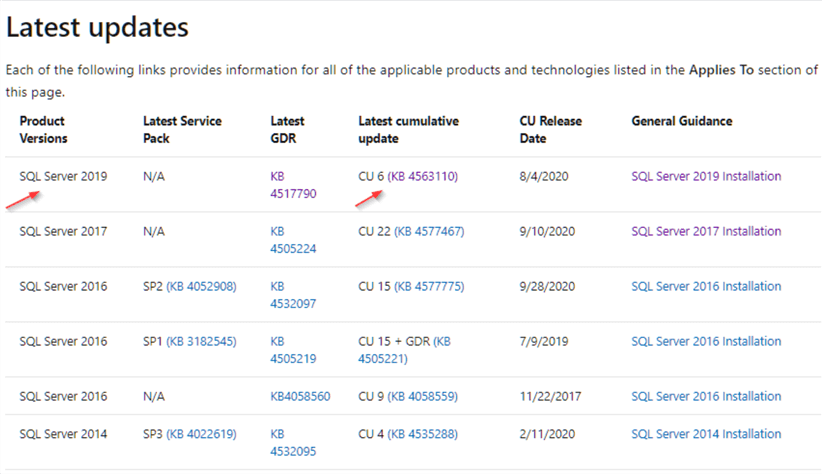
To obtain the latest CU we start here: Latest updates for Microsoft SQL Server and this brings us to the Latest updates for Microsoft SQL Server page. Scrolling down to the ‘Latest updates’ section we find our version then go over to ‘Latest cumulative update’ which is CU6 as of this writing and click on the link.
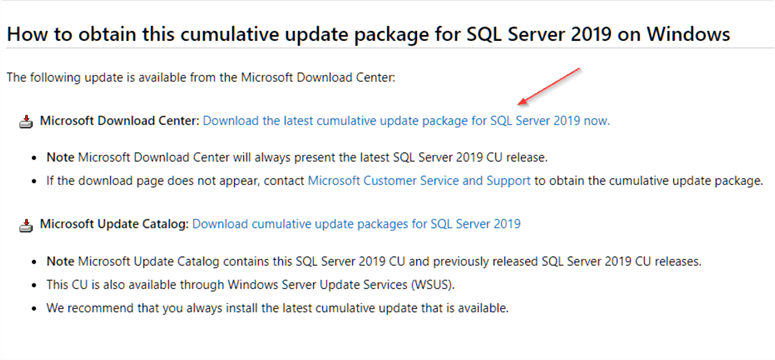
The link brings us to options for obtaining the CU. I chose the Microsoft Download Center by clicking on that link.
Which in turn brought me to the download page where you click on the Download button.
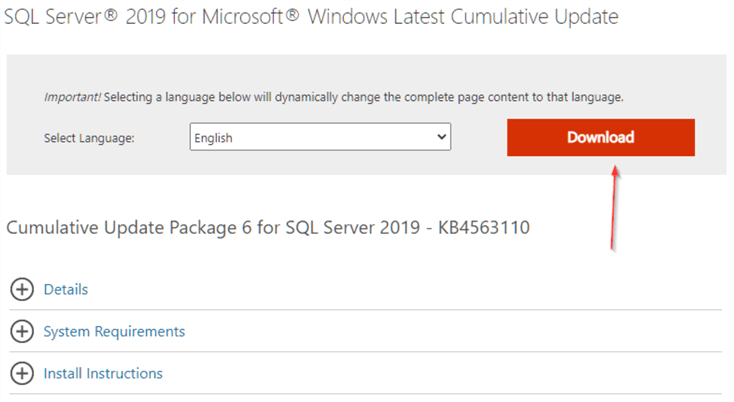
Wait for the download to complete and double click on the click on the downloaded .exe file to start the CU update.
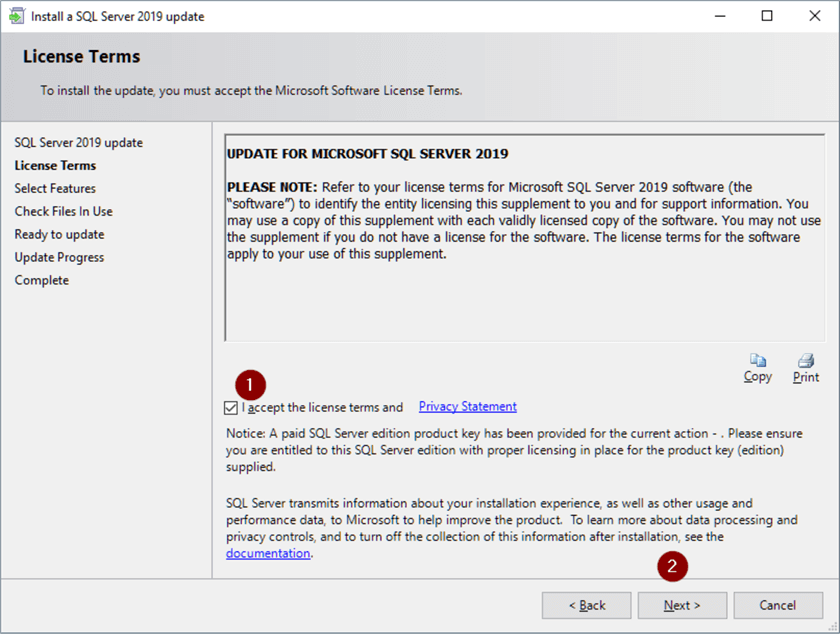
License Terms
- Check off ‘I accept the license terms…’
- Click Next
Select Features
- Select Instance you’re updating (if there are other instances of the same version of SQL Server that are below the CU level you’re applying you would see those here)
- Click Next
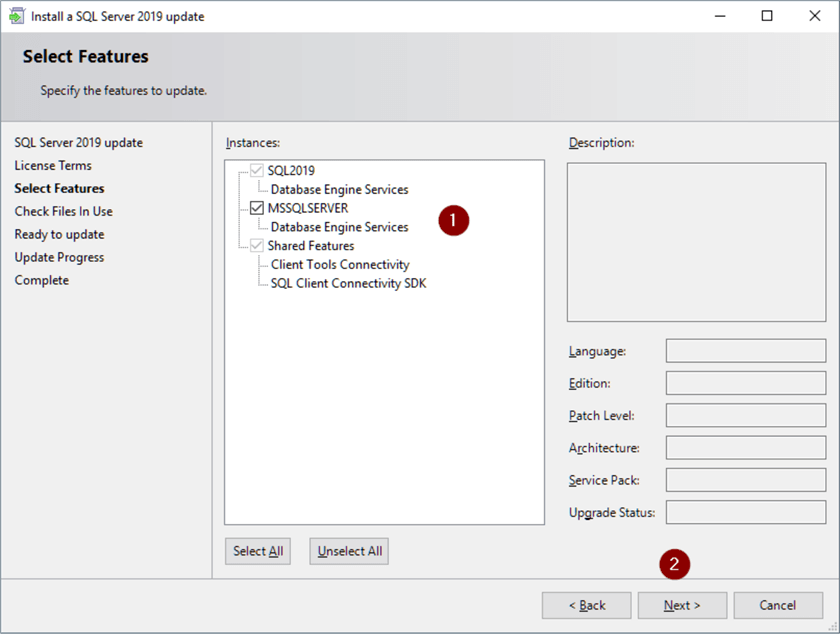
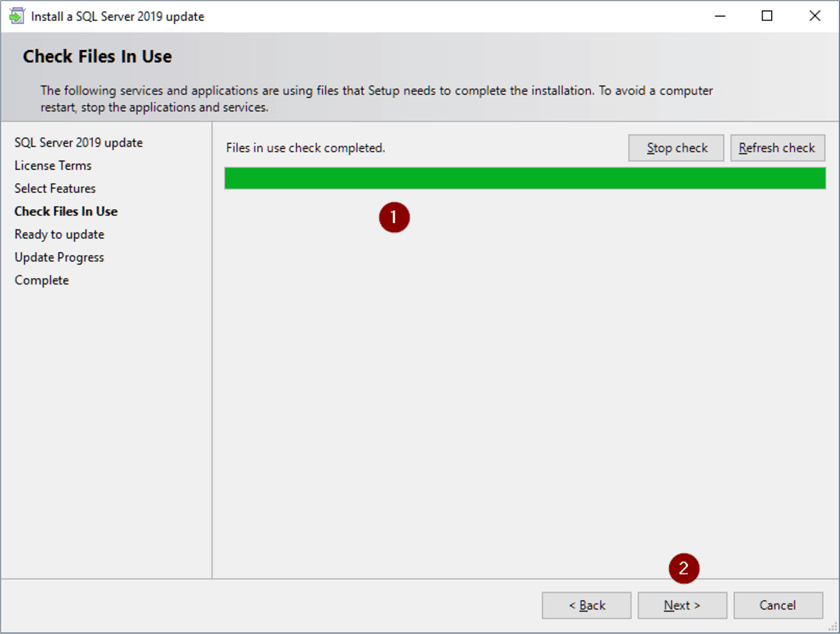
Check Files In Use
- Let ‘Check Files in Use’ complete
- Click Next
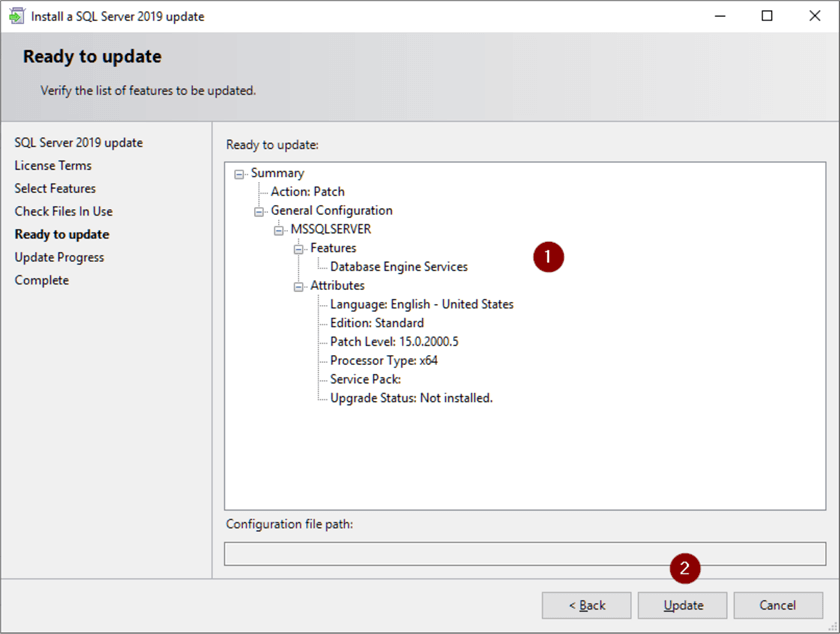
Ready to Update
- Verify configuration
- Click Update
Computer Restart Required
- If you get this box, click OK and reboot after you’re done

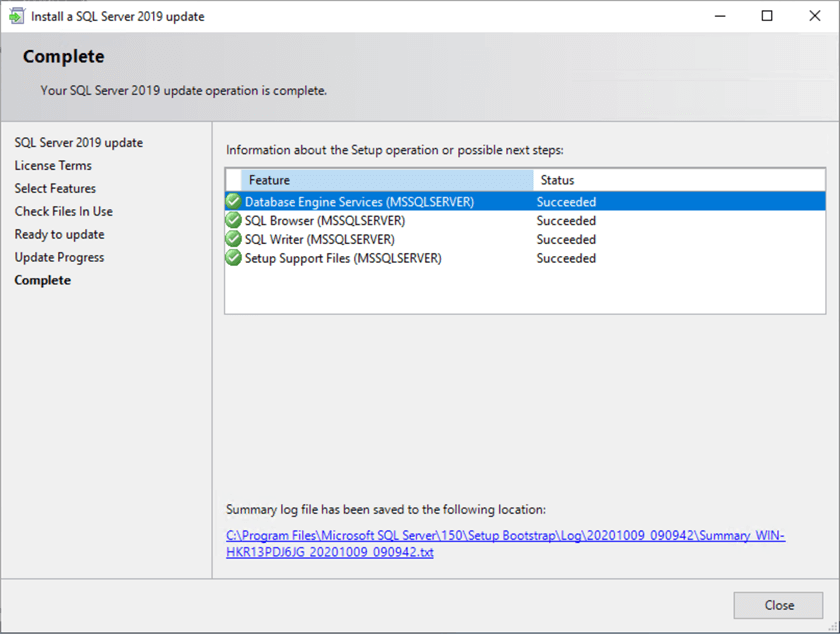
Complete
- Click link to open setup log file and review for any issues
- Close
Post-Installation Tasks
- Apply Updates: Install the latest updates and patches to ensure optimal performance and security.
- Configure Security: Set up user accounts, permissions, and security policies.
- Backup and Restore: Implement a regular backup and restore strategy to protect your data.
- Monitoring and Maintenance: Monitor server performance and perform regular maintenance tasks.
Conclusion
By following this step-by-step guide, you can successfully install SQL Server 2019 on your Windows system and unlock its powerful capabilities. With its enhanced performance, intelligent features, and robust security, SQL Server 2019 is a valuable asset for any organization looking to manage and analyze data effectively.

