6 Key New Features in Windows Server 2016

Windows Server 2016 introduces a plethora of new features and enhancements, making it a compelling choice for businesses seeking a robust and secure server platform. Let’s delve into the top 6 new features that set Windows Server 2016 apart:
1. Nano Server:
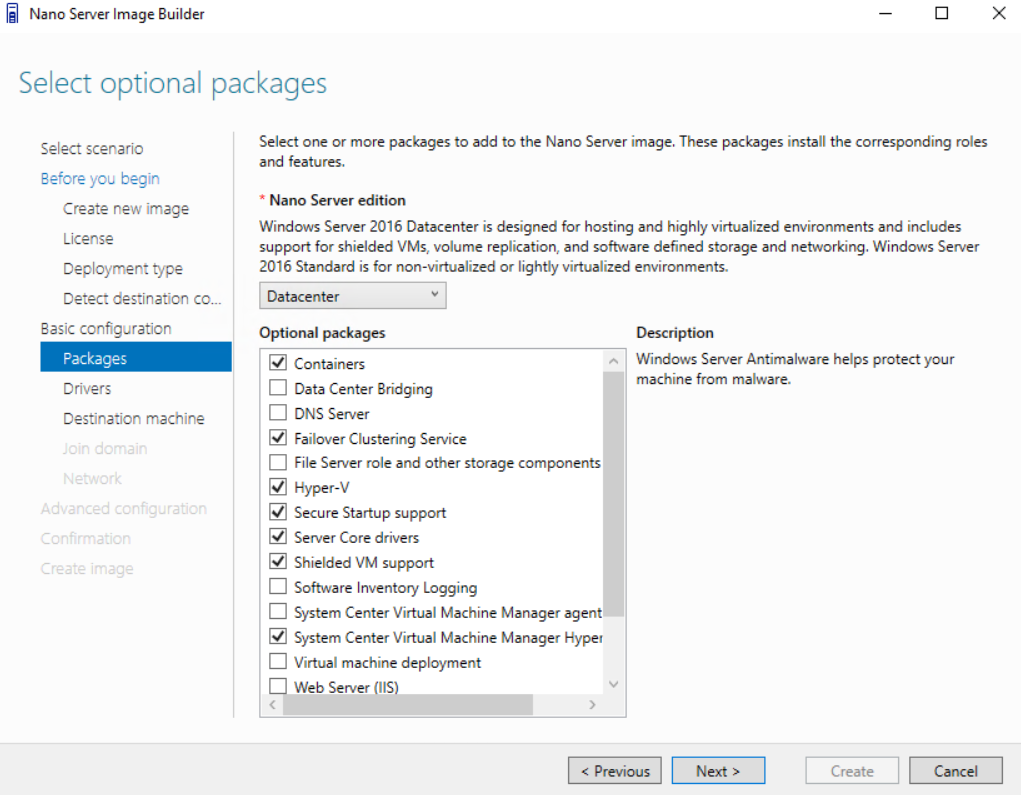
Embrace a lightweight, container-optimized server option with Nano Server. Designed for minimal footprint and optimized for cloud environments, Nano Server is ideal for microservices and web applications.
Here’s how to set up Nano Server:
- Download the Nano Server VHD image: Navigate to the Microsoft Download Center and download the Nano Server VHD image for your desired architecture (x64 or ARM64).

- Create a Nano Server VM: Utilize Hyper-V Manager or Azure Resource Manager to create a new virtual machine and attach the downloaded Nano Server VHD image.

- Configure Nano Server: Connect to the Nano Server VM using PowerShell and configure networking, join it to a domain, and install any necessary roles or features.

- Manage Nano Server: Leverage PowerShell commands or Desired State Configuration (DSC) to manage and automate tasks on your Nano Server deployment.

2. Containers:
Leverage Docker containers to package applications and their dependencies, enabling seamless deployment and portability across environments. Windows Server 2016 offers native container support, simplifying container orchestration and management.
Here’s how to get started with containers on Windows Server 2016:
-
Enable the container feature: Install the “Container” feature using PowerShell or Server Manager.
-
Install Docker: Download and install Docker Desktop for Windows.
-
Pull container images: Use the Docker CLI to pull container images from Docker Hub or a private registry.
-
Run containers: Execute the
docker runcommand to launch and run containerized applications. -
Manage containers: Utilize Docker commands or tools like Docker Compose to manage, orchestrate, and scale your containerized applications.
3. Hyper-V Containers:
Experience enhanced isolation and security with Hyper-V Containers. These lightweight containers utilize Hyper-V’s virtualization technology, providing greater resource isolation and security compared to traditional containers.
Here’s how to set up Hyper-V Containers:
-
Enable Hyper-V Containers: Install the “Hyper-V Containers” feature using PowerShell or Server Manager.
-
Create Hyper-V Containers: Use PowerShell or the Hyper-V Manager to create and manage Hyper-V Containers.
-
Package applications: Utilize tools like the Containerization Framework for Windows Server to package applications into Hyper-V Containers.
-
Deploy Hyper-V Containers: Deploy Hyper-V Containers to your Hyper-V environment or Azure Stack HCI clusters.
-
Manage Hyper-V Containers: Leverage PowerShell or the Hyper-V Manager to manage, monitor, and scale your Hyper-V Container deployments.
4. Active Directory Federation Services (ADFS) v4:
Strengthen identity and access management with ADFS v4. This updated version introduces support for the OAuth 2.0 protocol, enhancing access control and enabling secure authentication for modern web applications.
Here’s how to upgrade to ADFS v4:
-
Install ADFS v4: Deploy ADFS v4 on a Windows Server 2016 or later machine.
-
Configure ADFS v4: Configure ADFS v4 to connect to your existing Active Directory infrastructure and issue tokens for your applications.
-
register relying party applications: register your web applications with ADFS v4 to enable them to request and validate authentication tokens.
-
Configure client applications: Update your client applications to support OAuth 2.0 and integrate with ADFS v4 for authentication.
-
Test and monitor ADFS v4: Thoroughly test your ADFS v4 deployment and monitor its performance and security.
5. Windows Server 2016 Storage Spaces Direct:
Transform local disks into a high-performance software-defined storage (SDS) solution with Storage Spaces Direct. This feature eliminates the need for expensive hardware RAID controllers, making storage more scalable and cost-effective.
Here’s how to set up Storage Spaces Direct:
-
Enable Storage Spaces Direct: Install the “Storage Spaces Direct” feature using PowerShell or Server Manager.
-
Create a Storage Spaces Direct cluster: Add two or more Windows Server 2016 or later nodes to a Storage Spaces Direct cluster.
-
**Configure Storage Spaces

