How to Resolve the “Windows Cannot Stop the Device” Error
The error message “Windows is unable to stop the device” usually occurs when you try to eject a USB drive, external hard drive, or similar removable device. This issue happens because the device is in use by a program or Windows process, even if it doesn’t appear to be active. Below, we’ll guide you through troubleshooting steps to resolve this issue and safely eject your device.
What Causes the “Windows is Unable to Stop the Device” Error?
This error can occur due to the following reasons:
- A program or file is using the device: Open files or active applications may be preventing the device from being stopped.
- Windows background processes: Indexing or antivirus scans may be running on the device.
- Corrupt system processes or drivers: Faulty drivers or system processes can also cause this error.
Methods to Fix the “Windows is Unable to Stop the Device” Error
Close All Open Files and Programs
The first and simplest step is to ensure no files or programs are using the device. Here’s how:
- Close all documents, videos, or other files opened from the device.
- Close any programs (e.g., Word, media players, or browsers) that may have accessed files on the drive.
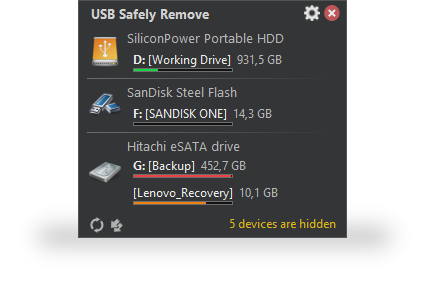
Now, try ejecting the device again by right-clicking on the USB icon in the system tray and selecting Eject.
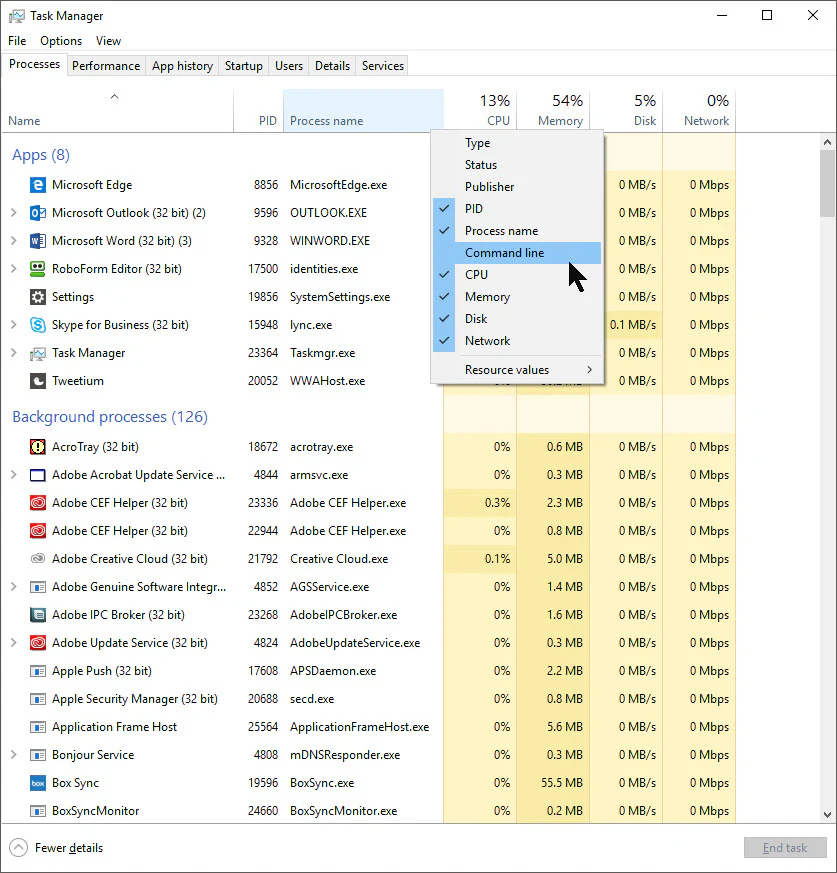
Use the Task Manager
If closing programs manually doesn’t work, some background processes may still be accessing the device.

- Press Ctrl + Shift + Esc to open the Task Manager.
- Look for any processes that might be using the device. For instance, check for programs like File Explorer, media players, or antivirus programs.
- Right-click the suspicious process and choose End Task.
Now, attempt to eject the device.
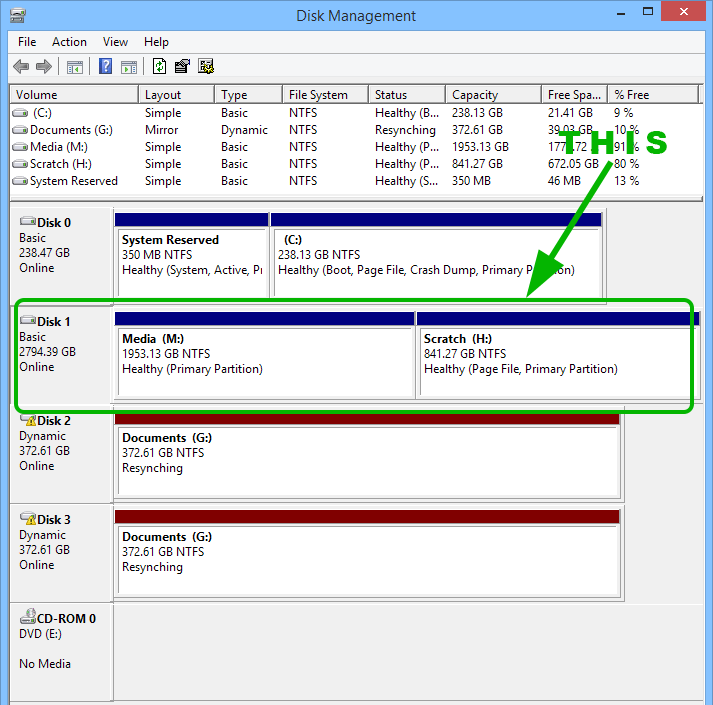
Safely Eject via Disk Management
If the issue persists, try ejecting the device through Disk Management.

- Press Win + X and select Disk Management.
- Locate your device in the list of connected drives.
- Right-click on the drive and select Offline or Eject (depending on your version of Windows).
This ensures Windows releases control of the device.
Disable Background Processes Like Antivirus
Your antivirus or indexing service may be scanning the device in the background, preventing it from being safely removed. Temporarily disable these services:
- Open your antivirus software and pause its real-time protection feature.
- If you suspect Windows indexing is the cause, disable it:
- Press Win + R, type
services.msc, and press Enter. - Scroll down to Windows Search, right-click, and select Stop.
- Press Win + R, type
Now, try ejecting the device again.
Use the “Safely Remove Hardware” Tool
If the usual eject option doesn’t work, try the Safely Remove Hardware tool:

- Press Win + R, type
rundll32.exe shell32.dll,Control_RunDLL hotplug.dll, and press Enter. - Select your device from the list and click Stop.
Shut Down Your PC
If none of the above methods work, the safest way to remove the device without risking data loss is to shut down your PC. Once your PC is off, you can disconnect the device safely.
How to Prevent the Error in the Future
To minimize the chances of encountering this error in the future, follow these tips:
- Always close all files and programs before ejecting a device.
- Regularly update your device drivers:
- Press Win + X and select Device Manager.
- Right-click on your USB device under Disk Drives and select Update driver.
- Avoid abrupt disconnections during file transfers to prevent device corruption.
Detailed Visual Guide
Below are detailed images to guide you through some of the steps mentioned above:
