How to Easily Update Intel Drivers on Windows 11
Keeping your Intel drivers up to date is essential for optimal performance on your Windows 11 PC. Updated drivers ensure that your system runs smoothly, offers the best performance, and can prevent errors related to hardware. This guide will show you how to update Intel drivers in Windows 11 using several methods, with detailed instructions and images.
Why You Should Update Your Intel Drivers
Intel drivers are responsible for communication between your Intel hardware (such as processors, integrated graphics, and network adapters) and the operating system. When Intel releases new driver updates, they often include:
- Performance improvements for your system.
- Bug fixes and security patches.
- Compatibility improvements for new software or updates.
Regularly updating your drivers can help your system run more efficiently and minimize potential issues.
Method 1: Update Drivers via Windows Update
Windows Update often includes driver updates for Intel hardware. This is the easiest and most automated way to ensure your drivers stay current.
Steps to Update Drivers Using Windows Update
- Open Settings: Press
Windows + Ito open the Settings menu.
- Navigate to Windows Update: Click on Windows Update in the left-hand menu.

- Check for Updates: Click the Check for updates button. Windows will search for available updates, including drivers.

- Install Updates: If any Intel driver updates are found, they will automatically download and install.
- Restart Your PC: After installation, restart your PC to apply the changes.
This method is simple, but sometimes Windows Update may not have the latest drivers. In such cases, you can use the Intel Driver & Support Assistant.
Method 2: Update Using Intel Driver & Support Assistant
Intel provides its own tool, Intel Driver & Support Assistant (Intel DSA), to help users automatically detect and install the latest Intel drivers.
Steps to Update Drivers Using Intel Driver & Support Assistant
- Download Intel Driver & Support Assistant:
- Go to the official Intel Driver & Support Assistant website.
- Download and install the tool.

- Run the Tool:
- After installation, open Intel Driver & Support Assistant. It will automatically scan your system for any outdated drivers.
- View Available Updates: The tool will display any driver updates that are available for your Intel hardware.

- Install the Updates: Follow the on-screen prompts to download and install the updated drivers.
- Restart Your PC: After the drivers have been updated, restart your computer to ensure the updates are applied correctly.
This method ensures that you have the latest Intel drivers directly from the manufacturer.
Method 3: Manually Download and Install Intel Drivers
If you prefer to manually manage your driver updates, you can download the latest drivers from Intel’s website and install them yourself.
Steps to Manually Update Intel Drivers
- Identify Your Intel Hardware:
- Press
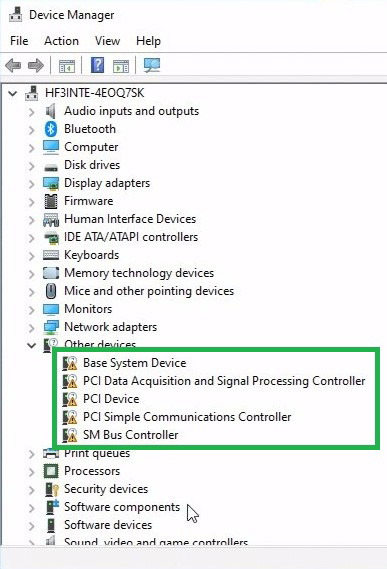
Windows + Xand select Device Manager. - Expand the categories to find your Intel hardware (e.g., Display adapters for graphics, Network adapters for Wi-Fi or Ethernet).
- Right-click the Intel device and select Properties.
- Go to the Details tab and select Hardware Ids from the drop-down menu to identify the exact hardware model.

- Press
- Download the Latest Driver:
- Visit the Intel Download Center.
- Search for your specific hardware model and download the latest driver.
- Install the Driver:
- Run the downloaded file and follow the on-screen instructions to install the driver.
- Restart Your PC: Once the driver installation is complete, restart your PC to apply the changes.
Method 4: Update Drivers via Device Manager
Windows 11 allows you to update drivers directly through the Device Manager, a built-in utility.
Steps to Update Intel Drivers Using Device Manager
- Open Device Manager: Press
Windows + Xand select Device Manager. - Find Intel Hardware:
- Expand the relevant category, such as Display adapters (for Intel graphics) or Network adapters (for Intel Wi-Fi).
- Right-click the Intel device and select Update driver.
- Search for Drivers: Select Search automatically for drivers. Windows will search online for the latest driver version and install it.

- Restart Your PC: After installation, restart your computer to complete the update.
Conclusion
Keeping your Intel drivers updated is crucial for the smooth operation of your Windows 11 PC. Whether you choose to update drivers via Windows Update, use the Intel Driver & Support Assistant, or manually install drivers, these steps will ensure your system runs efficiently. Regularly checking for updates and applying them can help prevent hardware conflicts, improve performance, and ensure your device remains secure.
By following this guide, you’ll be able to easily keep your Intel drivers up to date. If you encounter any issues, you can always revert to a previous driver or contact Intel support for assistance.
