How to Turn Off Windows Ink Workspace in Windows 10
Windows Ink Workspace is a feature in Windows 10 that allows users to use a pen or touch-enabled devices to interact with tools such as Sticky Notes, Sketchpad, and Screen Sketch. While it’s a useful feature for those who use digital pens or touchscreens, some users may want to disable it, particularly on devices where it is not necessary. Disabling Windows Ink can help streamline the user experience and reduce resource usage.
This guide provides you with step-by-step methods to disable Windows Ink Workspace on Windows 10.
Why Disable Windows Ink Workspace?
There are several reasons you might want to turn off Windows Ink Workspace:
- No Need for Digital Pens: If you’re using a desktop without a touch screen or stylus support, the feature is unnecessary.
- Prevent Unintended Usage: On shared or business computers, users may want to prevent accidental use of Windows Ink tools.
- Reduce Resource Usage: Disabling unused features can help optimize system performance.
Methods to Disable Windows Ink Workspace
There are two primary methods to disable Windows Ink Workspace:
- Using Group Policy Editor (for Windows 10 Pro and Enterprise users)
- Using the Registry Editor (for all versions of Windows 10)
Method 1: Disable Windows Ink Workspace via Group Policy Editor
This method works for Windows 10 Pro and Enterprise users, as the Group Policy Editor is not available in Windows 10 Home.
Step 1: Open Group Policy Editor
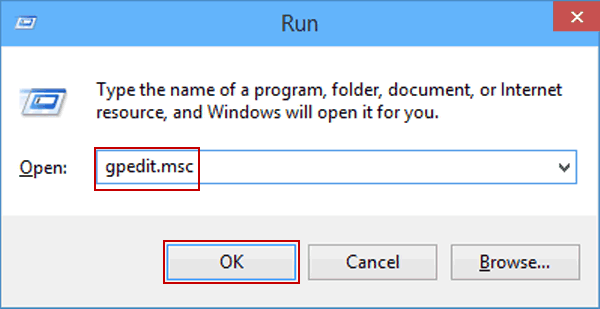
- Press Windows + R to open the Run dialog box.
- Type
gpedit.mscand press Enter.
This opens the Local Group Policy Editor.

Step 2: Navigate to Windows Ink Workspace Policy
- In the Group Policy Editor, navigate to the following path:
- On the right-hand pane, locate the policy named “Allow Windows Ink Workspace”.

Step 3: Disable Windows Ink Workspace
- Double-click the “Allow Windows Ink Workspace” policy to edit it.
- In the policy settings window, select Disabled.
- Click Apply and then OK to save the changes.

Step 4: Restart Your Computer
After completing the above steps, restart your computer for the changes to take effect. Windows Ink Workspace will now be disabled.
Method 2: Disable Windows Ink Workspace via Registry Editor
If you are using Windows 10 Home, you can disable Windows Ink Workspace through the Registry Editor. This method works for all versions of Windows 10.
Step 1: Open Registry Editor
- Press Windows + R to open the Run dialog box.
- Type
regeditand press Enter.
This opens the Registry Editor. - If prompted by the User Account Control (UAC), click Yes to allow changes.

Step 2: Navigate to Windows Ink Workspace Key
In the Registry Editor, navigate to the following location:
If the WindowsInkWorkspace key does not exist, you’ll need to create it.
- To create it:
- Right-click on the Microsoft folder.
- Select New > Key and name it WindowsInkWorkspace.

Step 3: Create a New DWORD Value
- Inside the WindowsInkWorkspace key, right-click on the empty space in the right-hand pane.
- Select New > DWORD (32-bit) Value.
- Name the new value AllowWindowsInkWorkspace.
Step 4: Disable Windows Ink Workspace
- Double-click the AllowWindowsInkWorkspace value you just created.
- Set its value to 0 to disable Windows Ink Workspace.
- Click OK to save the changes.

Step 5: Restart Your Computer
Restart your computer to apply the changes. Windows Ink Workspace will now be disabled.
How to Re-Enable Windows Ink Workspace
If you ever decide to re-enable Windows Ink Workspace, simply follow the same steps:
- For Group Policy Editor, set the policy to Not Configured or Enabled.
- For Registry Editor, set the AllowWindowsInkWorkspace value to 1 or delete it entirely.
After making the changes, restart your computer.
Verifying That Windows Ink Workspace Is Disabled
To confirm that Windows Ink Workspace has been successfully disabled:
- Right-click on the Taskbar.
- Check for the Show Windows Ink Workspace button option.
If Windows Ink Workspace is disabled, this option will no longer appear, and the Workspace tools (like Sticky Notes or Sketchpad) will not be accessible.

Conclusion
Disabling Windows Ink Workspace on Windows 10 is straightforward and can be done through either the Group Policy Editor or Registry Editor. While this feature is helpful for touchscreen and stylus users, disabling it on devices that don’t require it can simplify your system and reduce resource usage. Whether you are managing a shared computer or optimizing a non-touch system, these methods will help you effectively disable Windows Ink Workspace.
By following the steps outlined in this guide, you can ensure your computer operates efficiently without unnecessary features.

