5 Ways to Turn Off Skype on Windows 10
Skype is a useful application for communication, but sometimes it can be unnecessary, especially if it launches automatically on startup. If you want to disable Skype on Windows 10, here are five methods to prevent it from running, ensuring it doesn’t impact your device’s performance or interrupt your workflow. Follow these step-by-step instructions to disable Skype easily.
1. Disable Skype from Running on Startup

One of the simplest ways to prevent Skype from opening automatically is by disabling it in the startup settings.
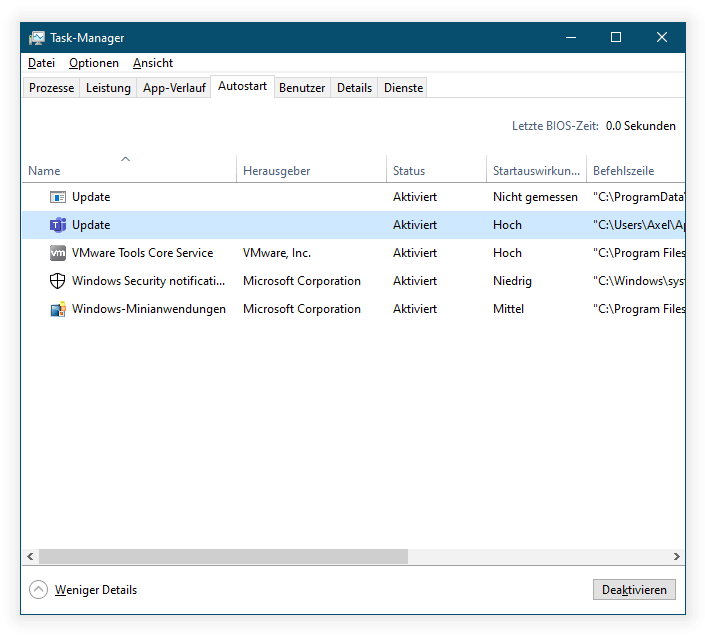
- Open Task Manager: Press Ctrl + Shift + Esc to open Task Manager.
- Go to the Startup Tab: Click on Startup to view the programs set to launch on startup.
- Locate Skype: Find Skype in the list, right-click it, and select Disable.
This will prevent Skype from opening automatically when you start your computer. You can still manually launch it whenever needed.
2. Stop Skype from Running in the Background

If you want Skype to stop running entirely in the background, you can disable its background activity in Windows settings.
- Open Settings: Press Win + I to open the Settings window.
- Go to Privacy: Select Privacy and navigate to the Background apps tab.
- Turn Off Skype: Scroll down to find Skype, and toggle it off.
This method ensures Skype does not consume resources while it’s not actively being used.
3. Uninstall Skype for Business

If you’re using Skype for Business, you may want to uninstall it entirely as it cannot be easily disabled.
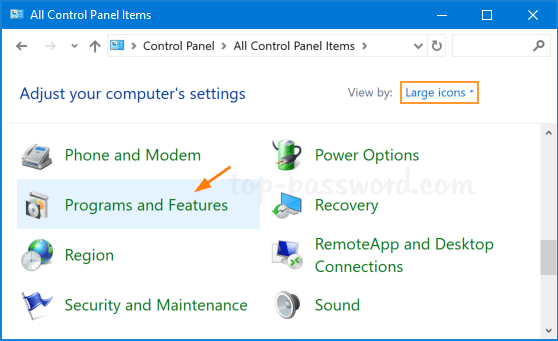
- Open Control Panel: Type Control Panel in the search bar and select it.
- Go to Programs and Features: Click on Uninstall a program under Programs.
- Find Skype for Business: Locate Skype for Business, right-click it, and select Uninstall.
Note that Skype for Business is often bundled with Microsoft Office installations, so you may need to uninstall the entire suite if it’s part of an Office package.
4. Use Group Policy Editor to Block Skype

For users with Windows 10 Pro or Enterprise, the Group Policy Editor allows you to block Skype from running altogether.
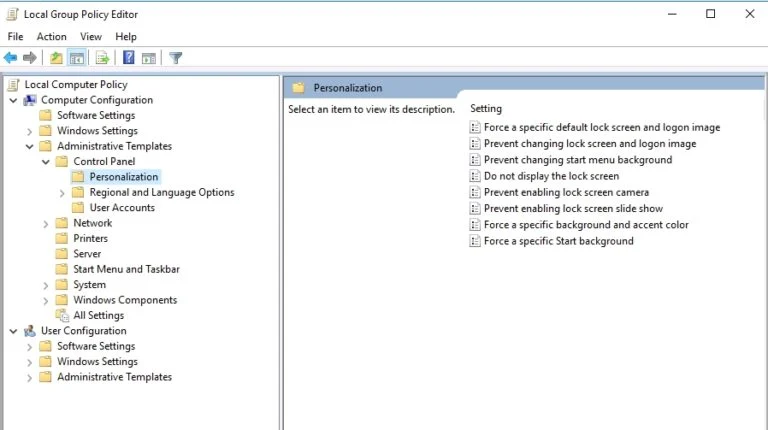
- Open Group Policy Editor: Press Win + R, type
gpedit.msc, and press Enter. - Navigate to App Management: Go to Computer Configuration > Administrative Templates > System > Apps.
- Add Skype to Blocked Apps: Double-click Don’t run specified Windows applications, enable it, and add
skype.exeto the list.
This prevents Skype from launching, even if someone tries to open it manually.
5. Remove Skype via PowerShell

PowerShell can be used to uninstall the built-in version of Skype on Windows 10.
- Open PowerShell as Administrator: Right-click the Start button and select Windows PowerShell (Admin).
- Enter Uninstall Command: Type the following command and press Enter:
This command will remove Skype from your device. If you need Skype again in the future, you can reinstall it from the Microsoft Store.
By following these methods, you can easily disable or remove Skype on Windows 10, allowing you to manage your computer’s resources and notifications more effectively.
