How to Stop Windows 11 Update and Keep Using Windows 10
With Microsoft’s push toward Windows 11, many users are being prompted to upgrade from Windows 10. However, not everyone is ready to make the switch. Whether due to software compatibility issues, hardware limitations, or simply personal preference, you may want to cancel the Windows 11 update and stick with Windows 10.
In this guide, we’ll walk you through several methods to cancel the Windows 11 update, block future update notifications, and stay on Windows 10.
Why Cancel Windows 11 Update?
There are several reasons why you might prefer to stay on Windows 10 instead of upgrading to Windows 11:
- System Requirements: Windows 11 has stricter hardware requirements, including TPM 2.0 and Secure Boot, which some systems may not meet.
- Software Compatibility: Certain programs and peripherals may not yet be fully compatible with Windows 11.
- User Interface Preferences: The new layout and features in Windows 11 may not appeal to every user.
- Stability Concerns: Windows 10 is a mature and stable operating system, while Windows 11 may still have bugs that need to be addressed.
Method 1: Pause Windows 11 Updates Temporarily
If you want to delay the Windows 11 update without disabling updates entirely, you can pause updates temporarily.
Steps to Pause Updates:

- Open Settings:
- Press
Windows + Ito open the Settings app.

- Press
- Go to Update & Security:
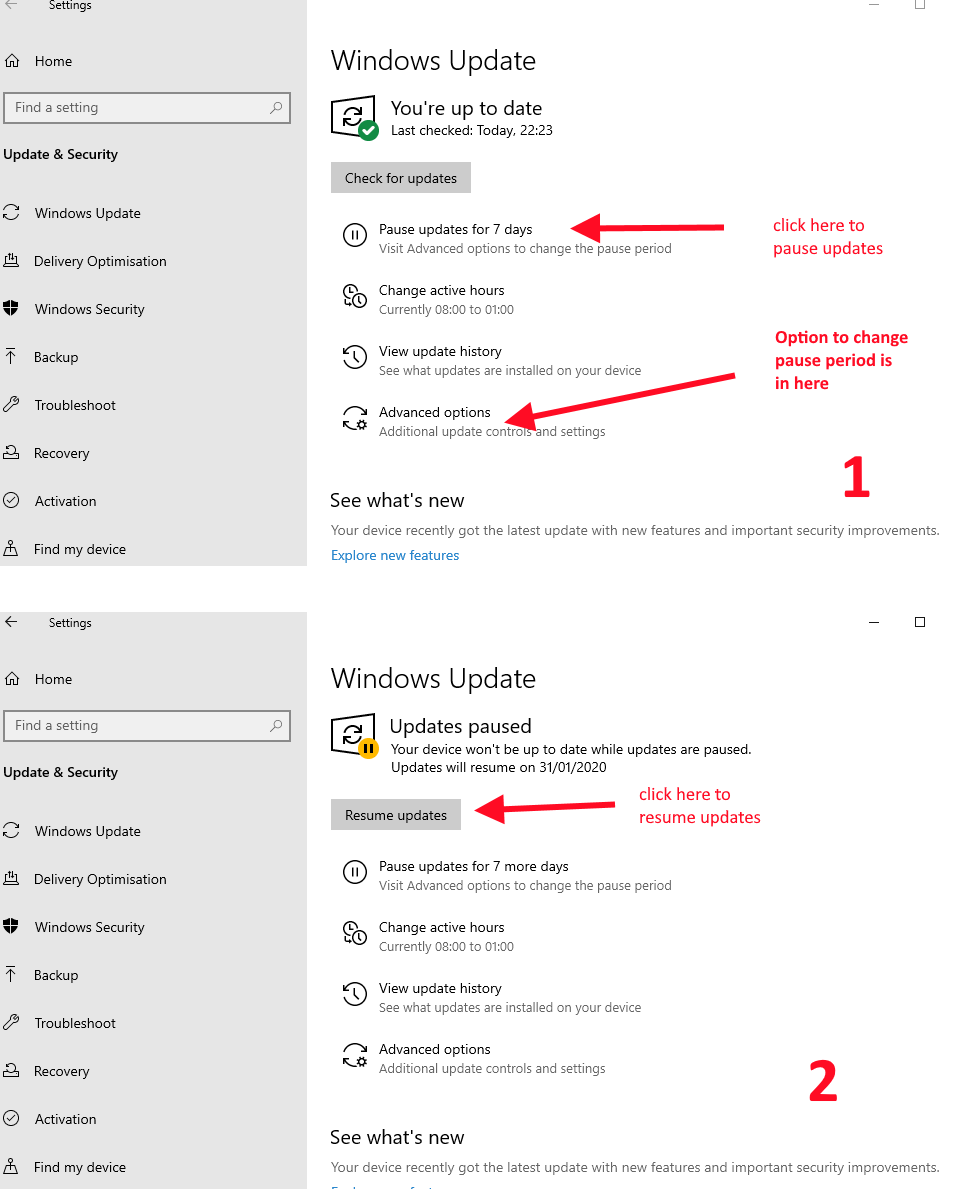
- In the Settings window, navigate to Update & Security > Windows Update.

- Pause Updates:
- Under the Pause updates section, select the option to pause updates for up to 35 days. This will prevent Windows 11 from installing during this period.
While this method only pauses updates temporarily, it can be useful if you’re not ready to upgrade just yet and need more time to evaluate the change.
Method 2: Block Windows 11 Updates Using Group Policy
For those using Windows 10 Pro, Enterprise, or Education, you can block Windows 11 updates using the Group Policy Editor.
Steps to Block Windows 11 via Group Policy:

- Open the Group Policy Editor:
- Press
Windows + R, type gpedit.msc, and press Enter.

- Press
- Navigate to Windows Update Settings:
- In the Group Policy Editor, navigate to Computer Configuration > Administrative Templates > Windows Components > Windows Update > Windows Update for Business.

- Select the Target Feature Update Version:
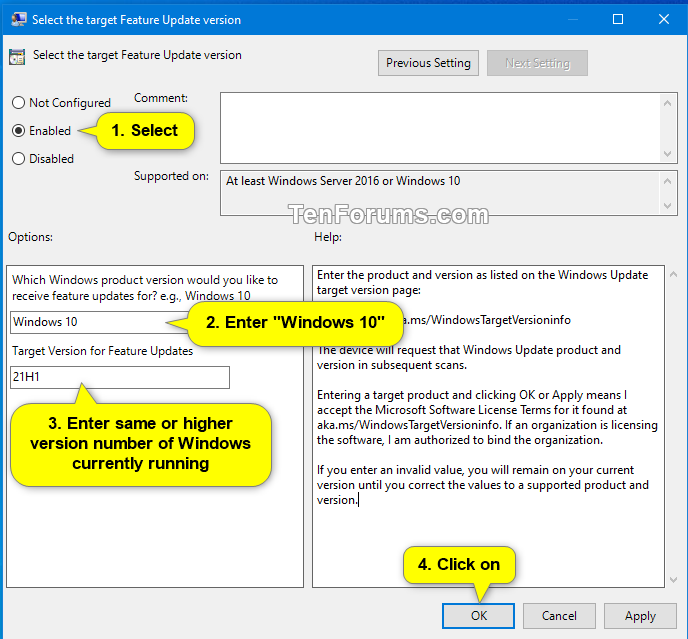
- Double-click on the policy labeled Select the target Feature Update version. Set this policy to Enabled and type 21H2 (the latest Windows 10 version) in the box. This will lock your system to Windows 10.
- Apply Changes:
- Click Apply and then OK. Restart your computer to ensure the changes take effect.
This method will prevent your PC from receiving any future feature updates beyond Windows 10.
Method 3: Use Registry Editor to Block Windows 11 Updates
If you are using Windows 10 Home, you won’t have access to the Group Policy Editor. Instead, you can use the Registry Editor to block Windows 11 updates.
Steps to Block Windows 11 via Registry Editor:

- Open Registry Editor:
- Press
Windows + R, type regedit, and press Enter.

- Press
- Navigate to Windows Update Settings:
- In the Registry Editor, navigate to the following path:
HKEY_LOCAL_MACHINE\SOFTWARE\Policies\Microsoft\Windows\WindowsUpdate

- In the Registry Editor, navigate to the following path:
- Create a New DWORD Value:
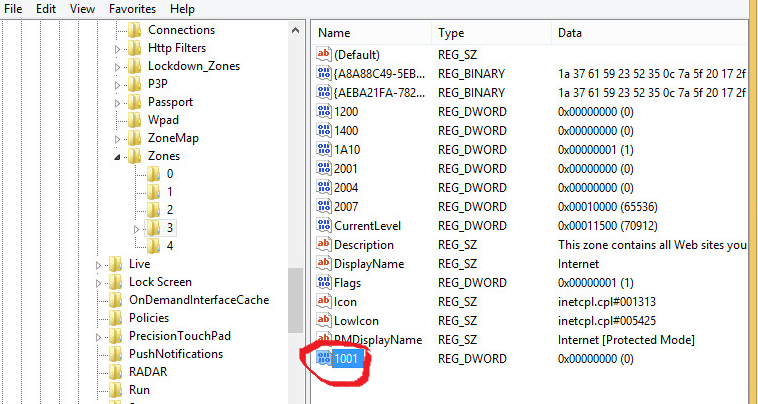
- Right-click on the WindowsUpdate folder, select New, and then choose DWORD (32-bit) Value. Name it TargetReleaseVersion and set its value to 1.

- Create Another DWORD for Feature Update:
- Create another DWORD named TargetReleaseVersionInfo and set its value to 21H2. This will lock your system to Windows 10 version 21H2.
- Restart Your Computer:
- Restart your computer to apply the changes.
By following these steps, you will block Windows 11 updates and remain on Windows 10.
Method 4: Uninstall Windows 11 Update (If Already Installed)
If Windows 11 has already been installed but you wish to return to Windows 10, you can do so within 10 days of the upgrade by reverting back to Windows 10.
Steps to Uninstall Windows 11:
- Open Settings:
- Press
Windows + Ito open the Settings app.

- Press
- Go to Recovery:
- Navigate to Update & Security > Recovery.
- Go Back to Windows 10:
- Under the Go back to the previous version of Windows 10 section, click Get started. Follow the on-screen instructions to complete the rollback.
This option is only available within 10 days of upgrading to Windows 11. After that, you’ll need to perform a clean installation of Windows 10 to revert.
Conclusion
By following the methods outlined above, you can easily cancel the Windows 11 update and remain on Windows 10 for as long as you like. Whether you prefer to pause updates temporarily, block future upgrades via Group Policy or the Registry Editor, or uninstall Windows 11 after upgrading, you have several options to maintain control over your operating system.
Microsoft will continue to support Windows 10 until October 2025, so you still have time before needing to make the switch. Until then, you can enjoy the stability and familiarity of Windows 10 without the pressure to upgrade.

