How to Temporarily Stop Updates in Windows 11

Windows 11 frequently rolls out updates to ensure system security, performance, and new features. However, constant updates can sometimes interrupt your work or daily tasks, especially if the updates happen automatically. Fortunately, Windows 11 allows users to pause updates temporarily, giving you more control over when these updates take place.
In this comprehensive guide, we will walk you through how to pause Windows 11 updates, as well as the different options you have for managing updates.
Why Would You Want to Pause Windows Updates?
There are several reasons why users might want to pause Windows updates:
- Avoid Interruptions: Updates can take time to download and install, which can interrupt your workflow.
- Stable System: Some updates may cause instability or incompatibility issues with your current setup. Pausing updates gives you the opportunity to review any potential issues before installing.
- Limited Internet Bandwidth: Downloading updates consumes bandwidth. Pausing them can save data, especially if you’re on a limited or metered connection.
Method 1: Using the Windows Settings

One of the easiest and most accessible ways to pause updates is through the Windows Settings app. This method allows you to pause updates for up to 35 days.
Step 1: Open Windows Settings
- Click on the Start button or press the Windows key.
- Select Settings (gear icon), or type “Settings” in the search bar.
Step 2: Navigate to Windows Update
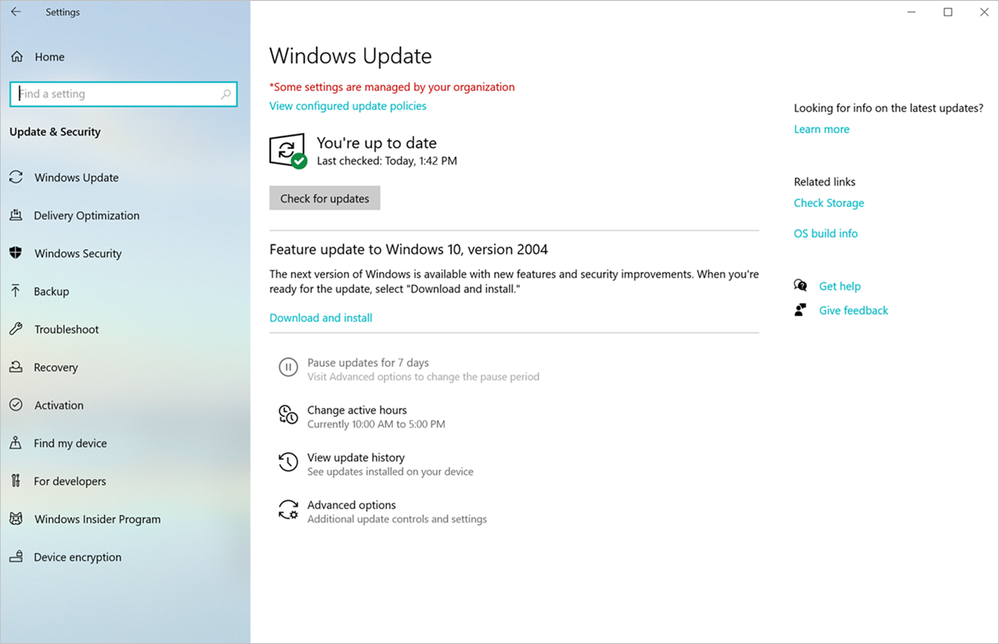
- In the Settings window, click on Windows Update in the left-hand menu.
Step 3: Pause Updates
- Under the More options section, you will see an option called Pause updates.
- Click on the drop-down menu under Pause updates and select the number of days you want to pause updates (up to 35 days).
Example:
Step 4: Resume Updates (If Needed)
- To resume updates before the selected time is over, go back to the Windows Update settings and click Resume updates.
This method is straightforward and provides you with a quick solution to avoid any updates for a while.
Method 2: Using Group Policy Editor (For Windows 11 Pro and Enterprise)

For those using Windows 11 Pro or Enterprise, you can utilize the Group Policy Editor to manage updates. This method gives you more flexibility than the default settings.
Step 1: Open Group Policy Editor
- Press Windows + R to open the Run dialog box.
- Type gpedit.msc and press Enter to open the Group Policy Editor.
Step 2: Navigate to Windows Update Policies
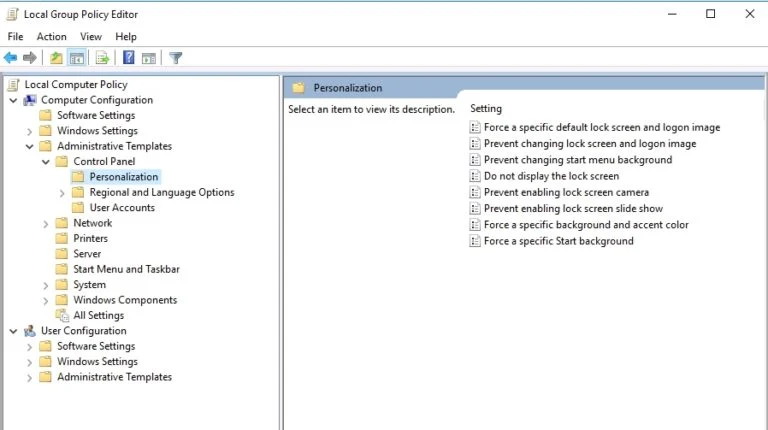
- In the Group Policy Editor, navigate to:
Computer Configuration>Administrative Templates>Windows Components>Windows Update.
Step 3: Configure Automatic Updates
- Double-click on Configure Automatic Updates.
- Set it to Disabled to effectively pause updates indefinitely.
- Click Apply and then OK.
Example:
If you wish to re-enable updates later, simply follow the same steps and set Configure Automatic Updates to Enabled.
Method 3: Using the Windows Update Service

For advanced users, you can use the Windows Update Service to stop updates. This approach disables the entire update service, halting all updates until you manually restart the service.
Step 1: Open Services
- Press Windows + R to open the Run dialog box.
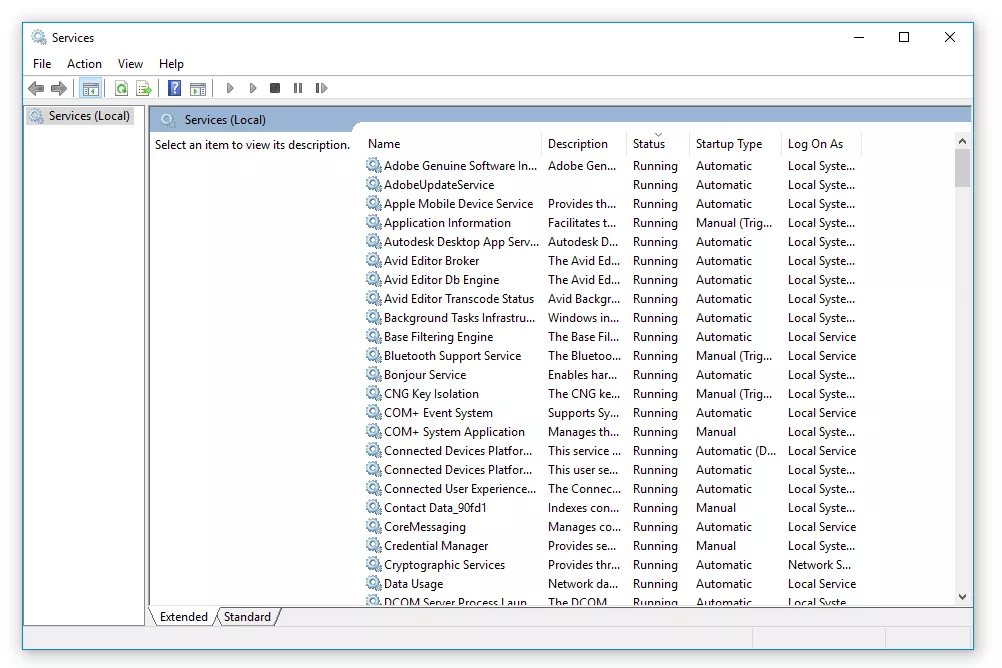
- Type services.msc and hit Enter to open the Services window.
Step 2: Find the Windows Update Service
- Scroll down the list of services and locate Windows Update.
Step 3: Stop the Windows Update Service
- Right-click on Windows Update and choose Stop.
- This will stop the Windows Update service from running.
Step 4: Disable the Windows Update Service
- To prevent it from restarting automatically, right-click Windows Update, select Properties, and change the Startup type to Disabled.
Example:
To resume updates later, return to the Services window and start the service again or set the Startup type to Manual or Automatic.
Method 4: Set Your Connection as Metered

Another option for pausing Windows 11 updates, particularly useful for those on limited internet plans, is to set your network connection as metered. This prevents Windows from downloading updates over that connection.
Step 1: Open Network Settings
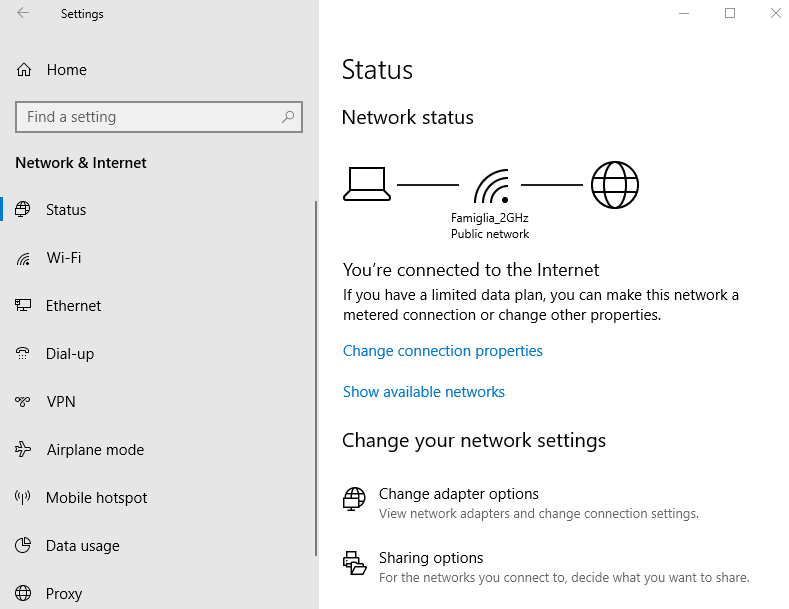
- Go to Settings > Network & Internet.
Step 2: Set Connection as Metered
- Select your Wi-Fi or Ethernet connection.
- Under Properties, toggle on the Set as metered connection option.
This trick is effective for those who don’t want to stop updates altogether but want to control when they’re downloaded, especially when on limited data plans.
Example:
Conclusion
Pausing Windows 11 updates is a simple but effective way to avoid interruptions, preserve system stability, and save bandwidth. Whether you use the built-in Windows settings, the Group Policy Editor, the Windows Update Service, or set a metered connection, you have several methods at your disposal.
Managing updates in this way gives you full control over when and how they are installed, ensuring a more seamless experience when using your PC.
