How to Use Split Screen Feature in Windows 10
Multitasking in Windows 10 is much easier when you know how to split your screen. By dividing your screen, you can work on multiple applications or documents simultaneously. This feature can save time and boost your productivity, whether you’re comparing files, following a tutorial, or using multiple tools at once.
In this guide, we’ll explain how to split your screen in Windows 10 using different methods, including Snap Assist, keyboard shortcuts, and more.
Why Split Your Screen?
Splitting your screen has several advantages:
- Efficient multitasking: Work on two or more tasks simultaneously without switching between windows.
- Better workflow: Compare documents, follow instructions, or transfer information from one window to another quickly.
- Improved productivity: Manage multiple applications side by side for seamless performance.
Method 1: Using Snap Assist

Snap Assist is a handy feature in Windows 10 that helps you organize and snap windows into place with ease. Here’s how to use it:
Step 1: Open the Applications You Want to Split
Before you split your screen, ensure the applications or windows you want to work with are open.
Step 2: Snap the First Window to the Left or Right
- Select the window you want to snap by clicking on its title bar.
- Drag the window to either the left or right edge of the screen until you see an outline indicating the window’s new position.
- Release the mouse, and the window will snap into place, occupying half of your screen.
Step 3: Choose Another Window to Snap to the Other Side
Once you snap the first window, Windows will show you the available open windows on the other half of the screen.
- Select the window you want to open on the other side by clicking its thumbnail.
Now, you have two windows sharing your screen, one on the left and one on the right.
Method 2: Using Keyboard Shortcuts

For a quicker way to split your screen, use keyboard shortcuts. This method is great if you prefer not to use your mouse.
Step 1: Snap a Window to One Side
- Select the window you want to snap by clicking on it.
- Press Windows key + Left arrow to snap the window to the left side or Windows key + Right arrow to snap it to the right side.
Step 2: Snap Another Window to the Opposite Side
Once the first window is snapped, press Windows key + Left arrow or Windows key + Right arrow to snap the second window to the opposite side.
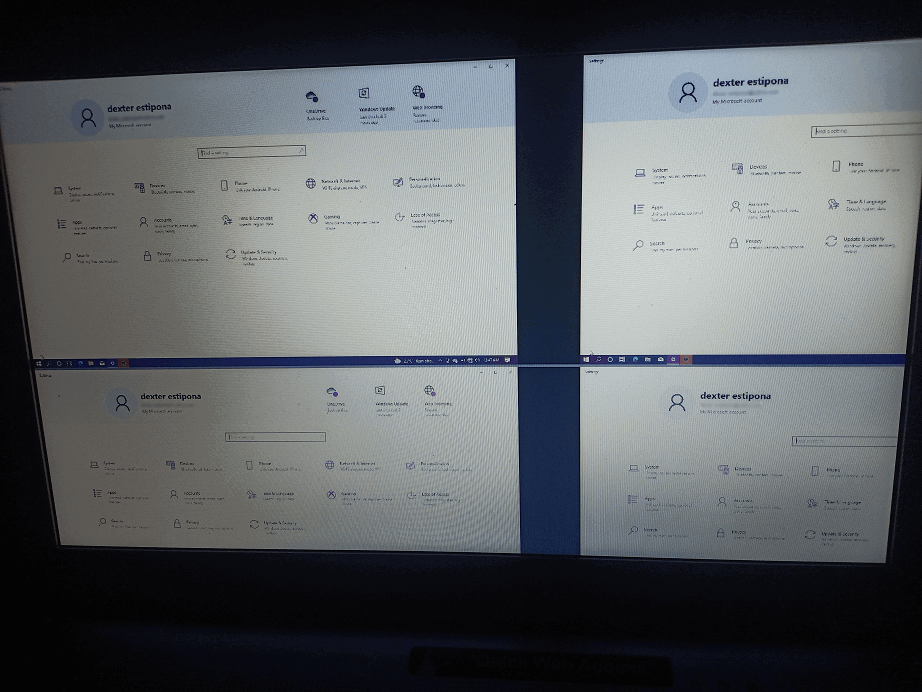
Method 3: Split Your Screen into Four Sections

If you want to take multitasking to the next level, you can split your screen into four quadrants.
Step 1: Snap the First Window to a Corner
- Select the first window and press Windows key + Left arrow followed by Windows key + Up arrow to snap it to the top-left corner of the screen.
Step 2: Snap Additional Windows
Repeat the above step for the other three windows using different arrow key combinations to snap them into different corners:
- Windows key + Right arrow + Up arrow for the top-right corner.
- Windows key + Left arrow + Down arrow for the bottom-left corner.
- Windows key + Right arrow + Down arrow for the bottom-right corner.
This way, you can have four windows displayed at once.
Method 4: Splitting Your Screen Across Multiple Monitors
For those who use multiple monitors, splitting screens across different displays can enhance your productivity even further.
Step 1: Connect and Set Up Multiple Monitors
- Connect your second or third monitor to your computer.
- Right-click on the desktop and select Display settings.
- Under Multiple displays, select the option that fits your need, like Extend these displays.
Step 2: Snap Windows Across Monitors
You can now snap windows not only to different sides of your primary monitor but also to other monitors. Use the same Snap Assist or keyboard shortcuts to manage your windows across multiple displays.
Common Issues and Troubleshooting
Windows Not Snapping
If Snap Assist isn’t working, ensure it’s enabled:
- Go to Settings > System > Multitasking.
- Ensure Snap windows is toggled on.
Incorrect Window Sizes
If your windows aren’t resizing correctly, double-check the resolution and scaling settings in Display settings.
Conclusion
Learning how to split your screen in Windows 10 can significantly improve your workflow by making multitasking easier and more efficient. With Snap Assist, keyboard shortcuts, and the ability to split your screen into four sections or across multiple monitors, you have plenty of options to tailor the experience to your needs. Whether you’re working on two tasks at once or juggling multiple projects, screen splitting helps streamline your efforts and boosts productivity.
