How to Share Files and Folders with Microsoft Office 365

Sharing files and folders is an essential feature in today’s collaborative work environment. Microsoft Office 365 provides robust tools that make file sharing easy and efficient. Whether you’re working on a project with teammates or need to provide access to specific documents, Office 365 allows seamless sharing directly from OneDrive, Microsoft Teams, or even Outlook.
This guide will walk you through the step-by-step process of sharing files and folders using Microsoft Office 365, ensuring a smooth experience for you and your collaborators.
Why Share Files Using Microsoft Office 365?
1. Real-Time Collaboration
Office 365 enables multiple users to work on the same file simultaneously, ensuring real-time updates.
2. Secure Sharing Options
You can control who accesses your files and set permissions such as read-only or edit rights.
3. Easy Integration
Sharing files is seamless across Office apps like Word, Excel, and PowerPoint, and works well with Outlook for emailing links to documents.
Methods to Share Files and Folders in Office 365
1. Sharing Files via OneDrive
OneDrive is Office 365’s cloud storage solution and one of the most straightforward ways to share files and folders.
Step-by-Step Guide:
- Log In to OneDrive
- Go to OneDrive and sign in with your Office 365 account.

- Go to OneDrive and sign in with your Office 365 account.
- Locate the File or Folder
- Navigate to the file or folder you wish to share.
- Click the Share Button
- Right-click on the file or folder and select Share.
- Alternatively, select the item and click Share from the toolbar at the top.

- Set Permissions
- Choose whether recipients can Edit or View Only the file.
- You can also set expiration dates or passwords for added security.

- Send the Link
- Enter the email addresses of the recipients or generate a sharing link.
- Click Send or Copy Link to distribute the link manually.
Pro Tips for Sharing via OneDrive:
- Use the “People with existing access” option to avoid duplicate permissions.
- For sensitive files, enable the Block download option to prevent unauthorized saving.
2. Sharing Files via Microsoft Teams
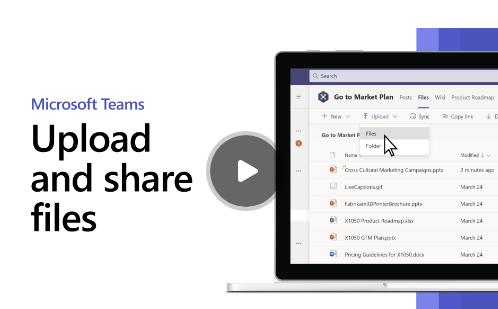
Microsoft Teams integrates with Office 365 apps, allowing you to share files within channels or chats effortlessly.
Step-by-Step Guide:
- Open Microsoft Teams
- Log in to Teams and select the desired Team or Chat.
- Upload the File
- Click on the Files tab in the channel or chat and upload the file you want to share.

- Click on the Files tab in the channel or chat and upload the file you want to share.
- Share the File
- Once uploaded, hover over the file, click the More Options (three dots) icon, and select Get Link.
- Share the link in the channel, chat, or external email.

- Adjust Permissions
- Click Manage Access to modify sharing permissions directly from Teams.
Benefits of Sharing via Teams:
- Collaboration tools are built-in, including commenting and file editing.
- Easy to track shared files in the Files tab of each channel or chat.
3. Sharing Files via Outlook
Outlook simplifies sharing files by allowing you to attach them directly or insert links to files stored in OneDrive.
Step-by-Step Guide:
- Compose a New Email
- Open Outlook and click New Email.

- Open Outlook and click New Email.
- Attach a File
- Click Attach File and choose between uploading a file from your computer or linking a file from OneDrive.

- Click Attach File and choose between uploading a file from your computer or linking a file from OneDrive.
- Insert Links to Shared Files
- If you select a file from OneDrive, Outlook automatically inserts a sharing link.
- Send the Email
- Add recipients and send the email. Recipients can access the file directly from the email.
Pro Tips for Sharing via Outlook:
- Use OneDrive links to avoid attachment size limitations.
- Check the Sharing Permissions before sending the link.
Managing Shared Files and Folders
After sharing, you can manage permissions and track who has access to your files.
1. Adjust Permissions
- Open the file or folder in OneDrive or Teams.
- Click Manage Access to modify sharing settings, revoke access, or change editing rights.
2. Monitor Shared Activity
- In OneDrive, navigate to the Shared tab to view files and folders you’ve shared.
- Check activity logs for collaboration updates.
3. Stop Sharing
- To stop sharing a file, go to Manage Access and click Remove Link or revoke individual permissions.
Security Best Practices for Sharing Files
1. Set Expiration Dates
For time-sensitive files, set an expiration date for the sharing link to ensure it doesn’t remain accessible indefinitely.
2. Use Password Protection
Enable password protection for added security when sharing critical files.
3. Review Permissions Regularly
Audit your shared files periodically to ensure permissions align with current needs.
Troubleshooting Common Issues
1. Sharing Link Not Working
- Check if the link has expired or if permissions are too restrictive.
2. Unable to Share Files
- Ensure the file is stored in OneDrive or Teams. Files saved locally cannot be shared through cloud-based methods.
3. Permissions Error
- Verify that you have the appropriate rights to share the file. Ask the file owner to grant you sharing privileges if needed.
Conclusion
Sharing files and folders using Microsoft Office 365 is a straightforward and powerful way to collaborate with others. Whether you choose OneDrive, Teams, or Outlook, you’ll have the tools needed to share documents securely and efficiently. By following the steps outlined in this guide, you can maximize the benefits of Office 365’s sharing features and ensure seamless collaboration with your team.

