How to Set Up Partitions in Windows 10
Creating partitions on your Windows 10 system allows you to organize your data more effectively. Whether you want to set aside space for backups, a different operating system, or just better file management, partitioning your hard drive makes it easy to separate and manage different types of files.
In this guide, we’ll walk you through the steps to create a partition on Windows 10, using the built-in Disk Management tool.
What is a Partition?
A partition is a specific section of your hard drive or SSD that is treated as a separate volume by your computer. Windows 10 can manage multiple partitions on the same disk, allowing you to store data in an organized manner. Each partition can function like a separate hard drive, making it easy to manage your files, operating systems, or backups.
Why Create Partitions?
Here are a few reasons why you might want to create partitions:
- Organizing data: You can dedicate different partitions to different purposes, such as separating your personal files from system files.
- Backup and recovery: Creating a dedicated partition for backups can prevent accidental data loss.
- Running multiple operating systems: A separate partition can be used to install another OS alongside Windows 10.
- Improved file management: If you manage large volumes of data, partitions can make it easier to track and maintain files.
How to Create Partitions in Windows 10
Step 1: Access Disk Management
The Disk Management tool in Windows 10 makes it simple to create partitions without any third-party software.
Steps:
- Press
Windows + Xon your keyboard or right-click the Start button and select Disk Management from the menu. - This will open the Disk Management window, showing all the drives and partitions on your computer.
Step 2: Shrink an Existing Volume
To create a new partition, you need to shrink an existing partition to free up unallocated space.
Steps:
- In the Disk Management window, locate the partition you want to shrink (usually the C: drive).
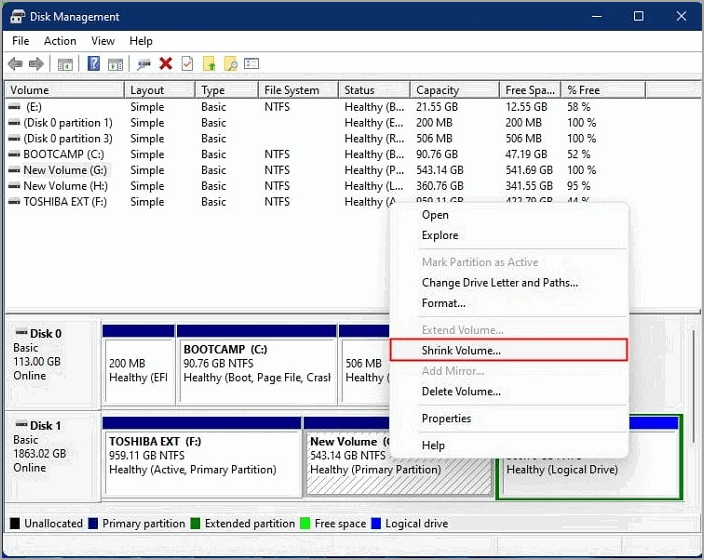
- Right-click the partition and select Shrink Volume.
- A dialog box will appear asking how much space you want to shrink. Enter the amount of space (in megabytes) that you want to allocate for the new partition. Click Shrink when done.
- Once the process is complete, you’ll see the unallocated space on your disk.
Step 3: Create a New Partition
Now that you have unallocated space, you can create a new partition.
Steps:
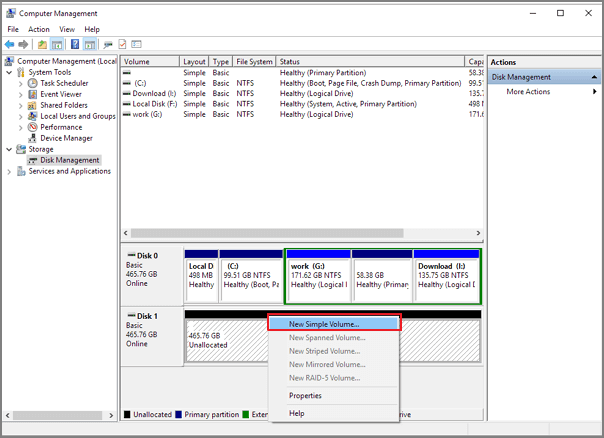
- Right-click the unallocated space in Disk Management and select New Simple Volume.
- The New Simple Volume Wizard will open. Click Next to proceed.
- Enter the size of the new volume. By default, the wizard will suggest the maximum available size. Adjust this if necessary, then click Next.
- Assign a drive letter to the new partition, then click Next.
Step 4: Format the Partition
The final step is to format the partition and set its file system.
Steps:
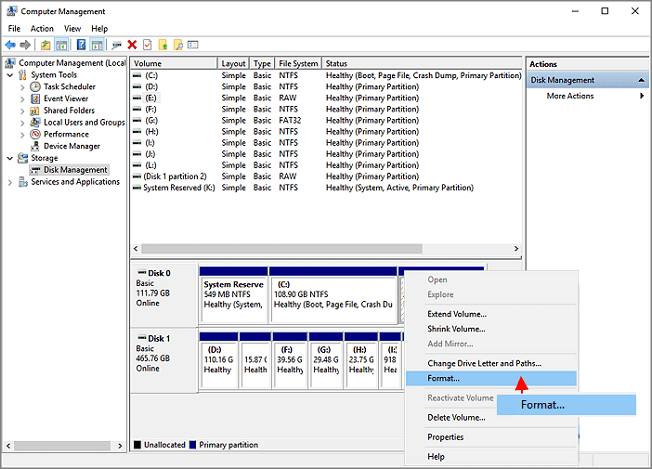
- Choose the file system for your new partition. Typically, you’ll want to use NTFS (default for Windows) or exFAT for compatibility across different platforms. Leave the Allocation unit size as default.

- Give the partition a volume label (name), such as Data or Backup.
- Ensure that the Perform a quick format box is checked, then click Next and Finish to complete the process.
Managing and Deleting Partitions
Once you have created partitions, you can manage them easily within Disk Management. If you need to delete a partition later, follow these steps:
- Open Disk Management.
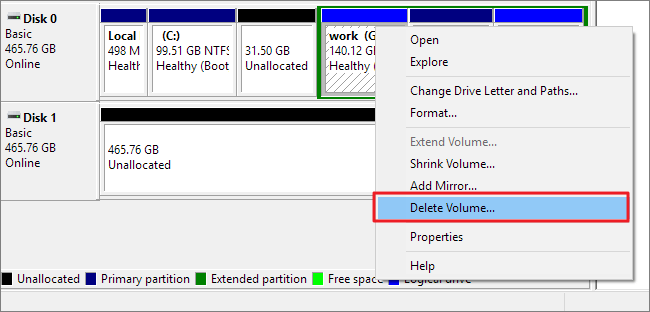
- Right-click the partition you want to delete and choose Delete Volume.
- Confirm the deletion. Keep in mind that deleting a partition will erase all data on it, so be sure to back up any important information first.
Additional Tips for Partition Management
- Backup important data: Before creating or modifying partitions, it’s always a good idea to back up your data to avoid any accidental loss.
- Use disk partitions wisely: Avoid creating too many small partitions, as this can make managing your storage space more complicated. Use partitions for clearly defined purposes.
- Consider using third-party tools: While Windows 10’s Disk Management tool works well, third-party partitioning software (such as EaseUS Partition Master or MiniTool Partition Wizard) may offer additional features and flexibility.
Conclusion
Partitioning your hard drive in Windows 10 is a simple and effective way to organize your data, improve file management, and create space for multiple operating systems or backups. Using the built-in Disk Management tool, you can quickly shrink existing volumes, create new partitions, and format them with the file system that best suits your needs.
By following the steps outlined in this guide, you can confidently manage your storage and create partitions to optimize your computer’s performance and organization.


Wonderful web site Lots of useful info here Im sending it to a few friends ans additionally sharing in delicious And obviously thanks to your effort