How to Resolve the “Server DNS Address Could Not Be Found” Error in Google Chrome
The “Server DNS Address Could Not Be Found” error in Google Chrome occurs when your browser cannot reach the DNS server to load the website. DNS (Domain Name System) is essential for translating domain names into IP addresses. When Chrome is unable to resolve a domain, you’ll see this error message. This guide will walk you through effective ways to fix this error and get back online.
Common Causes of the “Server DNS Address Could Not Be Found” Error
Several factors can trigger this error, including:
- DNS server issues or misconfigurations
- Cache conflicts in Chrome or your system’s DNS cache
- Outdated network drivers
- Issues with your internet connection
Each troubleshooting method addresses one or more of these potential causes, so try them step-by-step until you resolve the error.
Method 1: Clear Chrome’s DNS Cache
The DNS cache in Chrome can sometimes contain outdated or incorrect data, causing this error.
Step 1: Access Chrome’s DNS Settings
- Open Google Chrome and type chrome://net-internals/#dns in the address bar, then press Enter.
- In the DNS tab, you’ll see an option labeled Clear host cache.
Step 2: Clear the Cache
- Click Clear host cache to delete the stored DNS information.
- Close and reopen Chrome, then try visiting the website again.
This simple step often resolves the error if the issue was related to cached DNS data.
Method 2: Flush Your System’s DNS Cache
If clearing Chrome’s DNS cache didn’t work, try clearing the DNS cache on your operating system.
Step 1: Open Command Prompt
- Press Windows + R to open the Run dialog box.
- Type cmd and press Enter.
Step 2: Run the Flush Command
- In Command Prompt, type the following command and press Enter:
- You’ll receive a confirmation message stating that the DNS cache has been successfully flushed.
After flushing your system’s DNS cache, open Chrome and try accessing the website again.
Method 3: Change DNS Server Settings
Sometimes, switching to a more reliable DNS server, like Google’s Public DNS, can solve this issue.
Step 1: Open Network Settings

- Go to Control Panel > Network and Sharing Center.
- Select Change adapter settings on the left.
Step 2: Set Up Google DNS
- Right-click on your network connection and select Properties.
- Choose Internet Protocol Version 4 (TCP/IPv4) and click on Properties.
- Select Use the following DNS server addresses and enter the following:
- Preferred DNS server: 8.8.8.8
- Alternate DNS server: 8.8.4.4
- Click OK to save the changes, then restart Chrome to see if the issue is resolved.
Method 4: Restart Your Router and Computer
Network devices can sometimes experience connectivity glitches. Restarting your router and computer can help resolve these temporary issues.
Step 1: Restart Your Router
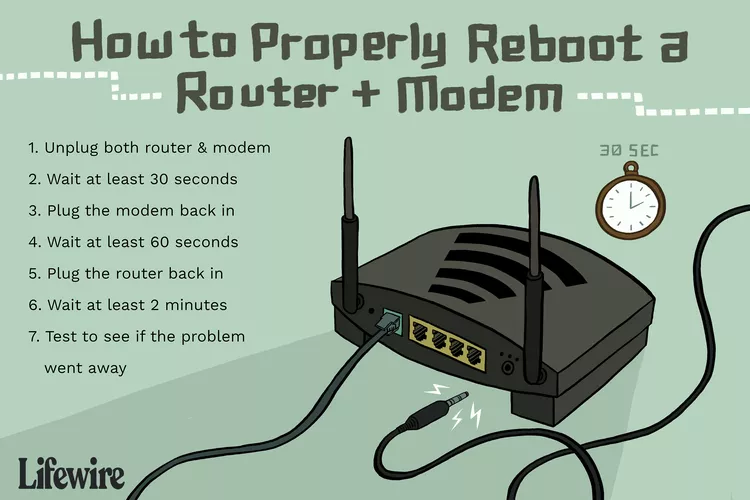
- Unplug your router from the power outlet, wait for about 30 seconds, and plug it back in.
- Wait for the router to fully restart and re-establish a connection.
Step 2: Restart Your Computer
- Close any open applications and restart your computer.
After both devices are restarted, try accessing the website again.
Method 5: Disable Any Proxy Settings
Proxy servers can sometimes interfere with DNS resolution, causing this error.
Step 1: Access Proxy Settings
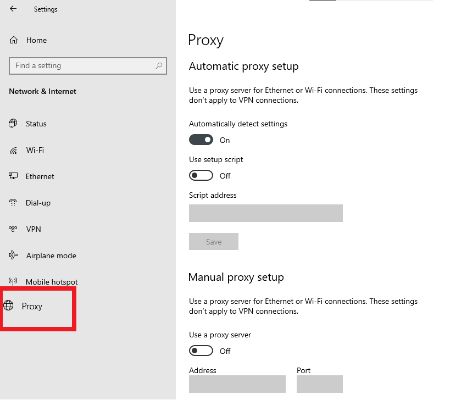
- Press Windows + I to open the Settings menu.
- Navigate to Network & Internet > Proxy.
Step 2: Turn Off Proxy Server
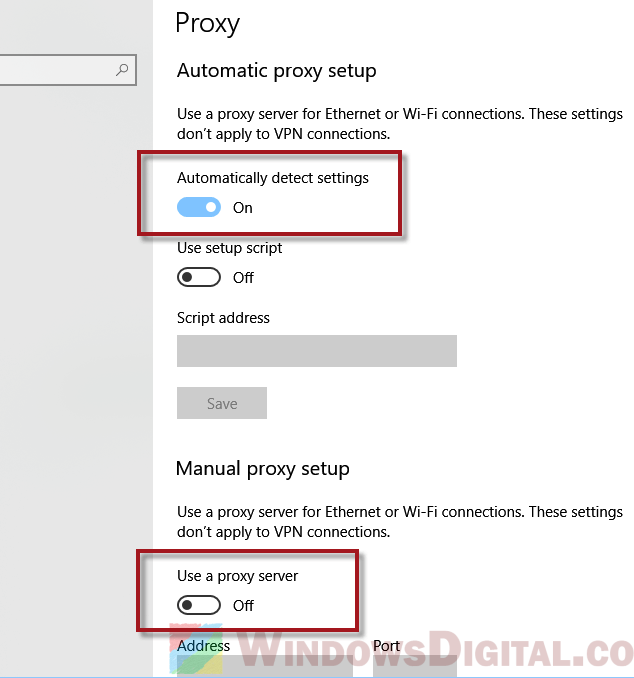
- Under Manual proxy setup, toggle off Use a proxy server if it’s enabled.
- Ensure Automatically detect settings is toggled on.
After adjusting the proxy settings, try reloading the website in Chrome.
Method 6: Update Your Network Driver
An outdated network driver can lead to DNS resolution issues. Updating the driver can potentially fix this error.
Step 1: Open Device Manager
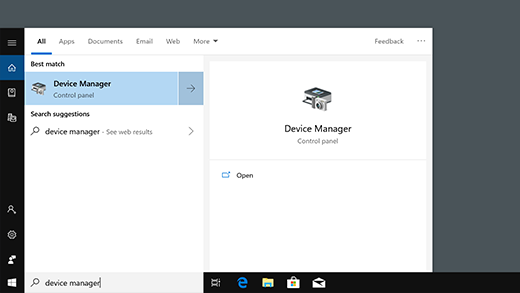
- Right-click on the Start menu and select Device Manager.
- Expand Network adapters to see a list of your network devices.
Step 2: Update the Driver
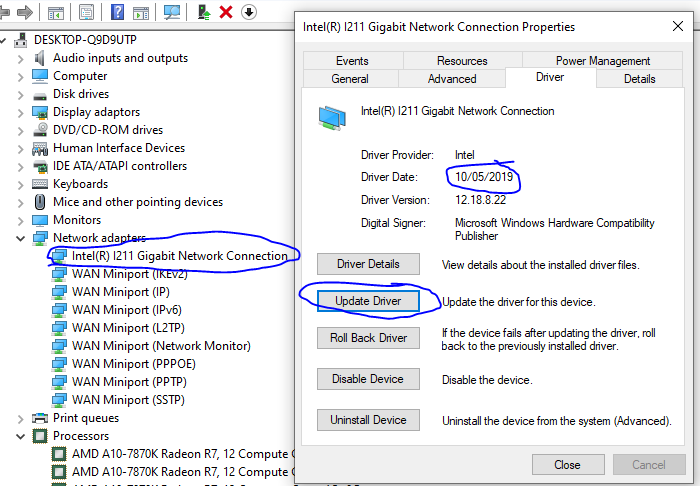
- Right-click on your active network adapter and select Update driver.
- Choose Search automatically for updated driver software. Windows will look for any available updates.
Once the driver is updated, restart your computer and check if Chrome can connect to the website.
Method 7: Reset Chrome to Default Settings
If none of the above methods work, resetting Chrome to its default settings can clear out any misconfigurations.
Step 1: Access Reset Settings
- Open Chrome and go to Settings by clicking on the three dots in the upper-right corner.
- Scroll down and click on Reset and clean up.
Step 2: Reset Chrome Settings
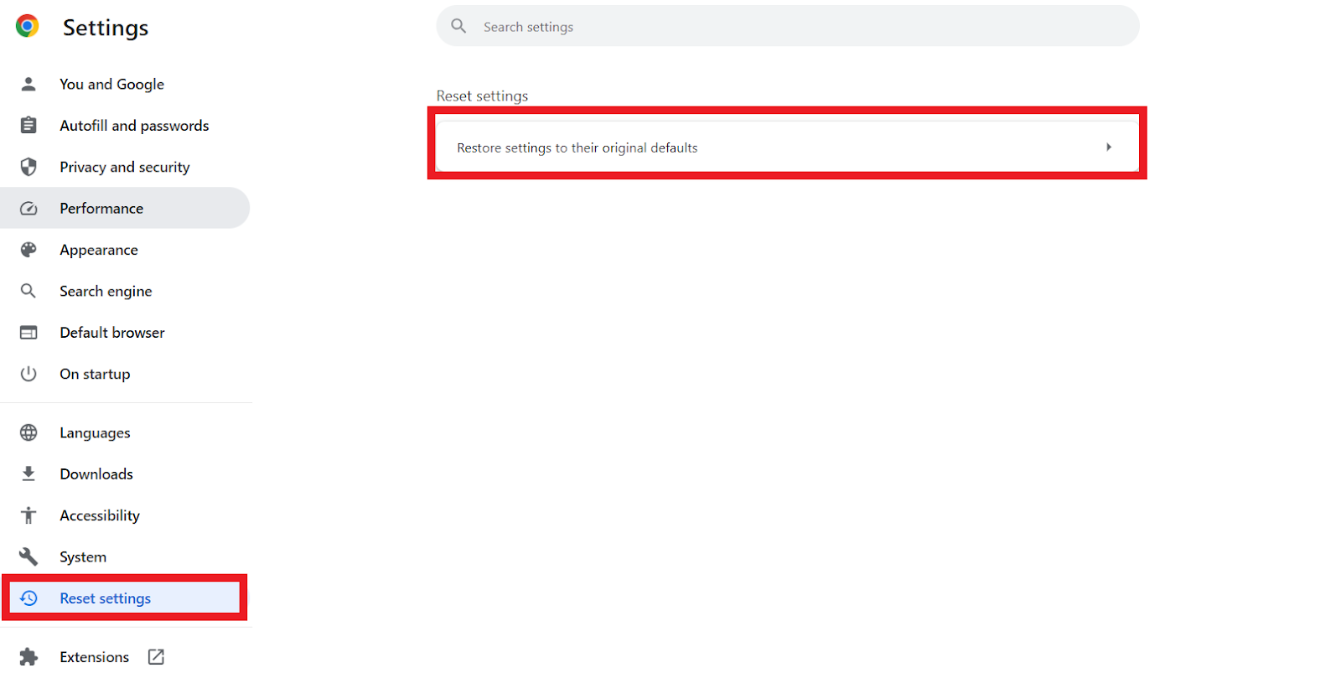
- Select Restore settings to their original defaults.
- Confirm the reset, then close and reopen Chrome.
This reset can help clear any issues in Chrome that might be blocking DNS connections.
Conclusion
The “Server DNS Address Could Not Be Found” error in Google Chrome is often due to DNS or network issues. By following these steps, you should be able to restore your browser’s connection. From clearing the cache to updating your network driver, each solution targets a potential cause, ensuring you have a reliable troubleshooting guide.
