Step-by-Step Guide: How to Secure an Excel File with a Password

Protecting your sensitive data is crucial, and one effective way to ensure your Excel files are secure is by password-protecting them. Excel offers built-in security features that allow you to encrypt your workbooks, preventing unauthorized access. In this guide, we will provide a step-by-step tutorial on how to password protect an Excel file, helping you safeguard your information.
1. Why Password Protect an Excel File?
Password-protecting an Excel file helps secure sensitive data, whether it’s financial information, confidential reports, or personal records. Key reasons for protecting your Excel files include:
- Data Security: Prevent unauthorized access to sensitive or confidential information.
- Data Integrity: Ensure that only authorized users can view or modify data.
- Compliance: Many organizations require password protection for files containing personal data to meet legal and regulatory standards.
Understanding the importance of protecting your Excel files can help you maintain privacy and ensure data security.
2. How to Password Protect an Excel File

Excel provides a simple way to password-protect a file, allowing you to lock the file so that only users with the correct password can open or modify it.
Step-by-Step Guide to Password Protecting an Excel File:
- Open the Excel Workbook:
- Open the Excel file you want to password protect.
- Go to the ‘File’ Tab:
- Click on the “File” tab located at the top left of the Excel window.
- Click on ‘Info’:
- In the File menu, click on “Info” to access file protection settings.
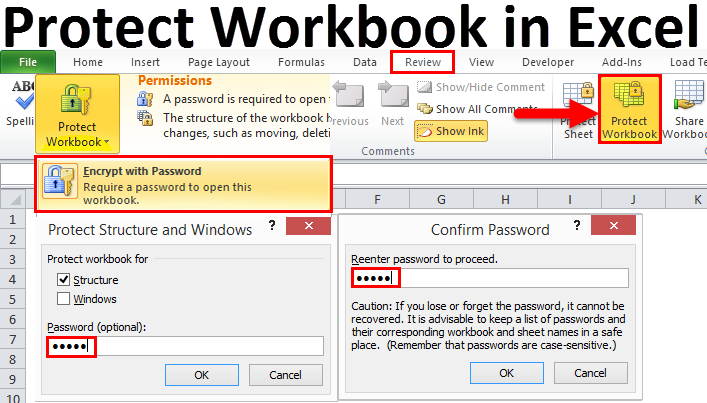
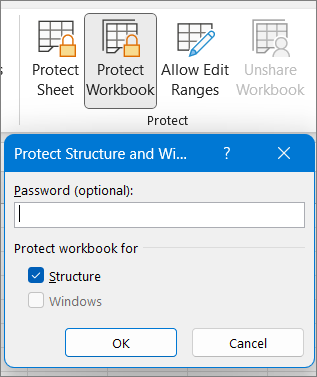
- Select ‘Protect Workbook’:
- Click on the “Protect Workbook” dropdown menu.
- Choose ‘Encrypt with Password’:
- In the dropdown menu, select “Encrypt with Password.” This will open a dialog box where you can set your password.
- Enter Your Password:
- In the Encrypt Document dialog box, enter the password you want to use. Ensure that the password is strong and memorable.
- Click ‘OK’:
- After entering the password, click “OK.” You will be prompted to re-enter the password for confirmation.
- Re-enter the Password:
- Confirm your password by typing it again, then click “OK.”
- Save the File:
- Save the Excel file by clicking “File” > “Save” or pressing
Ctrl + Son your keyboard.
- Save the Excel file by clicking “File” > “Save” or pressing
3. How to Password Protect for Editing Only

If you want others to be able to open the Excel file but restrict editing, Excel allows you to set a password specifically for editing.
Step-by-Step Guide to Password Protect for Editing:
- Go to the ‘File’ Tab:
- Open your Excel file and go to “File” > “Save As.”
- Select a Save Location:
- Choose a location to save the file, such as your computer or cloud storage.
- Open ‘Tools’ Menu in Save As Dialog:
- In the Save As dialog box, click on “Tools” located at the bottom left corner, then select “General Options.”
- Set a Password for Editing:
- In the General Options dialog box, you will see options for setting a password to modify the file. Enter the password under “Password to modify.”
- Click ‘OK’:
- After entering the password, click “OK,” then confirm the password by typing it again.
- Save the File:
- Finally, click “Save” to apply the password protection. Users will now be able to open the file without a password but will need the password to edit it.
4. Removing a Password from an Excel File

If you need to remove the password protection from an Excel file, you can do so by following these steps:
Step-by-Step Guide to Removing a Password:
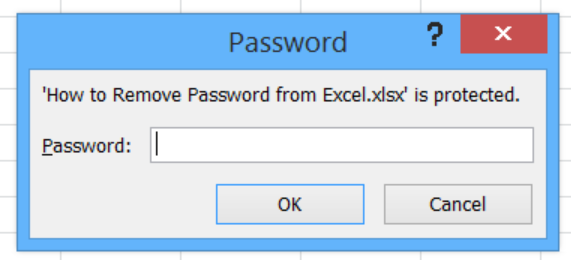
- Open the Protected Excel File:
- Open the password-protected Excel file by entering the password.
- Go to ‘File’ > ‘Info’:
- Click on the “File” tab, then select “Info.”
- Select ‘Protect Workbook’ > ‘Encrypt with Password’:
- Click on “Protect Workbook” and select “Encrypt with Password” from the dropdown menu.
- Delete the Existing Password:
- In the Encrypt Document dialog box, delete the password, leaving the field blank.
- Click ‘OK’:
- After deleting the password, click “OK” and save the file. The file will no longer require a password to open.
5. Best Practices for Setting Passwords in Excel
When setting passwords for your Excel files, follow these best practices to ensure your data is secure:
- Use Strong Passwords: Create complex passwords that include a mix of uppercase and lowercase letters, numbers, and special characters.
- Store Passwords Securely: Keep your passwords in a secure location, such as a password manager, to prevent losing access to important files.
- Regularly Update Passwords: Change passwords periodically to enhance security.
- Avoid Sharing Passwords: Limit the sharing of passwords to trusted individuals only.
Conclusion
Password protecting an Excel file is a straightforward and effective way to safeguard your sensitive data. Whether you need to prevent unauthorized access or restrict editing, Excel’s built-in protection features make it easy to secure your workbooks.
By following the steps outlined in this guide, you can easily set passwords, restrict editing, and remove protection when necessary. Keep in mind best practices for password security to ensure that your data remains safe. For more advanced Excel security features or additional tips on protecting your workbooks, explore Excel’s resources or consider professional training.
