How to Adjust or Turn Off Lock Screen Timeout in Windows 10
The lock screen timeout on Windows 10 determines how long your computer stays on the lock screen before it turns off the display. By default, this duration is often set to conserve power, but you might want to change it for personal preference or productivity reasons. In this guide, we’ll show you step-by-step how to change or disable the lock screen timeout.
Why Adjust the Lock Screen Timeout?
There are several reasons to adjust the lock screen timeout:
- Convenience: Prevent the display from turning off too quickly when you’re away briefly.
- Power Saving: Reduce screen-on time for better battery life.
- Custom Preferences: Align the timeout setting with your workflow.
Follow the steps below to modify this setting to suit your needs.
Step 1: Access Power Options

- Press the Windows + S keys to open the search bar.
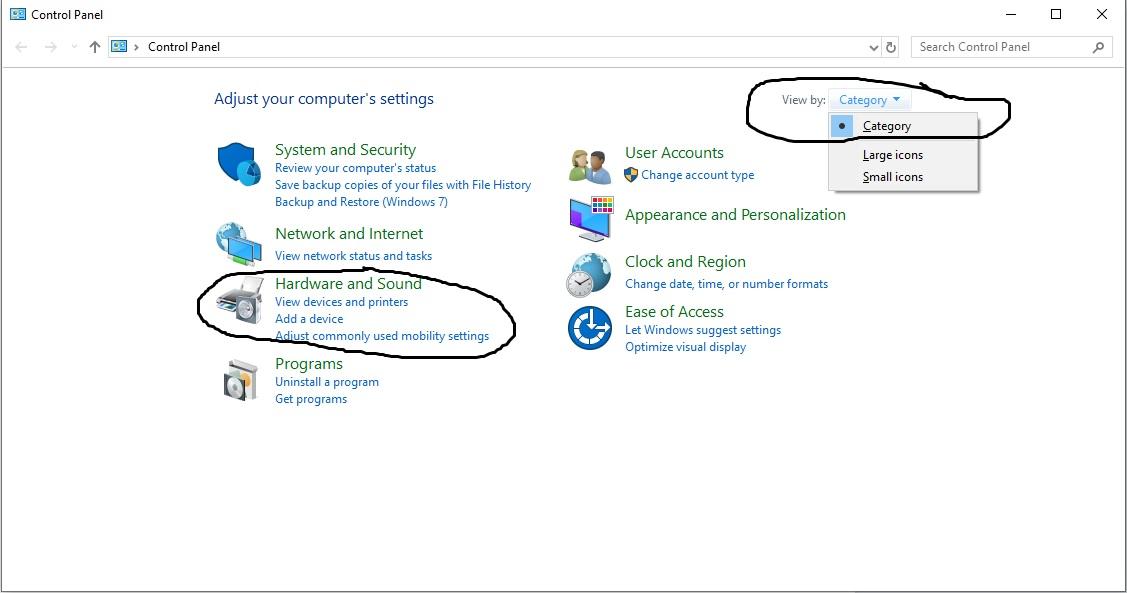
- Type Control Panel and select it from the results.
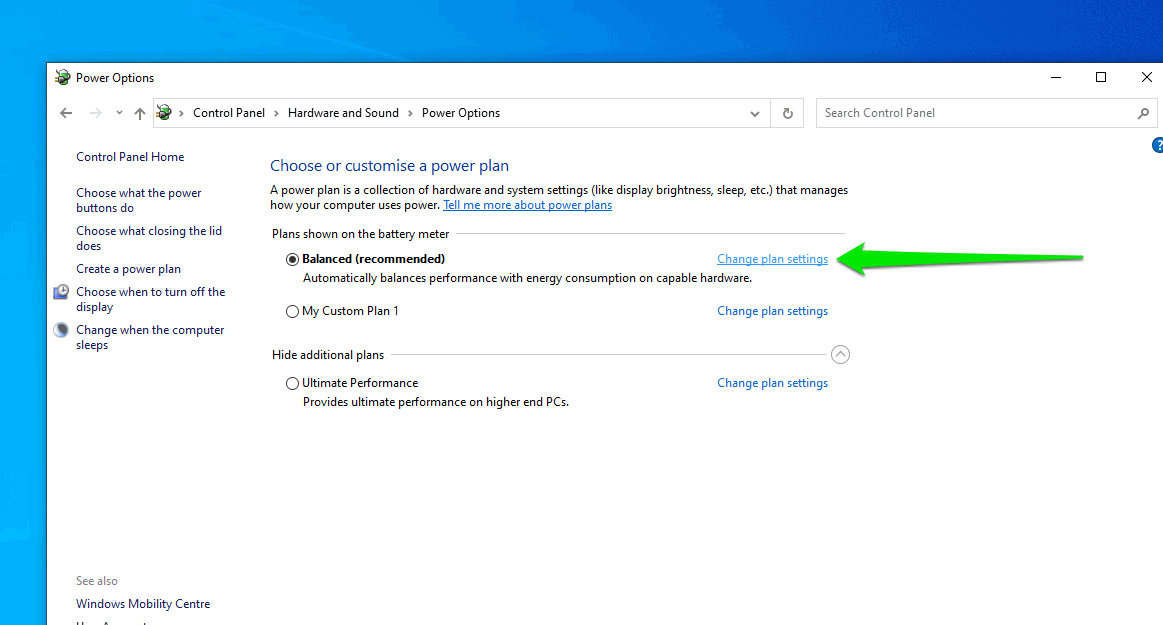
- In the Control Panel, click on Hardware and Sound and then Power Options.
- Identify the active power plan (usually labeled as “Balanced” or “High performance”) and click Change plan settings next to it.
Step 2: Adjust Display Timeout Settings

- In the next window, click Change advanced power settings.
- Scroll down and expand the Display section.
- Under Turn off the display after, adjust the time for both On battery and Plugged in modes.
- Set the time to a higher value for longer lock screen duration or choose Never to disable the timeout completely.
- Click Apply and then OK to save changes.
Step 3: Modify the Registry for Lock Screen Timeout (Optional)

If the above method does not meet your needs, you can make deeper adjustments using the Registry Editor.
Warning:
Modifying the Windows registry can cause system instability if done incorrectly. Always back up your registry before proceeding.
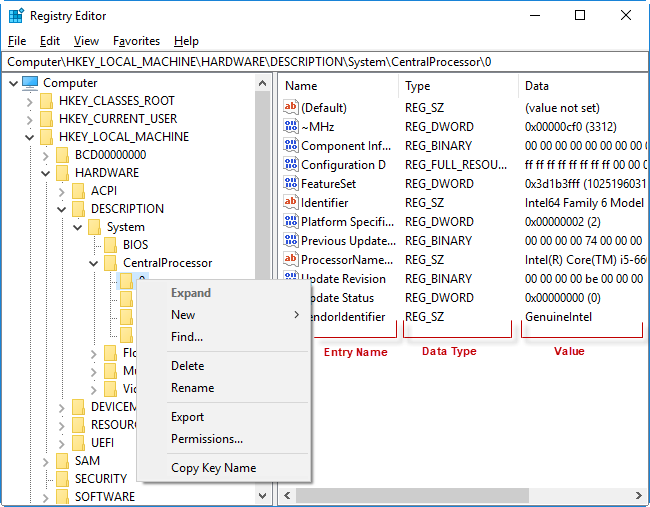
- Press Windows + R, type
regedit, and press Enter. - Navigate to the following path:
HKEY_LOCAL_MACHINE\SYSTEM\CurrentControlSet\Control\Power\PowerSettings\7516b95f-f776-4464-8c53-06167f40cc99\8ec4b3a5-6868-48c2-be75-4f3044be88a7 - Double-click the Attributes key on the right panel.
- Change its value from
1to2and click OK.
Step 4: Use Group Policy Editor (For Pro Users)

The Group Policy Editor provides another way to manage lock screen settings but is only available on Windows 10 Pro and Enterprise editions.
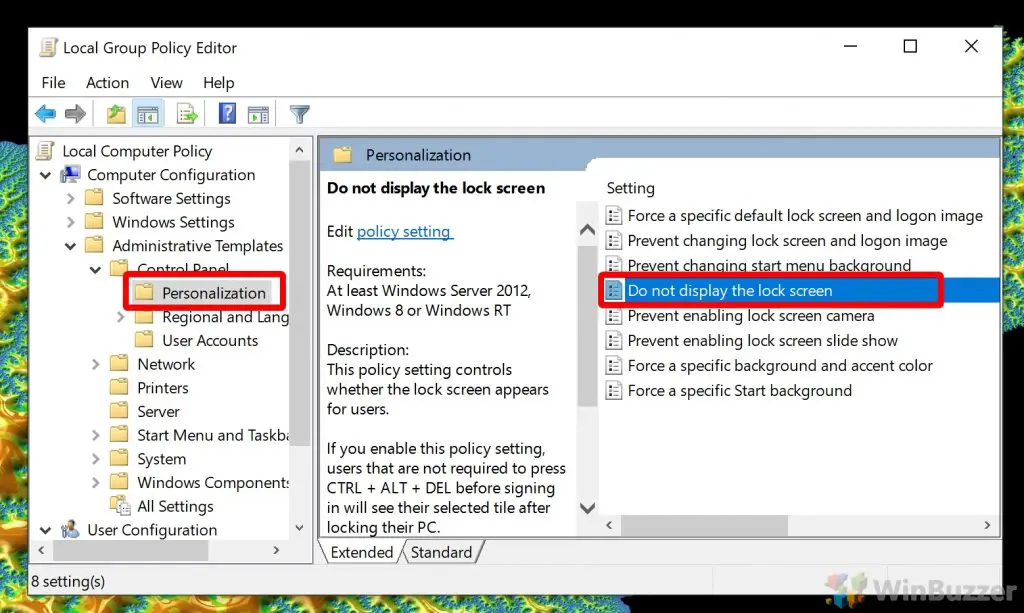
- Press Windows + R, type
gpedit.msc, and press Enter. - Navigate to:
Computer Configuration > Administrative Templates > Control Panel > Personalization - Double-click Do not display the lock screen and enable it to disable the lock screen entirely.
- Click Apply and OK.
Step 5: Test Your New Settings
To ensure the new settings work:
- Lock your computer by pressing Windows + L.
- Wait for the duration you set and observe whether the display turns off as expected.
- Adjust further if necessary.
Conclusion
Adjusting or disabling the lock screen timeout in Windows 10 can significantly improve your user experience. Whether you use Power Options, the Registry Editor, or Group Policy Editor, you have control over how your system behaves on the lock screen. Be sure to pick the method that suits your technical comfort level, and enjoy a more customized Windows experience.
