How to Resolve Spell Check Issues in Word
Spell check is a crucial feature in Microsoft Word, helping you to catch and correct spelling and grammar errors in your documents. However, it may sometimes stop working, leaving typos and grammatical issues unchecked. If you’re facing this issue, there are a few troubleshooting steps you can follow to restore spell check functionality. This guide will walk you through the most effective methods to fix spell check in Microsoft Word.
Check Basic Settings for Spell Check in Word
The first step is to make sure that spell check is actually enabled in Microsoft Word.
Step 1: Verify Proofing Options
- Open Word: Launch Microsoft Word and open any document.
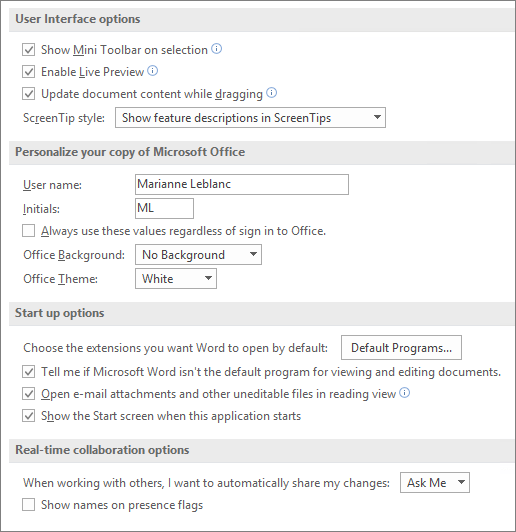
- Access Options: Go to File > Options to open the Word Options menu.
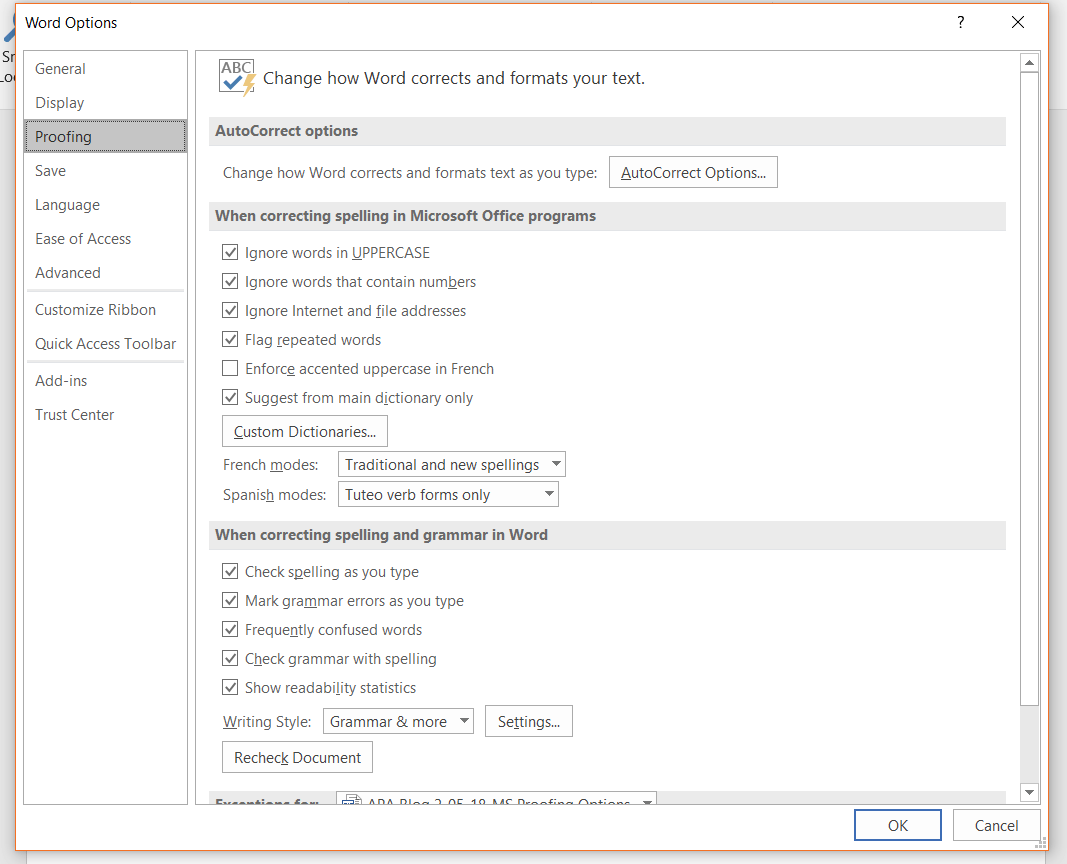
- Navigate to Proofing: In the left sidebar, select Proofing.
- Check Proofing Settings: Ensure the options Check spelling as you type and Mark grammar errors as you type are both checked.
These settings enable Word to underline spelling and grammar errors as you type, so if they are unchecked, Word’s spell check feature may not work.
Step 2: Re-check Language Settings
Sometimes, Word’s spell check can be disabled if the wrong language is selected.
- In the Proofing menu, click on Set Proofing Language.
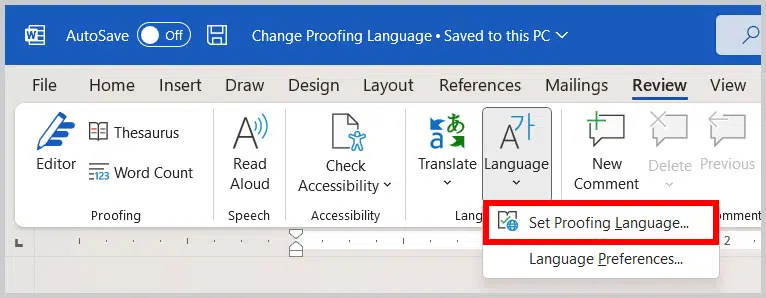
- Select Your Preferred Language: Choose the language you use and make sure that Do not check spelling or grammar is unchecked.
Tip: Be sure to select the correct dialect (e.g., English (United States) vs. English (United Kingdom)) for your document.
Ensure Word’s Proofing Tools Are Installed
Spell check may also stop working if Word’s proofing tools for your language are missing.
Step 1: Install Proofing Tools
- Open Office Settings: Go to File > Options > Language.

- Add Proofing Language: In the Choose Editing Languages section, select the desired language and click Add.

- Click on Not installed? if the proofing tools are missing and follow the prompts to download and install them.
Step 2: Restart Microsoft Word
After installing the proofing tools, restart Word and check if spell check is now functional.
Fixing Spell Check Issues by Clearing Exemptions
In some cases, certain paragraphs or sections may be exempt from spell check. You can disable these exemptions to restore the feature.
Step 1: Remove Language Exemptions for Selected Text
- Select All Text: Press Ctrl + A to select your entire document.
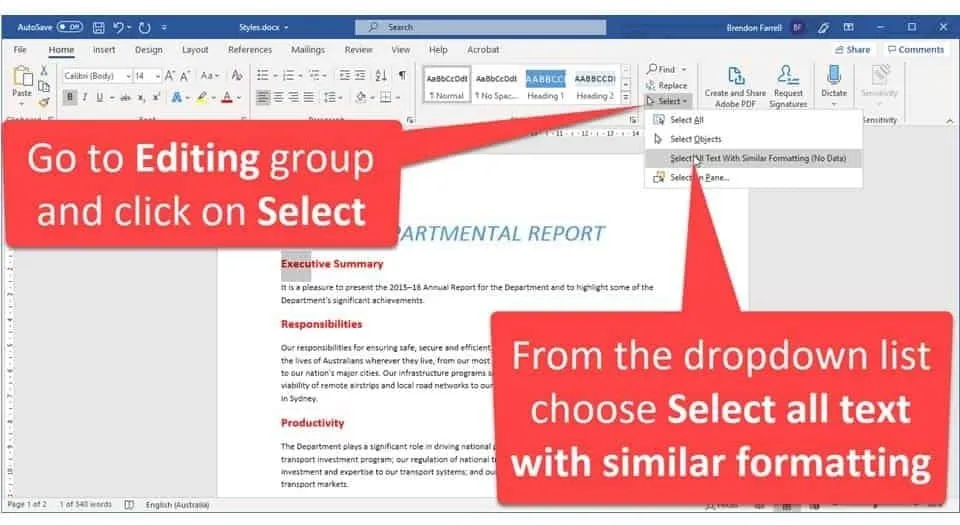
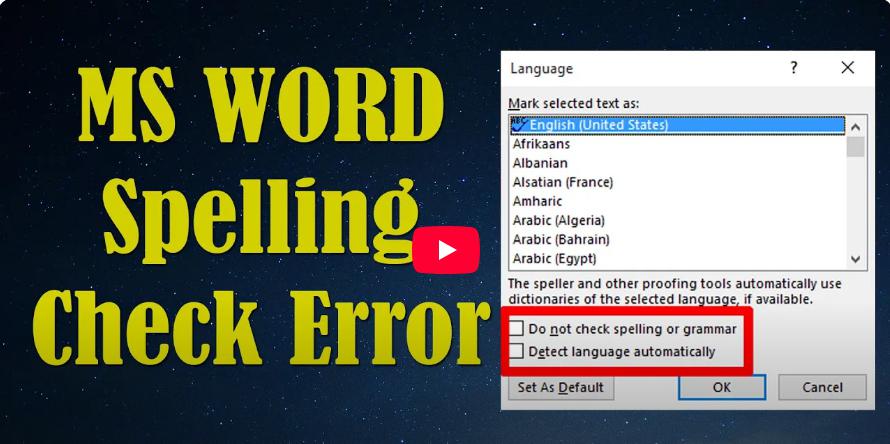
- Open Language Settings: Go to the Review tab, click on Language, and select Set Proofing Language.
- Uncheck Exemption: Make sure Do not check spelling or grammar is unchecked.
Step 2: Clear Document Formatting
Formatting settings can sometimes interfere with spell check. To reset these settings:
- Select the Text: Highlight the section where spell check isn’t working.
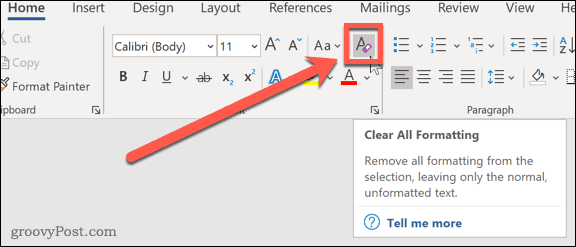
- Go to the Home tab, click on Clear Formatting to remove any style or language settings that may be causing the issue.
Run the Microsoft Office Repair Tool
If spell check still isn’t working, your Office installation may need repairing. Here’s how to do it.
Step 1: Access the Repair Tool
- Open Control Panel: Go to Control Panel > Programs and Features.
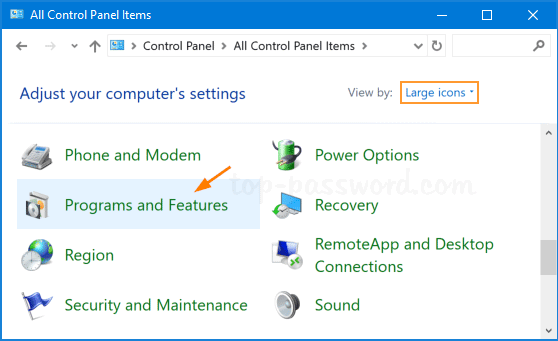
- Locate Microsoft Office: Find Microsoft Office in the list, right-click, and select Change.
Step 2: Choose the Repair Option
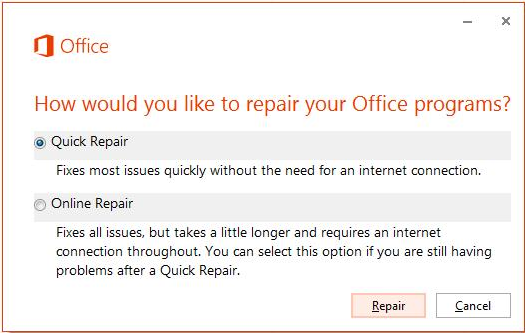
- Choose either Quick Repair or Online Repair (recommended for a thorough fix).
- Follow the prompts to complete the repair process.
Once repaired, restart Word to see if spell check functionality has returned.
Enable Spell Check in Word’s Registry Editor (Advanced)
If all else fails, you can try modifying Word’s registry settings. Caution: Editing the registry can have unintended effects on your system, so proceed only if you’re comfortable with advanced troubleshooting.
Step 1: Open the Registry Editor
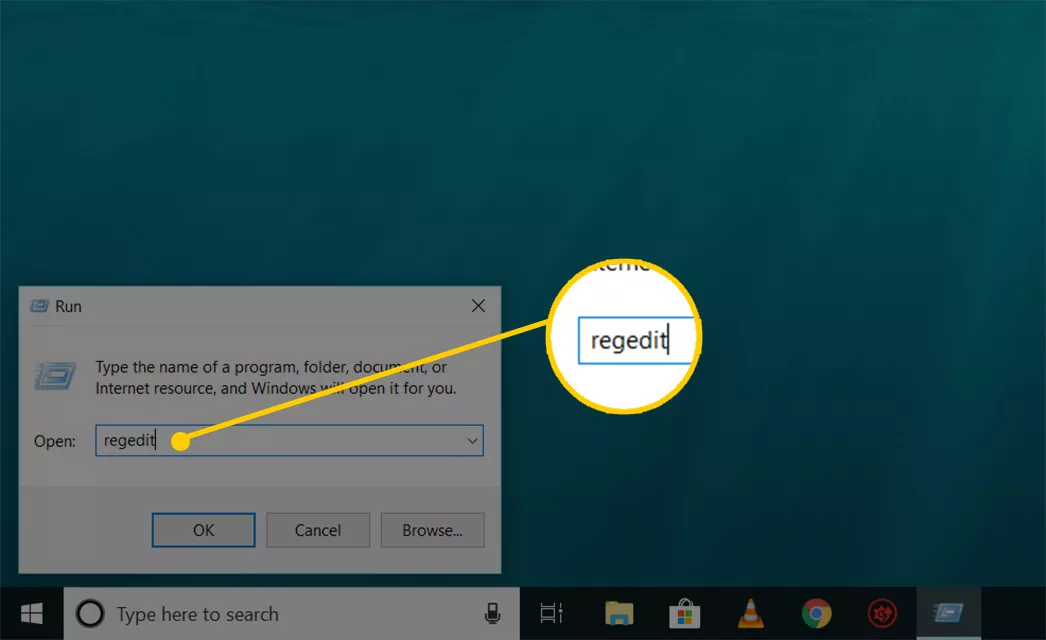
- Press Windows + R to open the Run dialog.
- Type regedit and press Enter.
Step 2: Navigate to the Proofing Settings
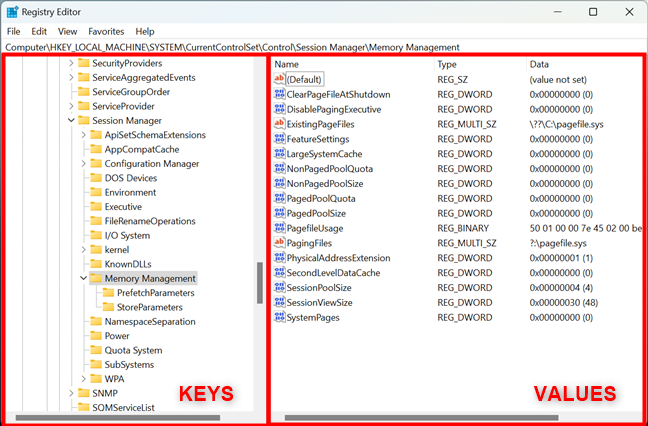
- Go to HKEY_CURRENT_USER\Software\Microsoft\Office\16.0\Word.
- Open Proofing and look for any entries related to spelling and grammar settings.
Step 3: Modify Settings
- Double-click any spelling-related entries and set their values to 1 to enable them.
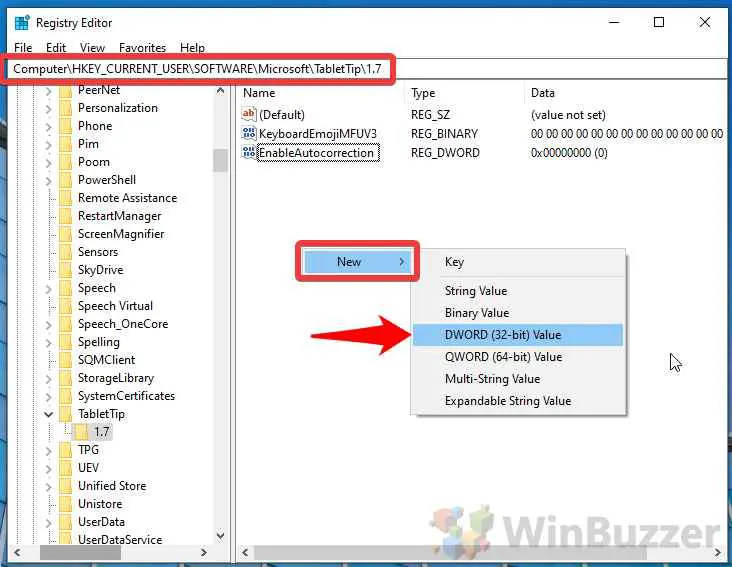
- Restart Word to apply the changes.
Additional Tips for Resolving Spell Check Issues
Check for Updates
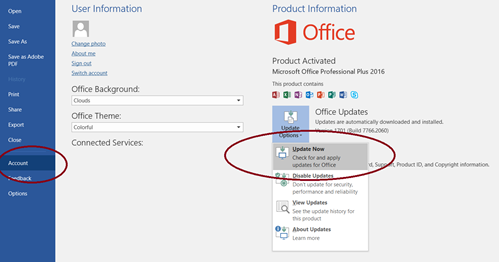
Sometimes, Microsoft releases updates that include fixes for known issues. Go to File > Account > Update Options and select Update Now to ensure you have the latest version of Word.
Restart Your Computer
If none of the above methods work, try restarting your computer. This can resolve temporary glitches that may prevent spell check from working.
Conclusion
Spell check not working in Microsoft Word can be frustrating, but following these steps should help restore the feature. From checking basic settings to advanced troubleshooting, each method can help you address common issues with Word’s spell check functionality. After completing these steps, you should be able to rely on spell check to catch typos and grammatical errors in your documents once again.
