Ways to Hide or Remove Gridlines in Excel

Gridlines in Excel help users visually differentiate between cells, making it easier to organize and read data. However, in some scenarios, such as creating a polished report or professional presentation, you may want to remove these gridlines for a cleaner look. Thankfully, Excel provides simple methods to hide or remove gridlines entirely.
What Are Gridlines in Excel?
Gridlines are the faint horizontal and vertical lines that appear between cells in an Excel worksheet. They serve as visual boundaries but are not part of the cell data or formatting. Gridlines are often confused with borders, which are customizable and visible in printouts, while gridlines are visible only on-screen unless specifically enabled for printing.
Why Remove Gridlines?
There are several reasons why users might want to remove gridlines in Excel:
- Enhanced Presentation: Removing gridlines gives a professional, uncluttered appearance to the worksheet.
- Focus on Data: Without gridlines, viewers focus more on the content instead of the structure.
- Customization: Removing gridlines allows for better integration with custom borders and formatting.
How to Remove Gridlines in Excel
Method 1: Remove Gridlines from the Entire Worksheet

This method hides all gridlines across the worksheet.
- Open Your Excel File
Open the workbook where you want to remove gridlines. - Go to the View Tab
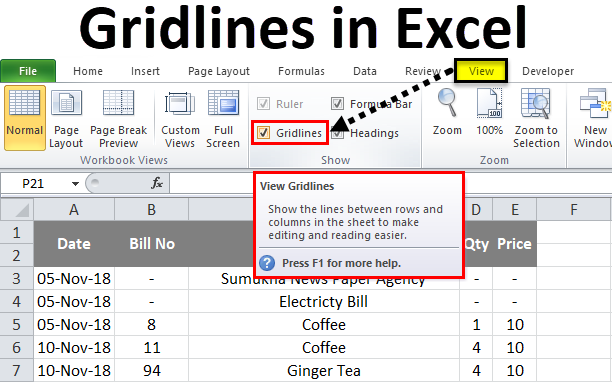
- Click on the View tab in the ribbon at the top of the Excel window.
- Uncheck the Gridlines Option
- Under the Show group, uncheck the Gridlines box.
This action removes gridlines from the entire worksheet.
Method 2: Remove Gridlines by Changing Background Color

If you only want to remove gridlines from specific cells or ranges, use the background color option:
- Select the Desired Cells
Highlight the cells where you want the gridlines to disappear. - Change the Background Color
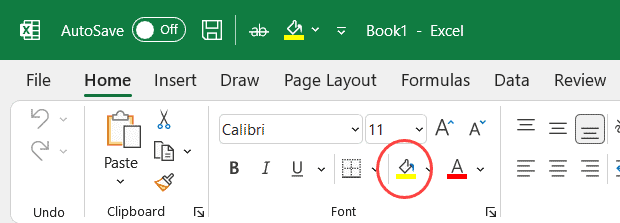
- Go to the Home tab in the ribbon.
- In the Font group, click on the Fill Color icon (a paint bucket).
- Select White or another preferred color as the background.
This method overrides the gridlines with the selected background color.
Method 3: Remove Gridlines from Printouts

To ensure gridlines do not appear in printed documents:
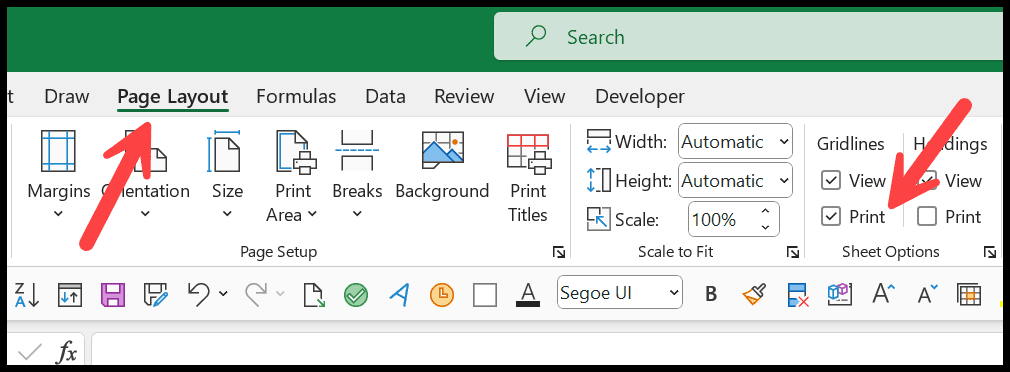
- Go to the Page Layout Tab
- Click on the Page Layout tab in the ribbon.
- Uncheck the Print Option for Gridlines
- In the Sheet Options group, uncheck the Print box under Gridlines.
This prevents gridlines from appearing when you print the worksheet.
Method 4: Remove Gridlines Using VBA (Advanced)

For advanced users, VBA can remove gridlines automatically:
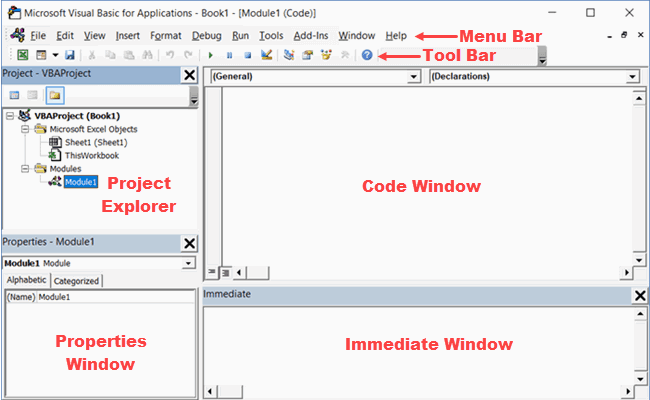
- Open the VBA Editor
- Press Alt + F11 to open the VBA editor.
- Insert a New Module
- Go to Insert > Module.
- Enter the VBA Code
Copy and paste the following code into the module: - Run the Code
- Press F5 or click Run to execute the code.
This method hides gridlines for the active worksheet.
How to Re-enable Gridlines
If you want to bring back the gridlines, simply reverse the methods:
- For Method 1: Recheck the Gridlines box in the View tab.
- For Method 2: Remove any background color formatting.
- For Method 3: Recheck the Print option under Sheet Options in the Page Layout tab.
Benefits of Customizing Gridlines
- Clear Presentation: Adjusting gridlines improves the visual appeal of reports and dashboards.
- Better Printing Control: Choosing when to include gridlines in printouts makes your work look more polished.
- Focus on Key Areas: Removing gridlines allows specific sections to stand out using borders or color.
Conclusion
Removing gridlines in Excel is a straightforward process that can significantly enhance the visual appeal of your worksheets. Whether you’re preparing a report or creating a dashboard, the ability to customize gridline visibility ensures your data remains the center of attention. Experiment with the methods outlined above to see what works best for your needs!
