How to Remove a Page in Word | Guide for Word on Mac
Whether you’re using Word on Windows or Mac, deleting a page is a straightforward task once you understand the process. Unwanted pages can appear due to formatting issues, paragraph breaks, or manual page breaks. Let’s go through the steps to delete a page in Word effectively.
How to Delete a Page in Word on Windows
Follow these methods to delete a page on Word for Windows. We’ll cover steps for both blank pages and content-filled pages.
Method 1: Delete a Blank Page
- Enable Paragraph Marks:
- Open your document in Word.
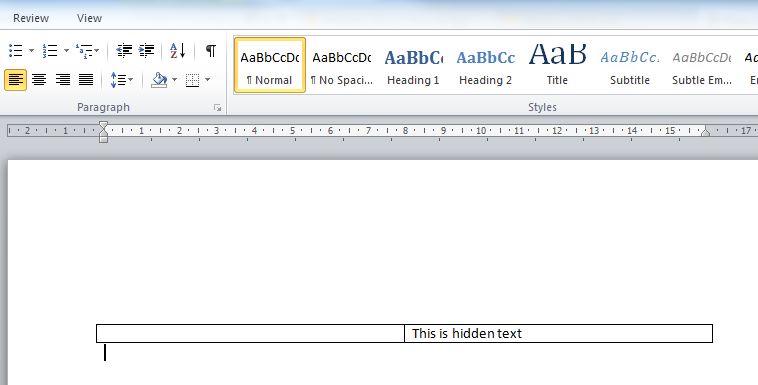
- Click the Home tab, then select Show/Hide Paragraph Marks (¶ symbol) in the toolbar. This option displays hidden formatting symbols, allowing you to see what’s creating the blank page.
- Select and Delete:
- Locate the paragraph marks on the blank page you wish to delete.
- Highlight the marks (or simply click on them) and press Delete or Backspace on your keyboard until the page is removed.
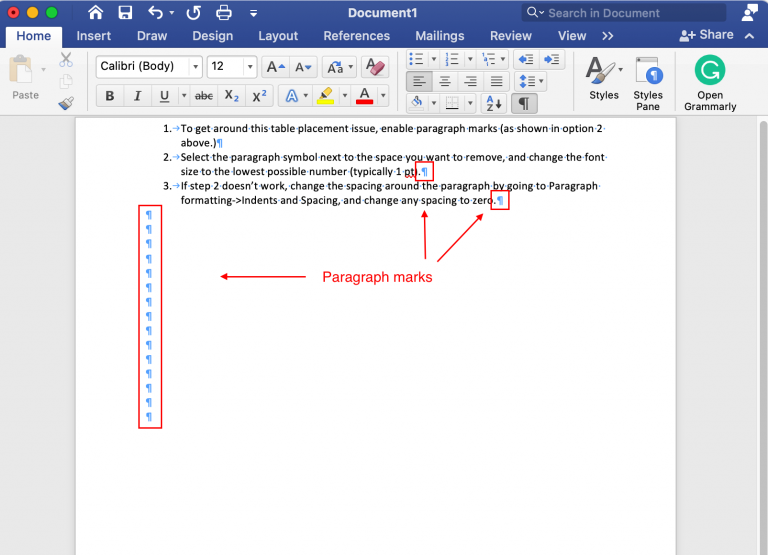
Tip: This method is useful for removing blank pages caused by extra paragraph marks or hidden formatting.
Method 2: Use the Navigation Pane to Locate and Delete a Page
- Open the Navigation Pane:
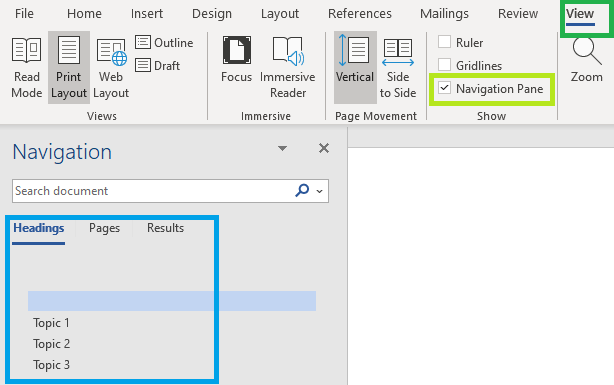
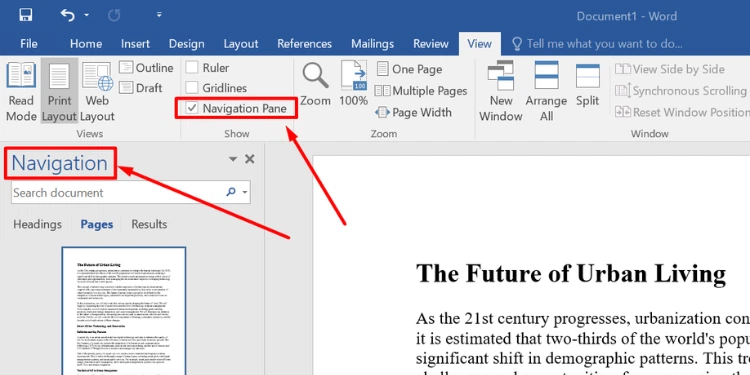
- Go to the View tab and check the Navigation Pane option. A pane will appear on the left side of the screen.
- Go to the View tab and check the Navigation Pane option. A pane will appear on the left side of the screen.
- Select the Page:
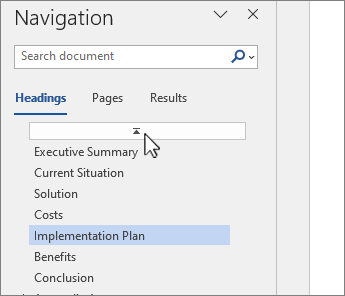
- Click on Pages in the Navigation Pane. This will show you a thumbnail view of all the pages in your document.
- Click on Pages in the Navigation Pane. This will show you a thumbnail view of all the pages in your document.
- Delete the Page:
- Scroll through the thumbnails to find the page you want to delete.
- Click on the thumbnail of the page, then press Delete on your keyboard.
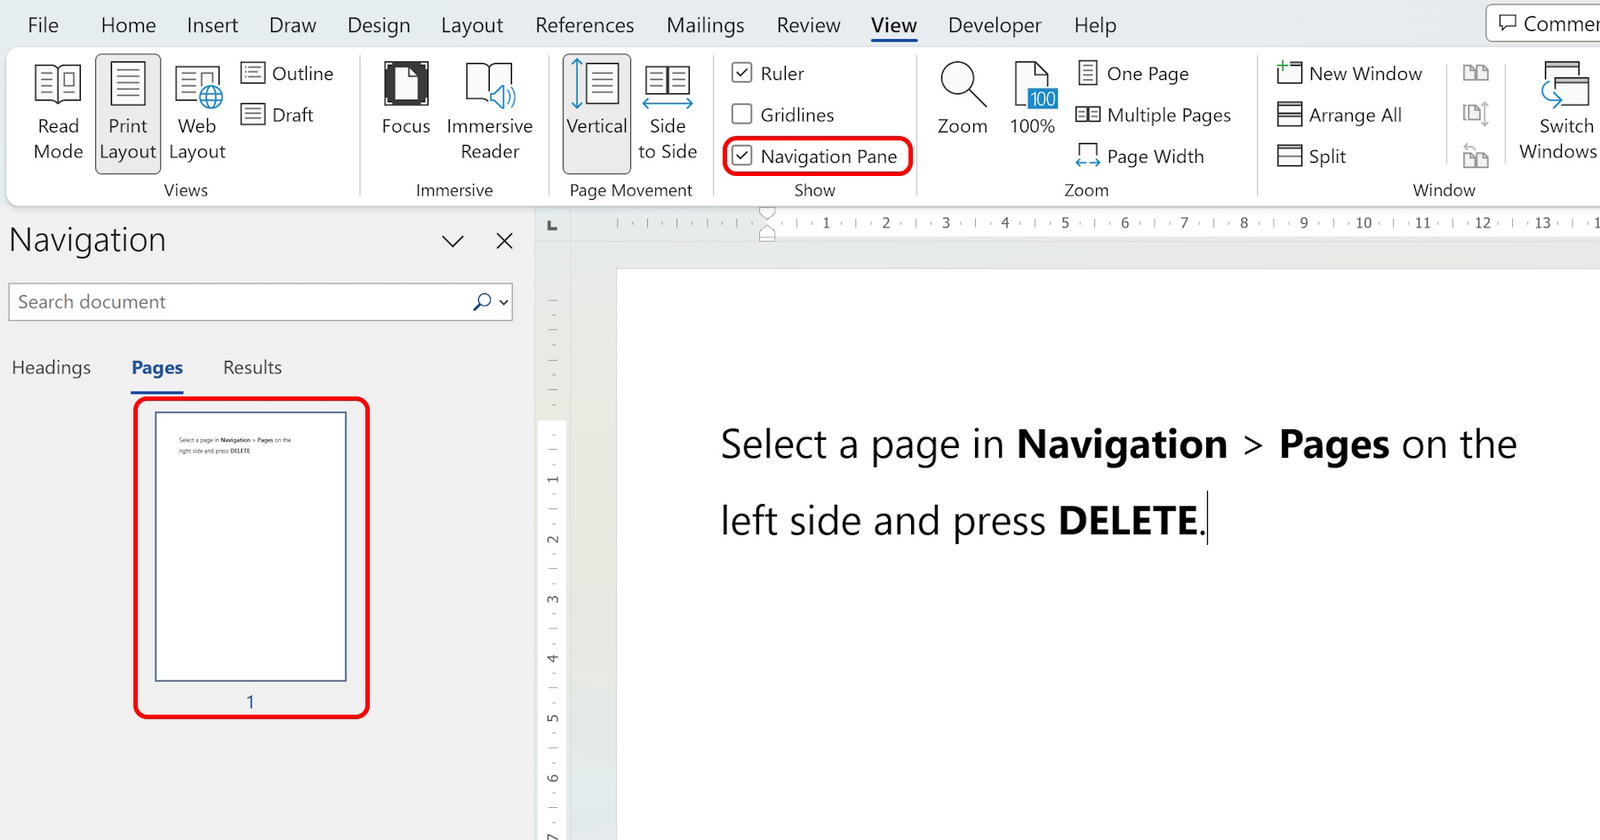
Tip: This is a great way to delete pages with text or images without accidentally removing content on nearby pages.
Method 3: Delete Using Go To Function
- Open the Go To Dialog:
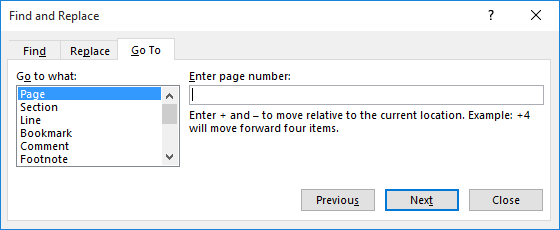
- Press Ctrl + G (or F5) on your keyboard to open the Go To dialog box.
- Press Ctrl + G (or F5) on your keyboard to open the Go To dialog box.
- Enter Page Number:
- Type
\pagein the Enter page number field and hit Enter. Word will select the entire page.
- Type
- Delete the Page:
- Press Close on the dialog box, then press Delete on your keyboard.
- Press Close on the dialog box, then press Delete on your keyboard.
Note: This method helps when you have a specific page number you want to delete without affecting the surrounding pages.
How to Delete a Page in Word on Mac
Deleting a page in Word on Mac follows similar steps to Windows but with some minor differences in keyboard shortcuts and menu navigation. Let’s go through the steps:
Method 1: Delete a Blank Page Using Paragraph Marks
- Show Paragraph Marks:
- Open your document and go to the Home tab.
- Select the Show/Hide Paragraph Marks (¶ symbol) option to reveal hidden formatting symbols.
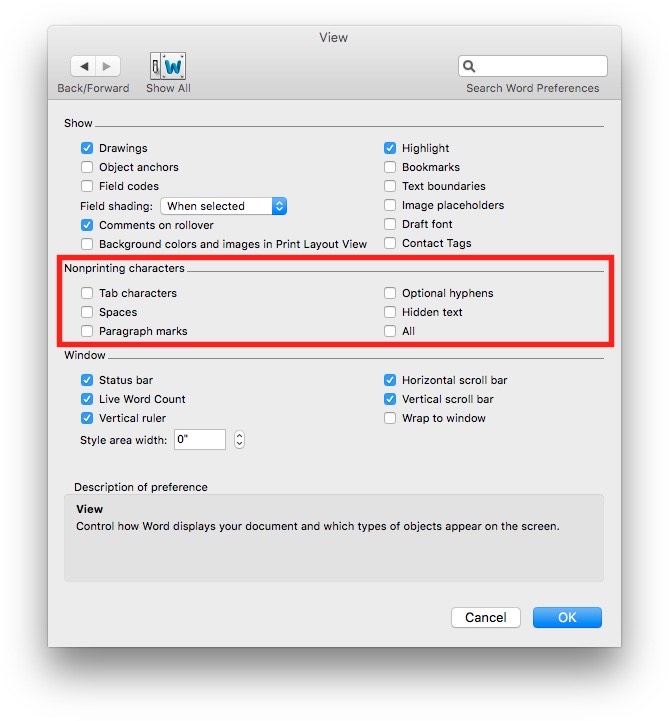
- Highlight and Delete:
- Locate the paragraph marks on the blank page.
- Highlight them and press Delete on your keyboard to remove the blank page.
Tip: This is useful for removing extra spaces or formatting errors that cause blank pages.
Method 2: Using the Navigation Pane
- Enable the Navigation Pane:
- Go to the View tab and check Navigation Pane.

- Go to the View tab and check Navigation Pane.
- Find and Delete:
- In the Navigation Pane, select Pages to view the document’s thumbnails.
- Click on the thumbnail of the page you want to delete, then press Delete on your keyboard.
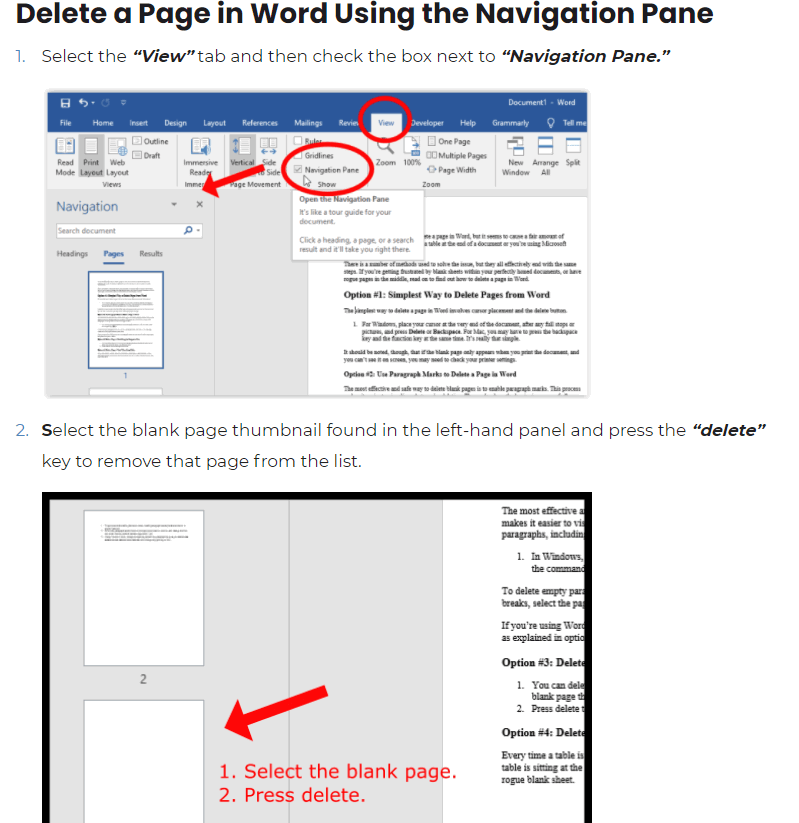
Tip: The Navigation Pane provides a quick overview, making it easier to find and delete unwanted pages.
Method 3: Delete Using Go To Function on Mac
- Open Go To:
- Press Command + Option + G to open the Go To dialog box.
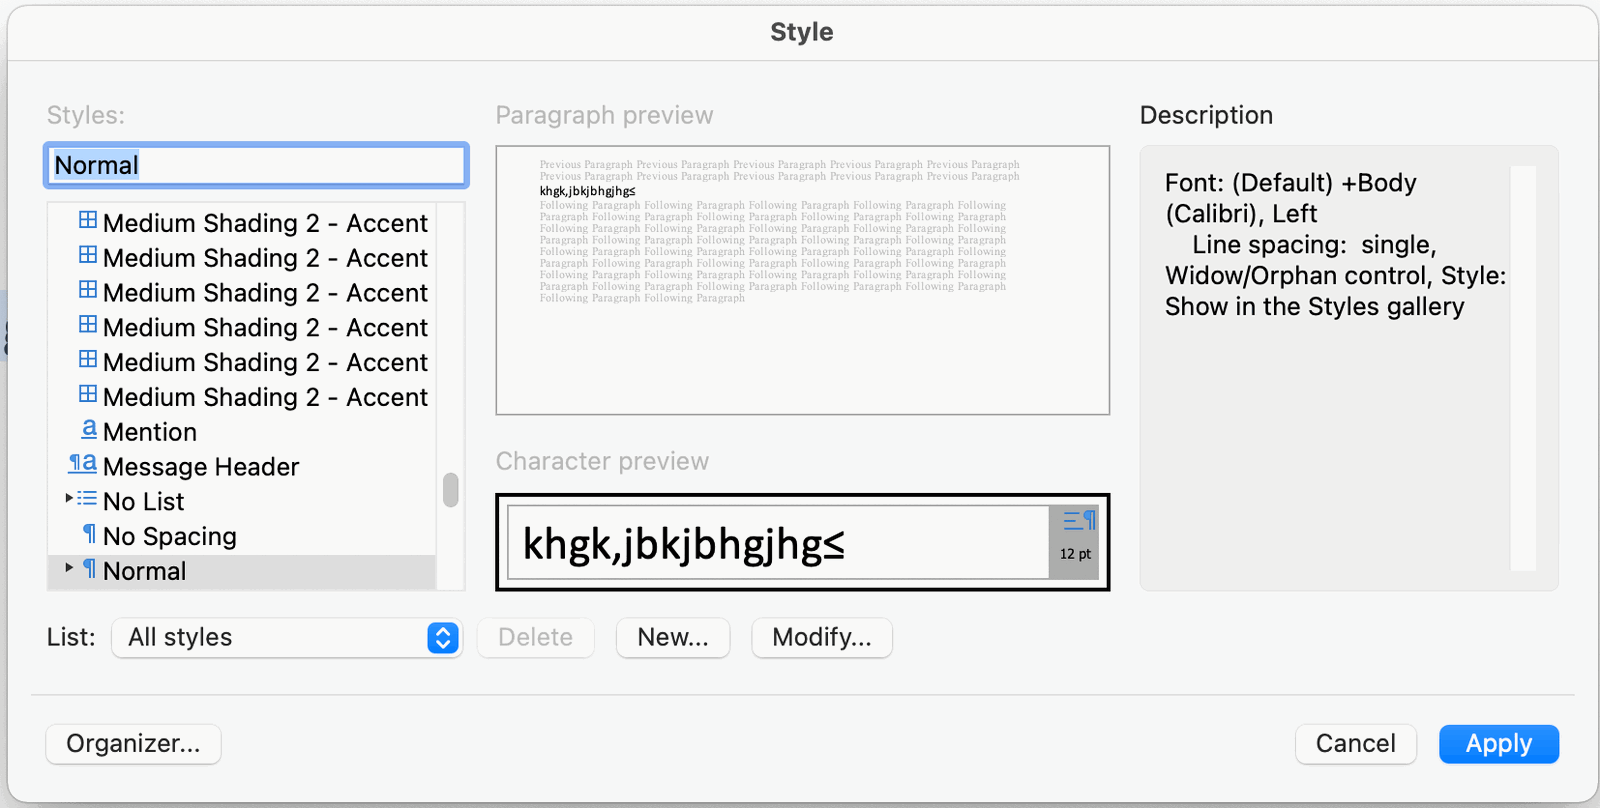
- Press Command + Option + G to open the Go To dialog box.
- Enter Page:
- Type
\pagein the field and hit Enter. Word will highlight the entire page.
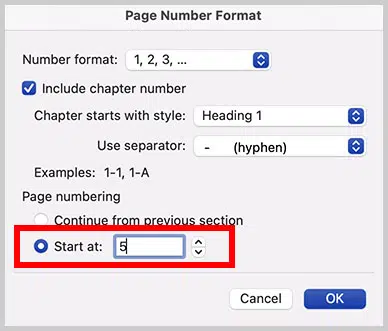
- Type
- Delete the Page:
- Close the dialog and press Delete to remove the highlighted page.
Note: This method is especially helpful for long documents where you know the specific page number you want to delete.
Tips for Troubleshooting Stubborn Blank Pages
Sometimes, deleting a page can be challenging, especially when dealing with blank pages at the end of a document. Here are some troubleshooting tips:
1. Remove Manual Page Breaks
- Open Paragraph Marks to view hidden formatting.
- Look for Page Break indicators on the blank page.
- Highlight and delete these breaks to remove the page.
2. Adjust Section Breaks
- Section breaks can sometimes add extra pages, especially at the end of a document.
- Open Paragraph Marks and look for Section Break.
- Highlight and delete any unwanted section breaks.
3. Adjust Page Layout and Margins
Sometimes the page layout or margin settings can add an extra page.
- Go to Layout > Margins and check for any unusual settings that may be adding blank space.
- Adjust the margins if necessary to prevent additional pages from being created.
Frequently Asked Questions
Q: Why does Word add a blank page at the end of my document?
Word often adds a blank page at the end of a document due to extra paragraph or section breaks. Removing these breaks typically resolves the issue.
Q: Can I delete multiple pages at once?
Yes, by using the Navigation Pane or Go To method, you can select multiple pages and delete them.
Q: How do I delete a page with tables or images?
Pages with tables or images can be deleted by highlighting the entire content and pressing Delete. If that doesn’t work, ensure there are no hidden formatting marks causing the page to remain.
Conclusion
Deleting a page in Microsoft Word, whether on Windows or Mac, is a straightforward process once you know the correct method. By using the Paragraph Marks, Navigation Pane, or Go To function, you can delete both blank and unwanted content pages easily. Whether you’re removing a blank page or a specific content page, these methods will help you keep your document organized and free of unnecessary pages.
