How to Resolve the “Remote Desktop Can not Connect to the Remote Computer” Error
Remote Desktop Connection is a useful feature that allows users to connect to and control another computer over the internet or local network. However, you might encounter the error message “Remote Desktop can’t connect to the remote computer”, which prevents a successful connection. This error can occur due to several reasons such as network issues, firewall settings, or incorrect Remote Desktop configurations.
In this guide, we will walk you through troubleshooting steps to fix this error and get your Remote Desktop working again.
Common Causes of the “Remote Desktop Can’t Connect” Error
Before diving into the solutions, it’s helpful to understand the main reasons for this error:
- Network connectivity issues: The computers involved in the Remote Desktop session must be connected to the same network or internet.
- Incorrect Remote Desktop settings: Settings on either the host or client computer could prevent Remote Desktop from working.
- Firewall or security software: A firewall may block Remote Desktop traffic.
- Remote access not enabled: Remote Desktop access might not be allowed on the target PC.
Solution 1: Check Network Connectivity
Ensure both the client (your computer) and the remote computer are connected to the internet or the same local network.
Steps to Check Network Connectivity:

- Check internet connection: Ensure that both computers are connected to a stable network.
- On both computers, check network connectivity by opening a browser and visiting a website.
- Ping the remote computer: Open Command Prompt (
Windows + R, typecmd, and press Enter) and type:- Replace
<RemoteComputerIP>with the IP address of the remote computer. - If the ping is successful, this means both computers are connected.
- Replace
Solution 2: Verify Remote Desktop is Enabled on the Remote Computer
Ensure that Remote Desktop is enabled on the computer you are trying to connect to.
Steps to Enable Remote Desktop:
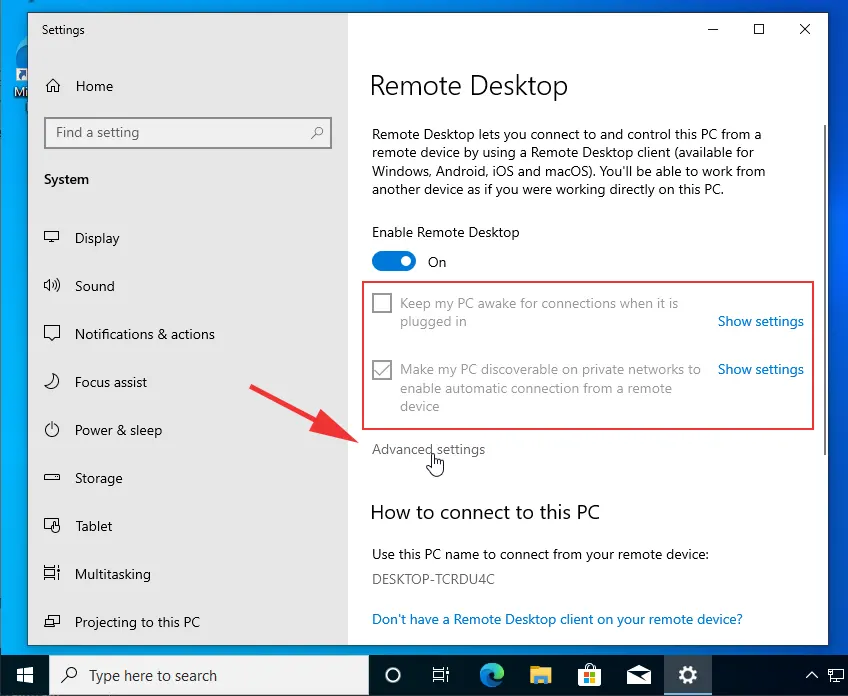
- On the remote computer, press
Windows + Ito open Settings. - Navigate to System > Remote Desktop.
- Toggle the switch under Enable Remote Desktop to On.
- Ensure that Network Level Authentication (NLA) is checked for added security.
- Click Confirm when prompted and close the window.
Solution 3: Check Windows Firewall Settings
The Windows Firewall might be blocking Remote Desktop connections.
Steps to Allow Remote Desktop Through Firewall:
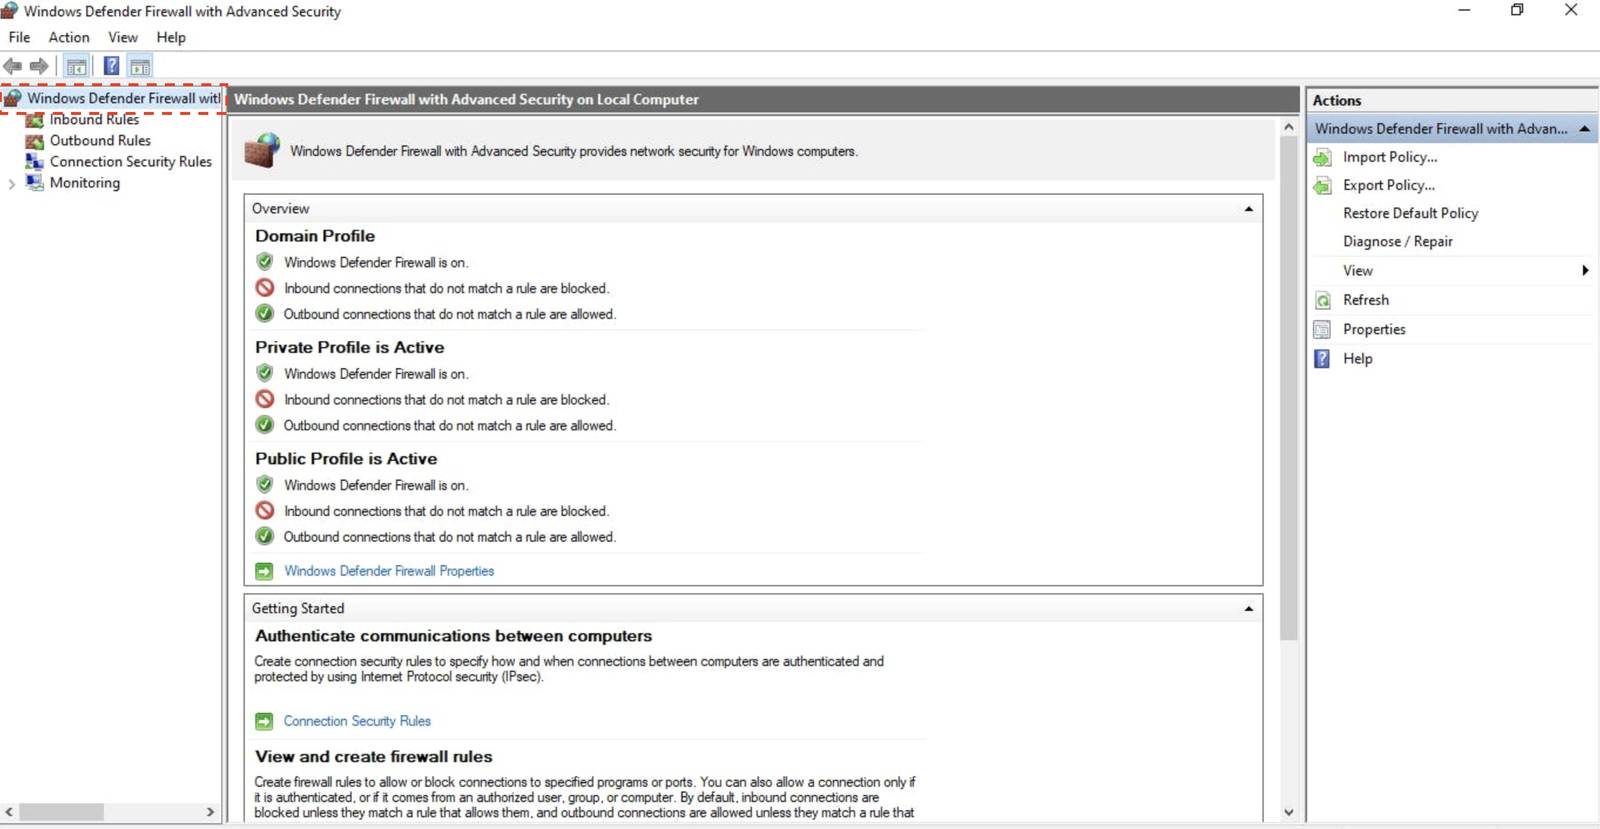
- On the remote computer, open the Control Panel and go to System and Security > Windows Defender Firewall.
- Click Allow an app or feature through Windows Defender Firewall on the left-hand menu.
- Scroll down and make sure Remote Desktop is checked for both Private and Public networks.
- Click OK to apply the changes.
Solution 4: Use the Correct IP Address or Hostname
Ensure that you are using the correct IP address or hostname of the remote computer when connecting.
Steps to Find the Remote Computer’s IP Address:
- On the remote computer, press
Windows + R, typecmd, and press Enter to open Command Prompt. - In Command Prompt, type:
- Look for the IPv4 address under the network adapter being used (Ethernet or Wi-Fi).
- Use this IP address to connect through Remote Desktop.
Solution 5: Restart the Remote Desktop Services
Sometimes, simply restarting the Remote Desktop Services can resolve the issue.
Steps to Restart Remote Desktop Services:
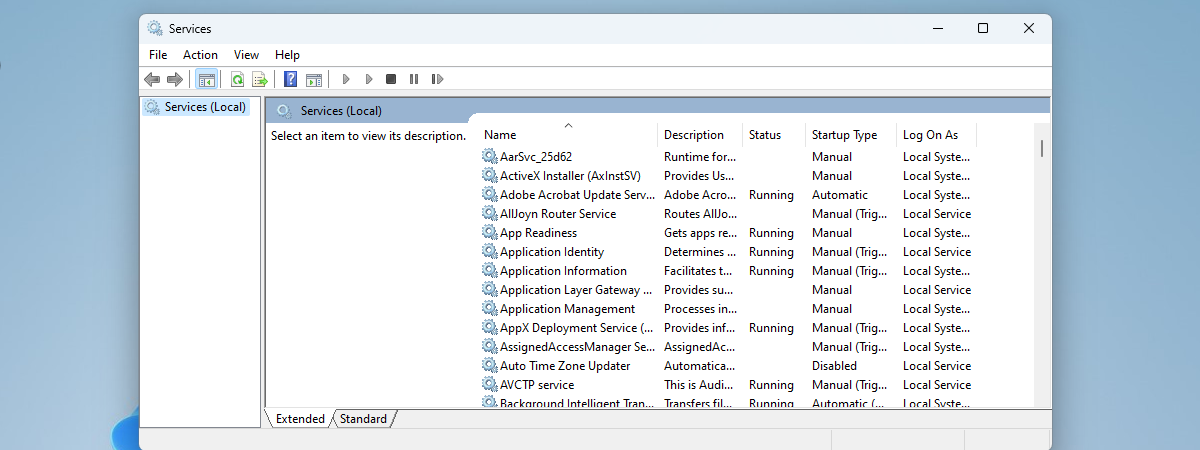
- On the remote computer, press
Windows + R, typeservices.msc, and press Enter. - In the Services window, scroll down to find Remote Desktop Services.
- Right-click Remote Desktop Services and select Restart.
- After the service restarts, try reconnecting.
Solution 6: Change DNS Settings
Sometimes, incorrect DNS settings can block Remote Desktop connections.
Steps to Change DNS Settings:
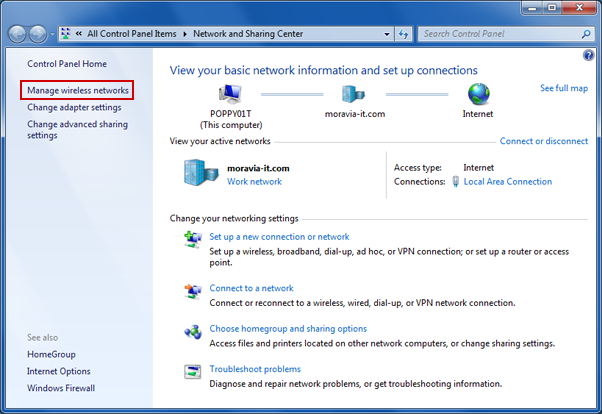
- Press
Windows + Ito open Settings and navigate to Network & Internet > Ethernet/Wi-Fi. - Scroll down and click Change adapter options.
- Right-click your active network and select Properties.
- Double-click Internet Protocol Version 4 (TCP/IPv4).
- Choose Use the following DNS server addresses and enter:
- Click OK and restart your computer.
Solution 7: Update Windows and Remote Desktop Client
Sometimes, the issue can be due to outdated Windows or Remote Desktop clients.
Steps to Update Windows:
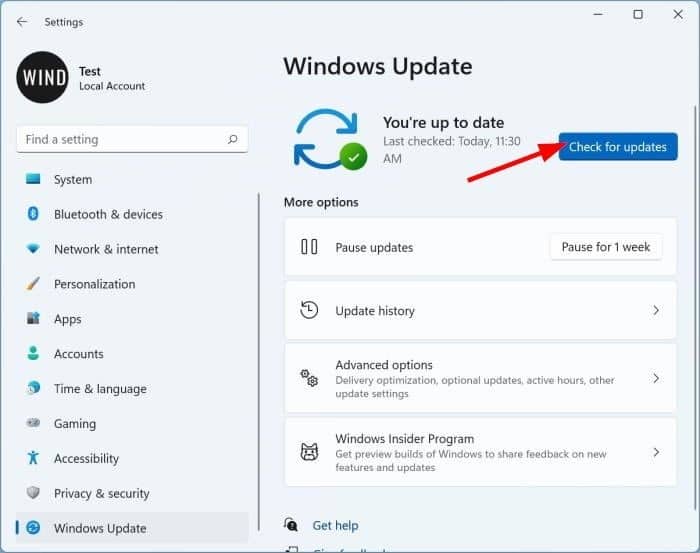
- Press
Windows + Ito open Settings. - Navigate to Update & Security > Windows Update.
- Click Check for updates and install any available updates.
- After updating, restart your computer and try reconnecting via Remote Desktop.
Conclusion
The “Remote Desktop can’t connect to the remote computer” error can be frustrating, but by following the steps outlined in this guide, you should be able to troubleshoot and resolve the issue. Whether it’s a network issue, a firewall setting, or incorrect Remote Desktop configurations, these solutions will help you restore a smooth Remote Desktop connection.
If the error persists, you may want to check for any security software that could be blocking connections or contact your network administrator for further assistance.
