How to Print in Black and White from Word (Step-by-Step Guide with Images)
Printing documents in black and white on Microsoft Word is a straightforward way to save on color ink and focus on text clarity. Follow this guide to print in black and white, whether you’re using a color printer or a black-and-white printer, and learn how to adjust settings within Microsoft Word and your printer.
Step 1: Open Your Document in Microsoft Word

First, open the document you want to print in black and white.
- Open Microsoft Word: Locate and open Microsoft Word from your applications.
- Open Your Document: Select File > Open, navigate to your document, and open it.
Step 2: Access the Print Settings
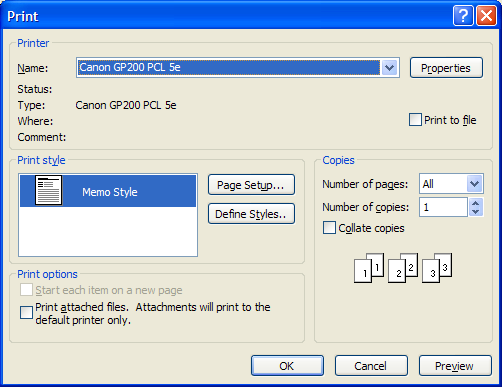
Once your document is open, you need to access the print settings.
- Go to Print: Click File in the top menu, then choose Print. Alternatively, you can press Ctrl + P to open the print options quickly.
This brings up the print settings, where you’ll adjust the settings to ensure the document prints in black and white.
Step 3: Choose Your Printer and Open Printer Properties
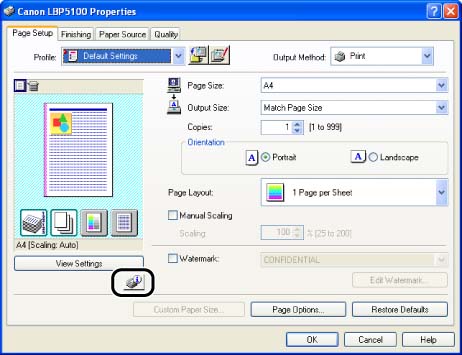
If you’re using a color printer, you’ll need to modify the printer properties to print only in black and white.
- Select Printer: In the Printer drop-down menu, choose the printer you want to use.
- Open Printer Properties: Click on Printer Properties or Preferences (depending on your printer model) to customize print settings.
Step 4: Set Printing to Black and White
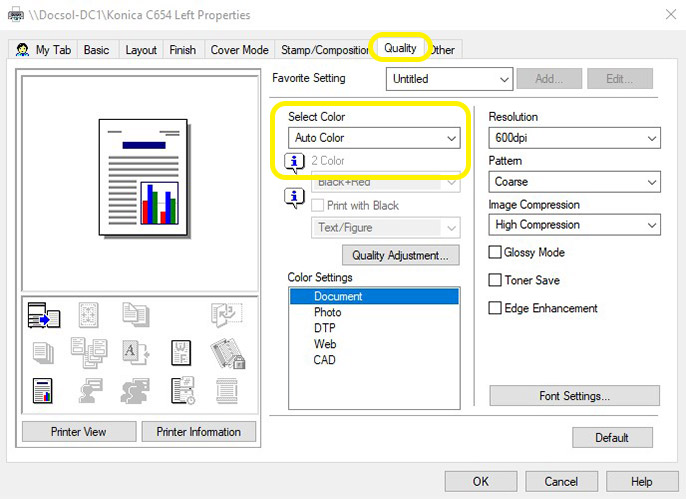
In the printer properties, look for the setting to print in grayscale or black and white.
- Find Color Settings: In the printer properties, look for an option labeled Color or Print Quality.
- Select Black and White or Grayscale: Change the setting to Black and White or Grayscale. This option might appear as a checkbox or a drop-down menu.
- Save Settings: Click OK to save the black-and-white printing preference.
Note: The exact location of this setting can vary based on your printer model. You may find it under a specific tab, like Paper/Quality or Advanced settings.
Step 5: Adjust Word Print Settings (Optional)
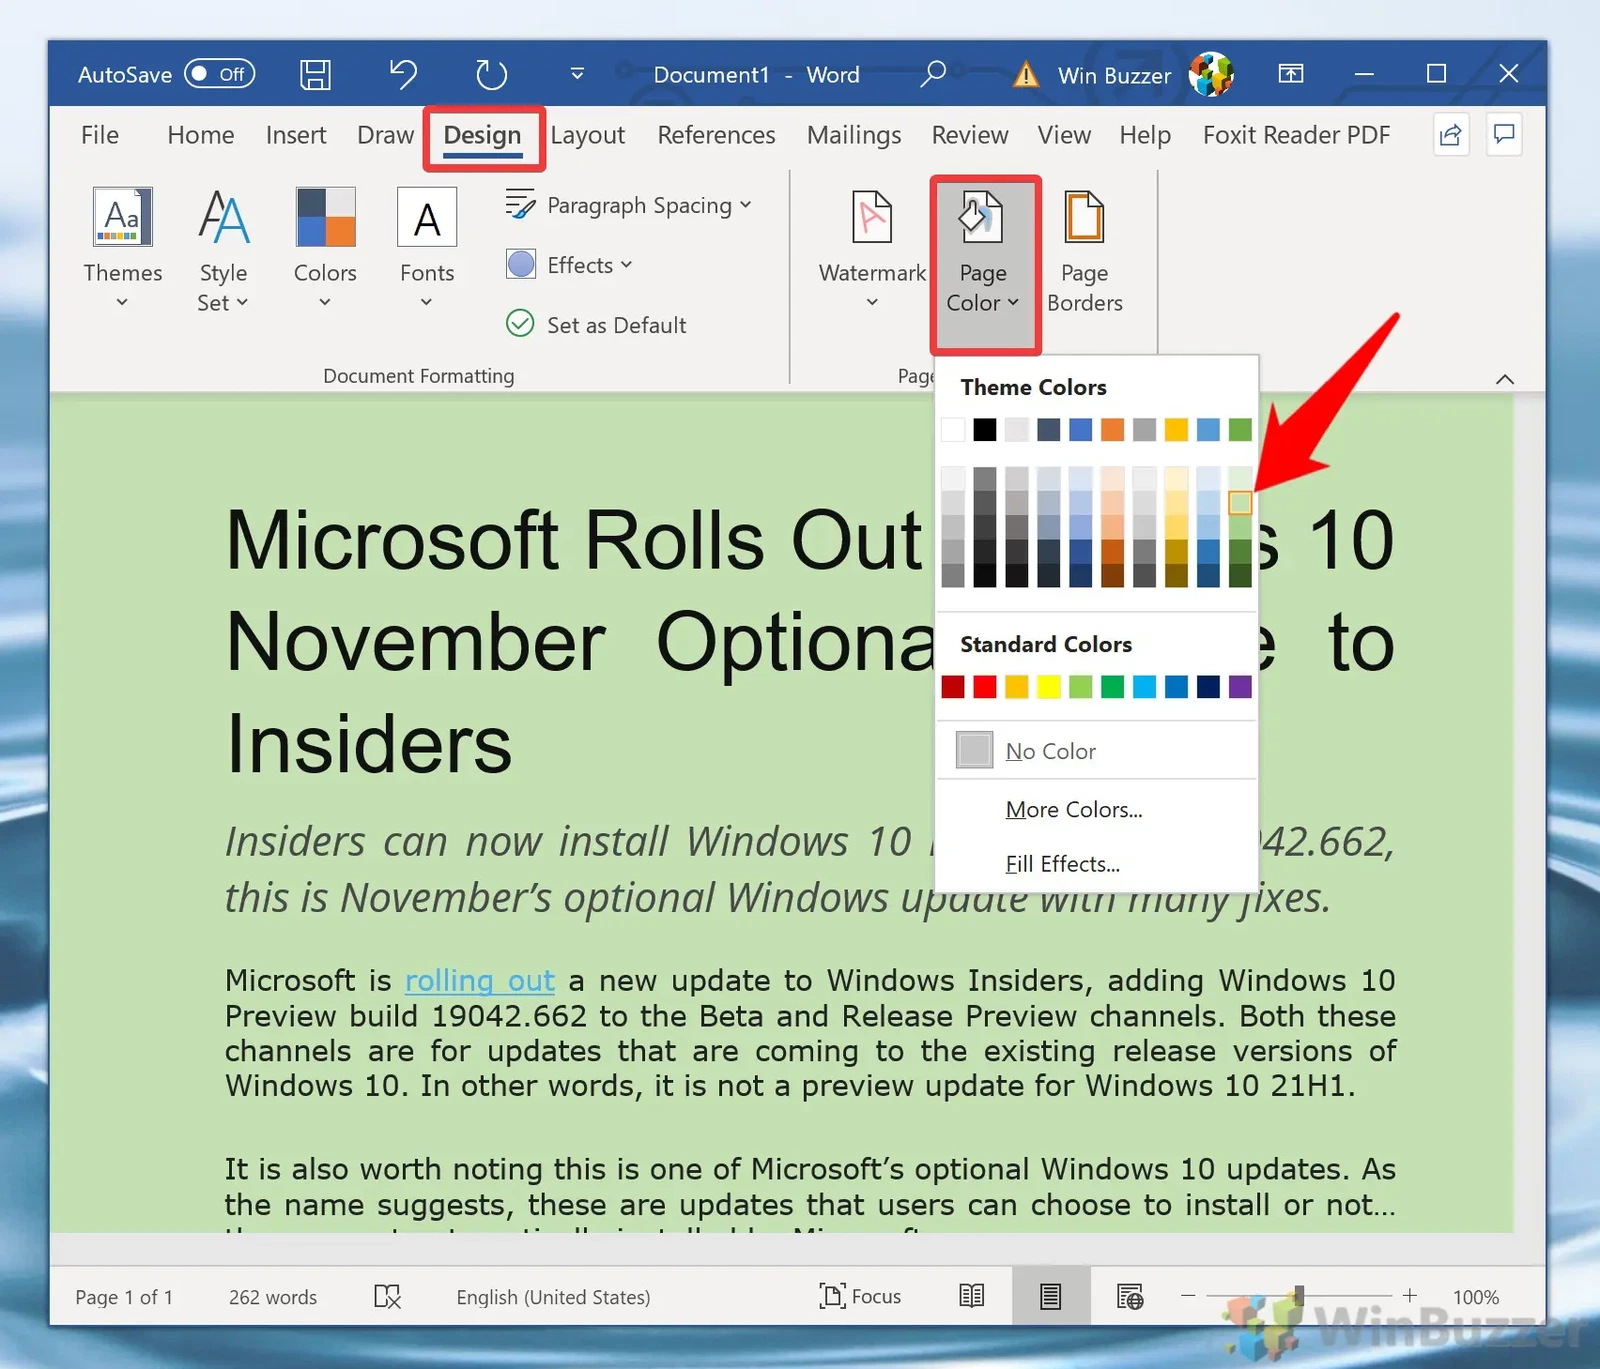
If your document contains colored elements that you want to display differently in black and white, you can make adjustments in Word before printing.
- Select Grayscale Colors: Adjust colored text or images to grayscale within Word by highlighting them, selecting Home > Font Color, and choosing a shade of gray or black.
- Convert Images to Grayscale: Click on an image, go to Format > Color, and select a grayscale option.
This step is optional but helpful if you want to see a preview of how the document will look in black and white before printing.
Step 6: Print Your Document
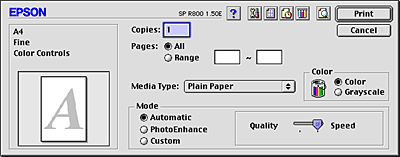
After configuring your settings, you’re ready to print.
- Confirm Print Settings: Make sure Print in Black and White or Grayscale is selected in the printer properties.
- Click Print: Press Print to begin printing your document in black and white.
Troubleshooting Common Issues
If you encounter any issues, here are some common solutions:
- Black-and-White Option Not Showing: Check your printer’s manual or driver settings. Some printers may require additional configuration or may not support grayscale printing.
- Low Print Quality: For text-based documents, use the Best Quality setting to enhance clarity.
- Ink Issues: Verify that your black ink cartridge is sufficiently filled to avoid faint or uneven printing.
By following these steps, you can easily print any Word document in black and white, whether for a professional setting or personal use, ensuring efficient and ink-friendly printing.
