How to Perform a Spelling and Grammar Check in Word
Microsoft Word offers robust tools to help you create error-free documents by checking for spelling and grammar mistakes. These features are essential for ensuring professionalism and clarity in your writing. This guide will show you how to use Word’s spelling and grammar tools effectively.
Step 1: Enable Spelling and Grammar Check

Before using the tools, ensure the spelling and grammar check is enabled in Word.
Steps to Enable:
- Open Word:
- Launch Microsoft Word on your computer.
- Go to Options:
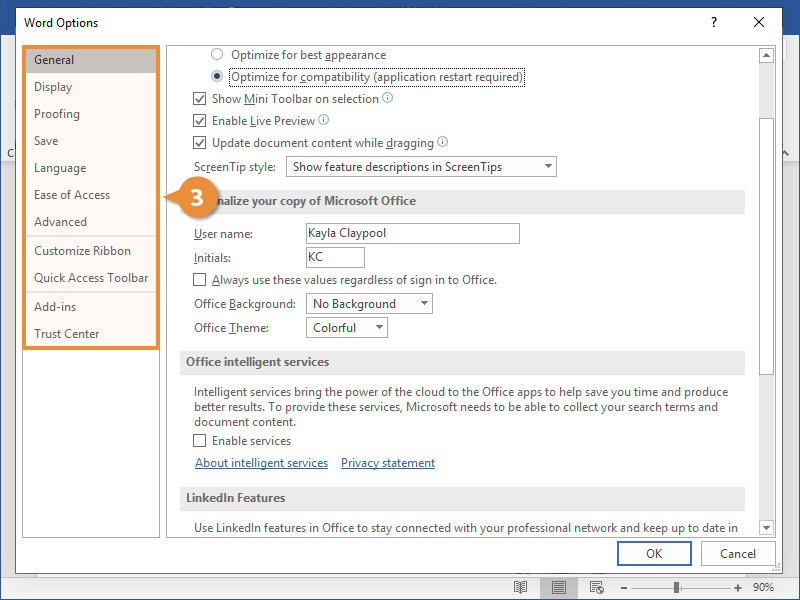
- Click File > Options.
- Access Proofing Settings:
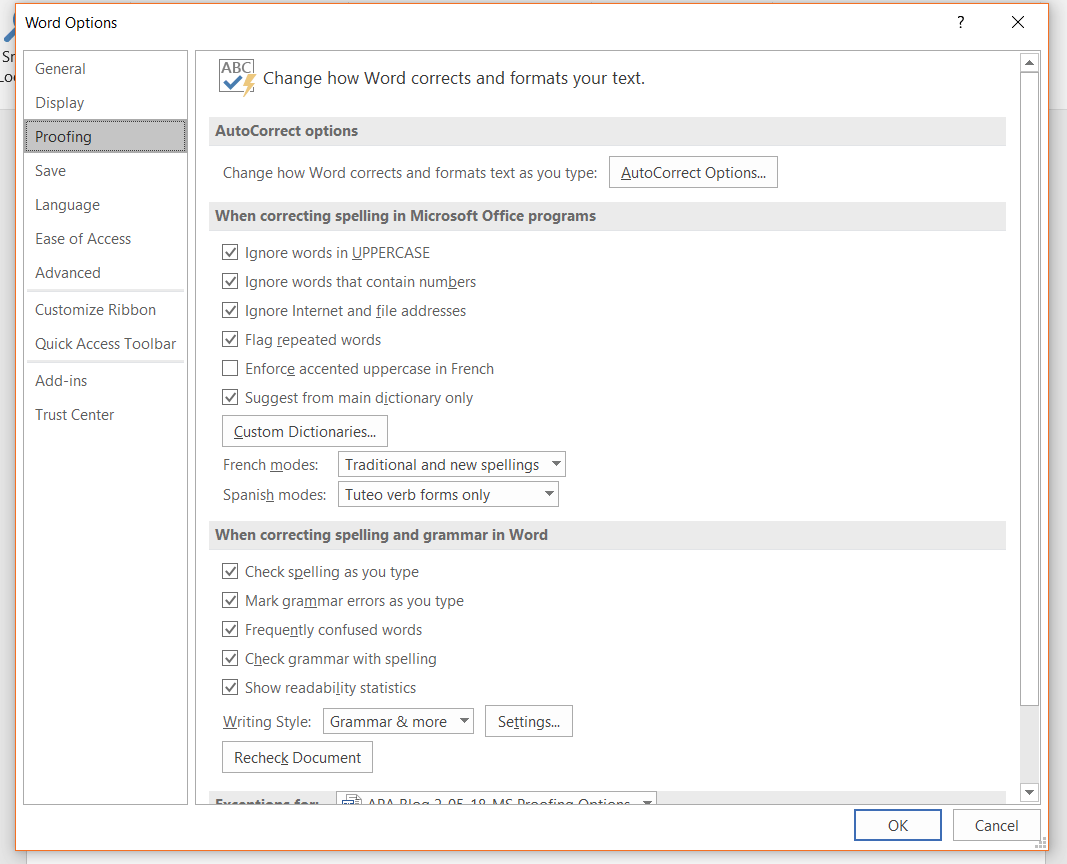
- In the Word Options window, select Proofing from the sidebar.
- Enable the Features:
- Check the following boxes:
- Check spelling as you type
- Mark grammar errors as you type
- Check the following boxes:
- Save the Settings:
- Click OK to save your changes.
Step 2: Use the Spelling and Grammar Check Tool

Word provides an integrated tool for checking your entire document at once.
Steps to Use the Tool:
- Open the Document:
- Open the Word document you want to review.
- Access the Review Tab:
- Click on the Review tab in the ribbon at the top of the screen.
- Start the Check:
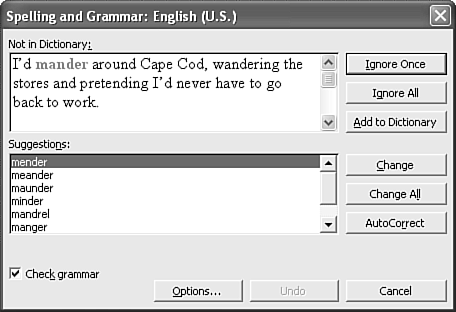
- Select Spelling & Grammar from the Proofing group.
- Review Suggestions:
- Word will highlight errors one by one and provide suggestions.
- To accept a suggestion, click Change. To ignore, click Ignore Once or Ignore All.
- Finish the Check:
- Once Word has reviewed the document, you’ll see a message indicating the check is complete.
Step 3: Check Spelling and Grammar as You Type
By default, Word checks spelling and grammar as you type, underlining potential issues.
What the Underlines Mean:
- Red Underline: Spelling error.
- Blue or Green Underline: Grammar or style issue.
Correct Errors as You Type:
- Right-Click the Underlined Text:
- Right-click on the word or phrase that is underlined.
- Select a Correction:
- Choose from the list of suggestions provided by Word.
Tip: For words that are spelled correctly but flagged as errors (e.g., names), select Add to Dictionary to avoid future alerts.
Step 4: Use the Editor for Advanced Suggestions

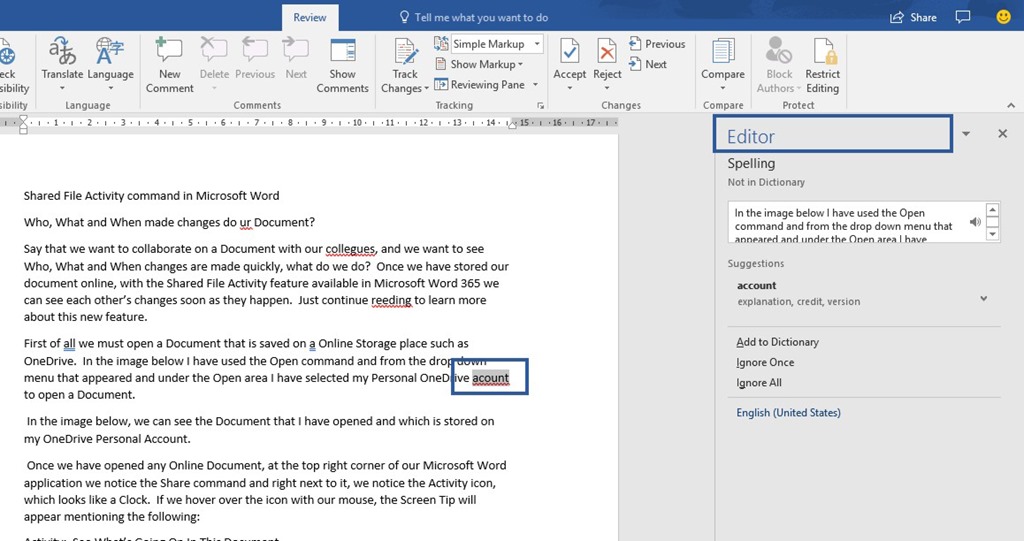
In the latest versions of Word, the Editor feature provides additional writing suggestions.
Steps to Access the Editor:
- Open the Editor:
- Go to the Review tab and click on Editor.
- Review the Insights:
- The Editor will categorize issues under sections like Spelling, Grammar, and Refinements.
- Accept or Dismiss Suggestions:
- Click on each issue to view suggestions, and decide whether to accept or dismiss them.
Step 5: Customize Proofing Settings

If the default settings don’t suit your needs, you can customize how Word handles spelling and grammar.
Steps to Customize:
- Go to Proofing Options:
- Click File > Options > Proofing.
- Choose Specific Checks:
- Select or deselect options like Ignore words in UPPERCASE or Check grammar with spelling.
- Change Writing Style:
- Under Writing Style, choose between Grammar & Refinements or Grammar Only.
Illustration
Here’s an image demonstrating the Spelling & Grammar tool in Word:
This image shows the Spelling and Grammar check interface, with suggestions displayed for review.
Troubleshooting Common Issues
If the spelling and grammar tools don’t work as expected, try the following:
- Restart Word: Close and reopen the app to refresh its settings.
- Check Language Settings: Ensure the correct language is selected under Review > Language > Set Proofing Language.
- Update Office: Install the latest updates to ensure compatibility.
Conclusion
The spelling and grammar tools in Microsoft Word are powerful features that help you produce polished, error-free documents. Whether you use them as you type or review the entire document at once, these tools are simple to use and highly effective.
