How to Turn Off Hardware Acceleration in Windows 10
Hardware acceleration is a feature that offloads tasks to your GPU to enhance performance for specific applications and processes. While this can be helpful, it may cause compatibility issues or glitches on some systems. If you’re experiencing problems, you can disable hardware acceleration in Windows 10. Here’s a detailed guide to do so.
Step 1: Check If Your System Supports Disabling Hardware Acceleration
Before proceeding, ensure your system allows you to disable hardware acceleration. Some applications or systems may restrict this option.
Step 2: Disable Hardware Acceleration via Display Settings
- Open Display Settings:
- Right-click on the desktop and select Display settings.
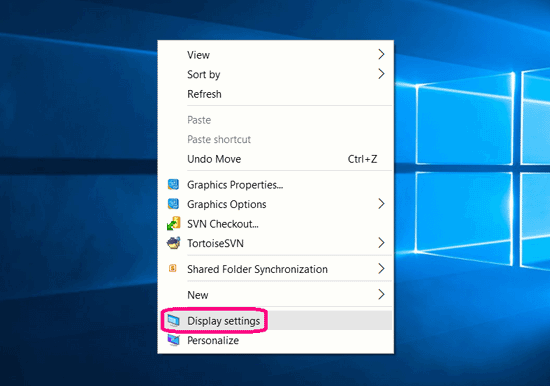
- Right-click on the desktop and select Display settings.
- Navigate to Advanced Graphics Settings:
- Scroll down and click on Advanced display settings.
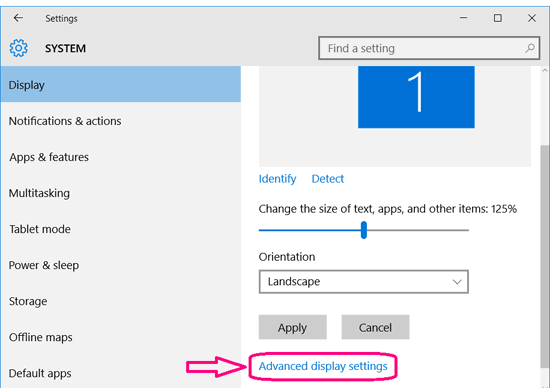
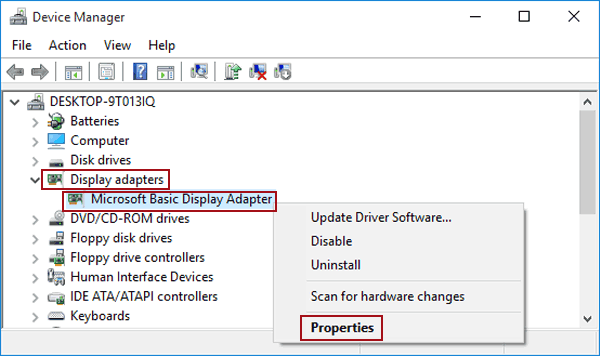
- From there, click Display adapter properties for Display 1.
- Scroll down and click on Advanced display settings.
- Adjust Hardware Acceleration:
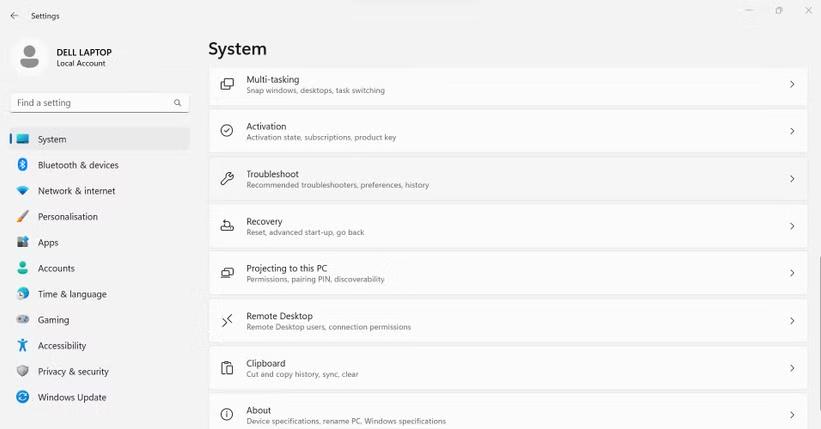
- In the new window, go to the Troubleshoot tab.
- Click Change settings (if available).
- Move the slider to None to disable hardware acceleration.

- Save Changes:
- Click OK to apply the changes.
Step 3: Disable Hardware Acceleration in Specific Applications
Some applications, such as browsers or media players, allow you to disable hardware acceleration individually.
Google Chrome
- Open Chrome Settings:
- Click the three dots in the top-right corner, then select Settings.
- Access Advanced Settings:
- Scroll down and click Advanced to expand more options.
- Disable Hardware Acceleration:
- Under System, toggle off Use hardware acceleration when available.
- Restart Chrome to apply changes.
Microsoft Edge
- Open Edge Settings:
- Click the three dots in the top-right corner, then select Settings.
- Disable Hardware Acceleration:
- Navigate to System and performance.
- Toggle off Use hardware acceleration when available.
- Restart Edge to apply changes.
Step 4: Disable Hardware Acceleration in Registry Editor
If the above methods do not work, you can disable hardware acceleration via the Registry Editor.
Warning
Editing the registry can cause serious problems if done incorrectly. Proceed with caution and back up your registry first.
- Open Registry Editor:
- Press Windows + R, type
regedit, and press Enter.
- Press Windows + R, type
- Navigate to Graphics Drivers:
- Go to the following path:
- Create or Edit a Key:
- Right-click on the right pane and select New > DWORD (32-bit) Value.
- Name the key
DisableHWAcceleration. - Double-click the key and set its value to 1.
- Restart Your Computer:
- Reboot to apply the changes.
Step 5: Update Graphics Drivers (Optional)
If you disable hardware acceleration to fix an issue, updating your graphics drivers may also help resolve the problem.
- Open Device Manager:
- Press Windows + X and select Device Manager.
- Update the Driver:
- Expand Display adapters.
- Right-click your GPU driver (e.g., NVIDIA, AMD, or Intel) and select Update driver.
- Choose Search automatically for drivers to let Windows find and install updates.
- Restart Your Computer:
- Apply the changes and check for improvements.
Step 6: Test the Changes
After disabling hardware acceleration, test your system or application for improvements. If the issue persists, consider enabling the feature again or trying alternative fixes.
Conclusion
Disabling hardware acceleration in Windows 10 can resolve performance issues and compatibility glitches. Follow the steps above carefully and always back up your system before making major changes. If you still encounter problems, you may need to consult with a professional or contact your hardware manufacturer.
