How to Resolve the “No Results Found” Issue in Windows Search
Encountering the “No Results Found” error in Windows Search can be frustrating, especially when you rely on the search functionality for quick access to files and applications. This error is common in Windows 10 and 11, but fortunately, it can be resolved with a few simple steps. In this guide, we’ll cover multiple methods to fix the issue and get your search function back to normal.
1. Restart Windows Search Service
Sometimes, the issue is caused by the Windows Search service malfunctioning. A simple restart can solve this problem.
Steps to Restart the Search Service:
- Press
Ctrl + Shift + Escto open the Task Manager. - Navigate to the Services tab.
- Scroll down to find WSearch (Windows Search Service).
- Right-click on it and select Restart.
If restarting the service resolves the issue, you should be able to search for files and apps again without any problems.
2. Rebuild the Search Index

Sometimes the search index becomes corrupted, leading to the “No Results Found” error. Rebuilding the index can fix this.
Steps to Rebuild the Search Index:
- Press
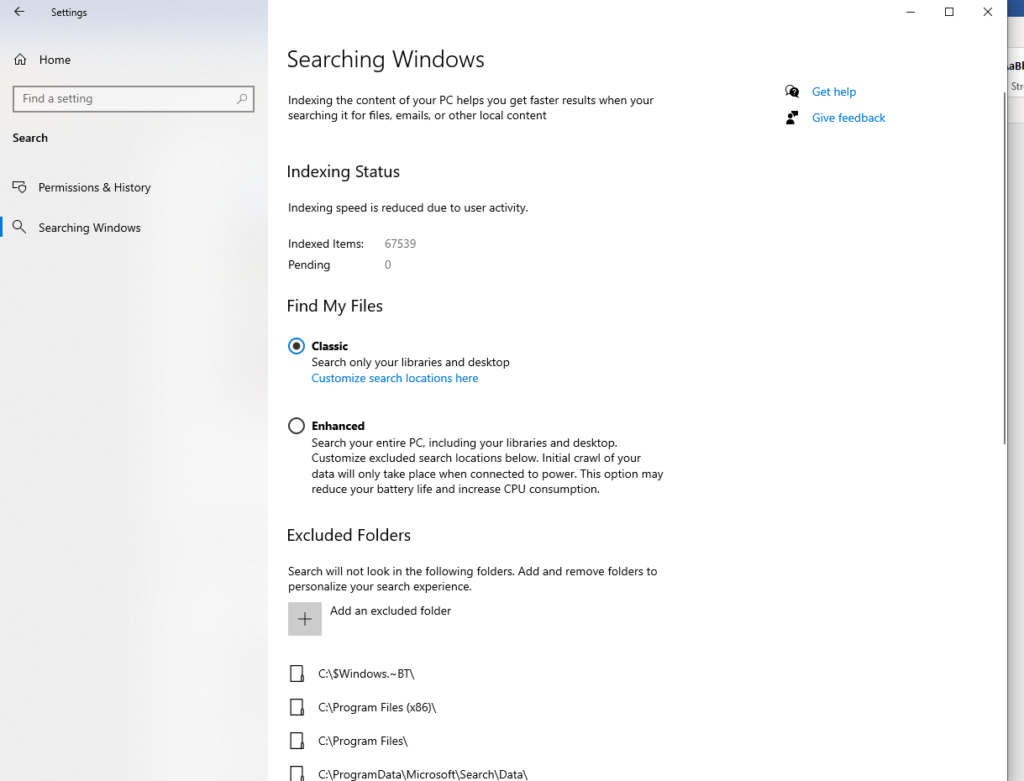
Windows + Ito open Settings. - Go to Search > Searching Windows.
- Scroll down to Advanced Search Indexer Settings and click on it.
- In the Indexing Options window, click on Advanced.
- Under the Troubleshooting section, click Rebuild.
This process might take some time, depending on the size of your drive and the number of files. Once complete, the search function should work correctly.
3. Run the Search Troubleshooter

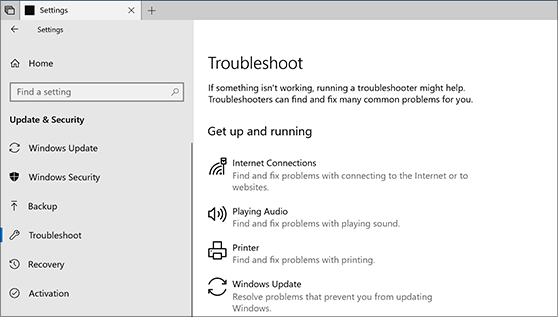
Windows comes with a built-in troubleshooter designed to fix issues with search and indexing.
Steps to Run the Search Troubleshooter:
- Press
Windows + Ito open Settings. - Go to System > Troubleshoot.
- Click on Other troubleshooters or Additional troubleshooters.
- Scroll down and click Run next to Search and Indexing.
- Follow the on-screen instructions to complete the troubleshooting process.
The troubleshooter will attempt to detect and fix any issues related to Windows Search.
4. Check Windows Search Settings
It’s possible that certain folders or files are excluded from the search index, which can cause the error. You can review your search settings to make sure everything is indexed correctly.
Steps to Review Search Settings:
- Press
Windows + Ito open Settings. - Go to Search > Searching Windows.
- Under Find My Files, choose Enhanced to index your entire PC.
- Scroll down to Excluded Folders. Make sure that no important folders (like Documents or Downloads) are listed here. If they are, remove them from the exclusion list.
Changing these settings ensures that the search function covers all the relevant files and folders.
5. Use the System File Checker (SFC)

Corrupt system files may also cause issues with Windows Search. The System File Checker (SFC) scans and repairs these files.
Steps to Run SFC:
- Press
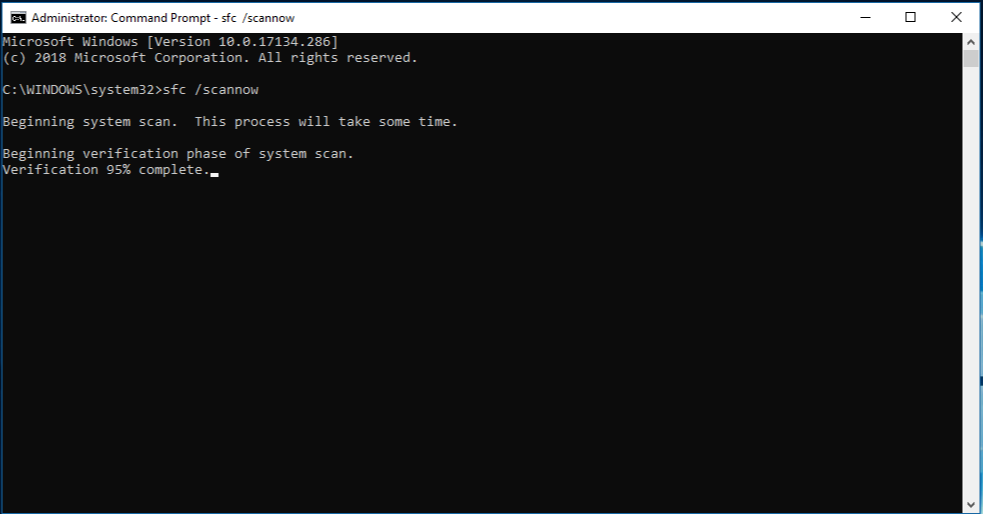
Windows + Xand select Windows Terminal (Admin). - Type the following command and press Enter:
bash
sfc /scannow
This process may take a while, but once completed, any corrupt files will be repaired, which may resolve the search issue.
6. Update Windows
Outdated Windows versions may cause the search function to malfunction. It’s always a good idea to ensure your system is up to date.
Steps to Update Windows:
- Press
Windows + Ito open Settings. - Go to Windows Update.
- Click Check for updates.
If any updates are available, install them and restart your computer to see if the search function has been fixed.
Conclusion
The “No Results Found” error in Windows Search can be a hassle, but with the methods outlined above, you should be able to fix it quickly. Whether it’s restarting the search service, rebuilding the index, or running the troubleshooter, these solutions address the most common causes of the issue.
If the problem persists after trying all these methods, consider checking for third-party software conflicts or seeking further assistance from Microsoft Support.
