MS Word Tips: How to Modify Settings in Word?
Microsoft Word is packed with features that make it versatile and user-friendly. However, to make the most out of it, you may want to adjust settings according to your preferences. Whether you’re looking to change the default font, tweak layout options, or modify advanced settings, this guide provides step-by-step instructions on how to change settings in Word.
Accessing Word Settings
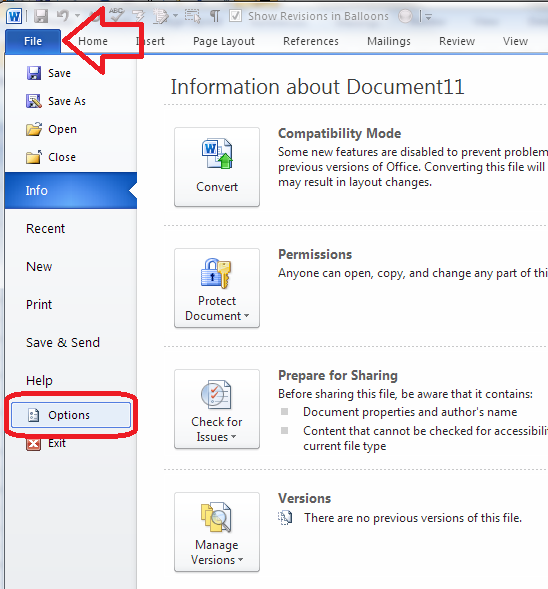
The first step to customize Word is to access the settings menu. Here’s how:
- Open Microsoft Word
- Launch Word by clicking on the application from your desktop or Start menu.
- Go to Options
- Click on the File tab in the top-left corner of the screen.
- From the menu that appears, select Options at the bottom. This will open the Word Options window, where you can access various settings.
Changing the Default Font and Text Size
One of the most common customizations is changing the default font and size.
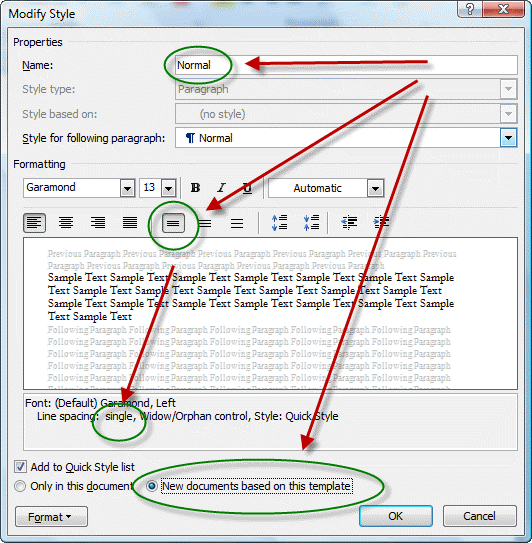
- Navigate to the Font Settings
- In the Word Options window, select Advanced.
- Scroll down to the General section and click Customize Normal.dotm or access the font dialog directly from the Home tab.
- Set Your Preferred Font and Size
- Select a font and size from the dialog box. Popular choices include Calibri (default) or Arial.
- Set as Default
- Click the Set As Default button and choose whether to apply the change to all documents or just the current one.
Customizing the Ribbon and Quick Access Toolbar
For quicker access to frequently used tools, you can customize the Ribbon or Quick Access Toolbar.
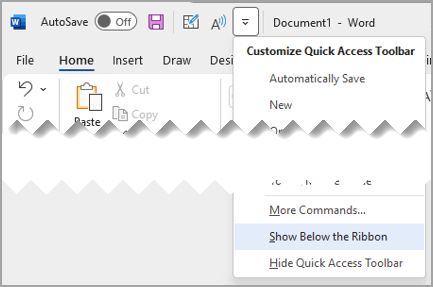
- Modify the Ribbon
- In the Word Options window, select Customize Ribbon.
- Add or remove commands by selecting them from the left-hand menu and clicking Add >>. You can also create new tabs.
- Adjust the Quick Access Toolbar
- Go to Quick Access Toolbar in the same menu.
- Add commands such as Save, Undo, or Print Preview for easier access.
Adjusting Page Layout Settings
You can change page orientation, margins, and other layout features.
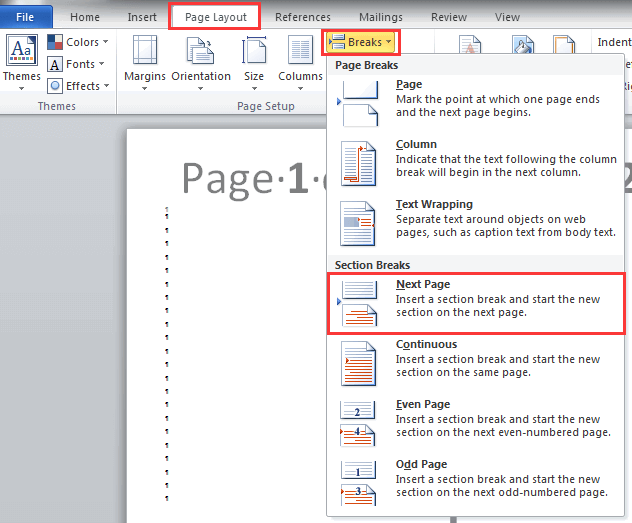
- Access Page Setup
- Go to the Layout tab in the ribbon.
- Use options such as Margins, Orientation, and Size to adjust your document layout.
- Set as Default
- After making changes, click Set As Default to save these settings for future documents.
Configuring Proofing and AutoCorrect Options
Word’s proofing and AutoCorrect features help streamline typing and minimize errors.
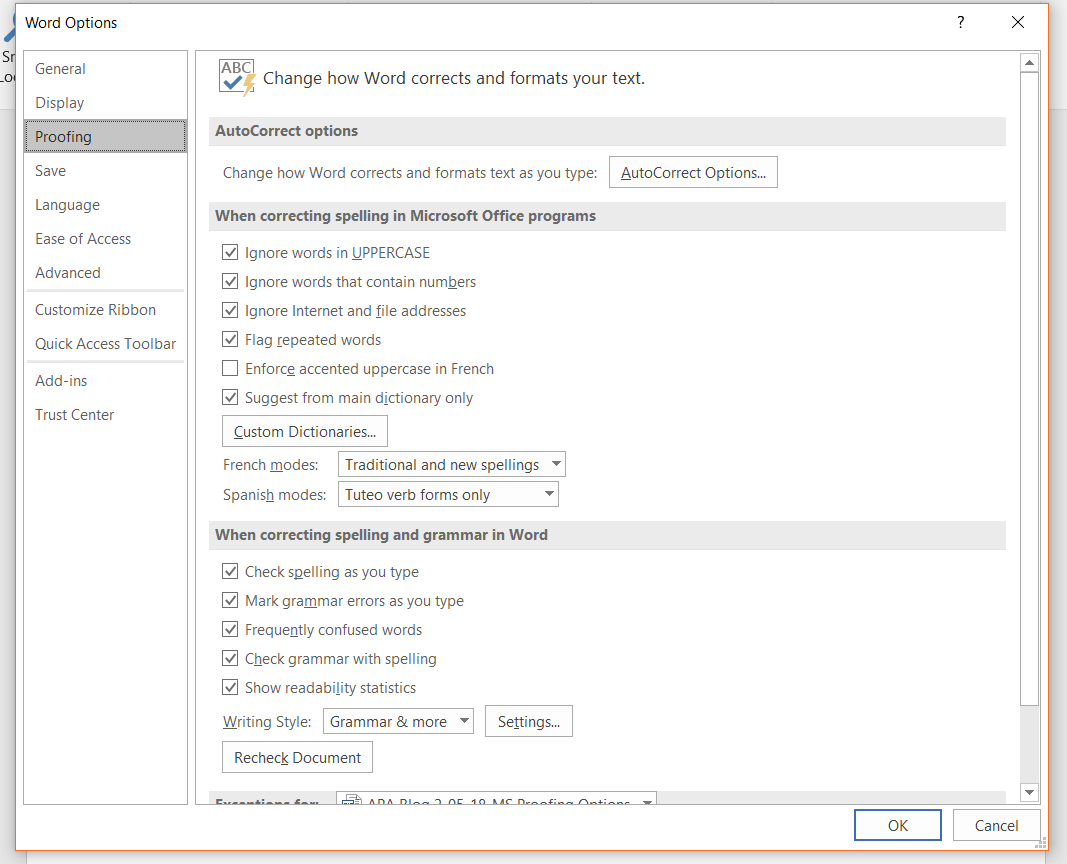
- Open Proofing Options
- In the Word Options menu, click on Proofing.
- Customize AutoCorrect
- Click AutoCorrect Options to modify automatic formatting rules, such as capitalization or replacing text as you type.
- Spell Check Settings
- Adjust how Word handles grammar and spelling errors, such as ignoring certain words or enforcing specific grammar rules.
Changing File Save Locations
If you frequently save files in a specific folder or cloud service, you can modify the default save location.
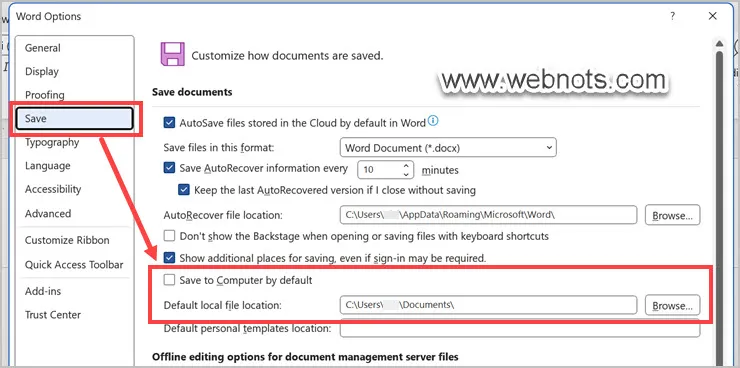
- Access Save Settings
- In the Word Options menu, click Save.
- Choose Default Location
- Under Save documents, click Browse to select a new default folder for saving files.
Adjusting Advanced Settings
For users looking for more granular control, the Advanced tab in Word Options is packed with customization options.
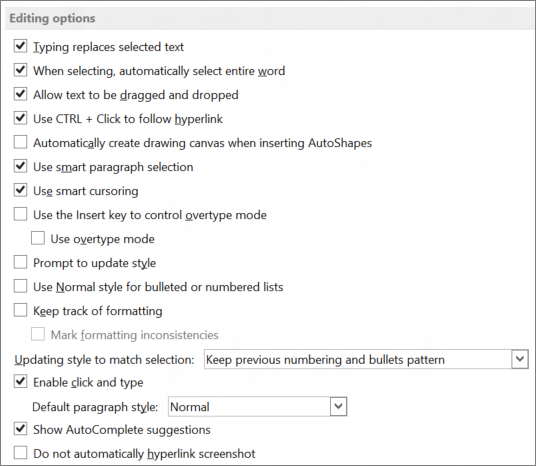
- Modify Display Options
- Adjust how Word displays elements like scrollbars, page breaks, and formatting marks.
- Optimize Editing Settings
- Enable or disable features like click-and-type or drag-and-drop text editing.
- Adjust Printing Preferences
- Configure how Word handles graphics, text formatting, and other elements when printing.
Restoring Default Settings
If you ever want to reset Word to its original settings, follow these steps:
- Reset Normal.dotm Template
- Locate the Normal.dotm file (default template) and delete or rename it. Word will create a new default template automatically.
- Repair Word Installation
- Go to the Control Panel > Programs and Features, select Microsoft Office, and click Repair.
Conclusion
Customizing Microsoft Word settings allows you to create a personalized workspace tailored to your needs. Whether you’re changing the default font, optimizing the toolbar, or configuring proofing tools, these adjustments can enhance productivity and streamline your workflow. Take advantage of Word’s rich features to create a more efficient and enjoyable document-editing experience.
