How to Schedule Meetings and Appointments in Microsoft Outlook
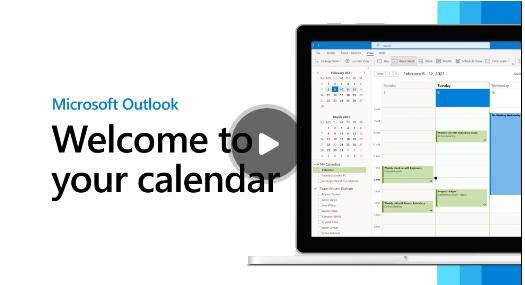
Microsoft Outlook is not just an email application; it’s also a powerful tool for managing your calendar, meetings, and appointments. Whether you need to set up a quick appointment or organize a meeting with colleagues, Outlook’s calendar functionality makes it easy to stay on top of your schedule. In this comprehensive guide, we will walk you through the process of creating meetings and appointments in Microsoft Outlook, helping you manage your time efficiently.
1. What is the Difference Between Meetings and Appointments?
Before diving into the specifics, it’s important to understand the difference between meetings and appointments in Outlook:
- Appointments: An appointment is typically a scheduled event that you organize for yourself. You may set reminders and add details, but it doesn’t involve inviting other people or scheduling a shared event.
- Meetings: Meetings, on the other hand, are appointments where you invite others to join. You can schedule a meeting with colleagues, attach meeting agendas, and even set up video conferences or other collaborative features.
2. How To Create an Appointment in Outlook
Creating an appointment in Outlook is simple and straightforward. Appointments can be personal or professional, and you can customize them with reminders, recurrence settings, and more.
Steps to Create an Appointment:
- Open Outlook: Launch Microsoft Outlook on your computer. If you’re using the web version, go to outlook.office.com.
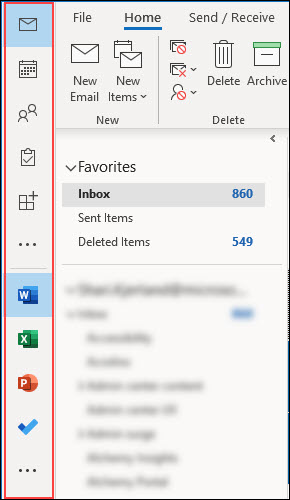
- Navigate to the Calendar: Click on the Calendar icon, usually found in the bottom left corner of the screen.
- Create a New Appointment:
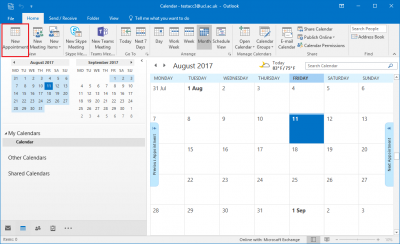
- In the desktop version: Click on New Appointment at the top left corner of your calendar screen.
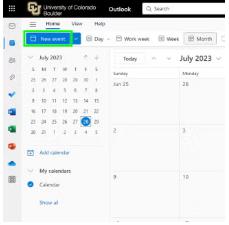
- In the web version: Click on New Event in the upper left.
- In the desktop version: Click on New Appointment at the top left corner of your calendar screen.
- Set the Details:
- Title: Add a title for your appointment (e.g., “Doctor’s Appointment”).
- Location: Enter the location, if necessary.
- Start/End Time: Set the start and end times for the appointment. You can select the calendar date and time using the drop-down options.
- Reminder: Set a reminder to notify you before the appointment. The default is 15 minutes before, but you can adjust it as needed.
- Save the Appointment: After adding all the relevant details, click on Save or Save & Close. The appointment will be saved to your calendar.
3. How To Create a Meeting in Outlook
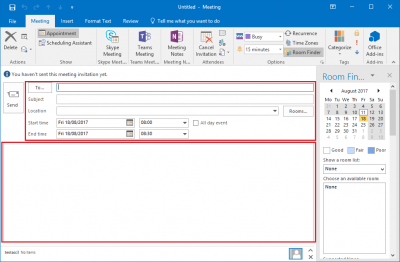
Creating a meeting in Outlook is almost identical to creating an appointment, with the added step of inviting other participants. Here’s how to set up a meeting:
Steps to Create a Meeting:
- Open Outlook and Go to Calendar: As with appointments, start by navigating to the Calendar section in Microsoft Outlook.
- Create a New Meeting:
- In the desktop version: Click on New Meeting in the ribbon at the top.
- In the web version: Click on New Event and select the Meeting option.
- Enter Meeting Details:
- Subject: Add a subject line to describe the meeting (e.g., “Team Sync”).
- Location: If the meeting is in person, specify the location. For virtual meetings, you can include the conference link (such as Zoom or Teams).
- Start/End Time: Set the start and end times for the meeting, along with the meeting date.
- Description: In the body of the invitation, add any relevant details or an agenda for the meeting.
- Add Participants:
- Invite Attendees: In the To field, type the email addresses of the people you want to invite to the meeting. If they are within your organization, their names will autocomplete.
- Optional: You can also choose whether you want to request responses or allow attendees to propose new times.
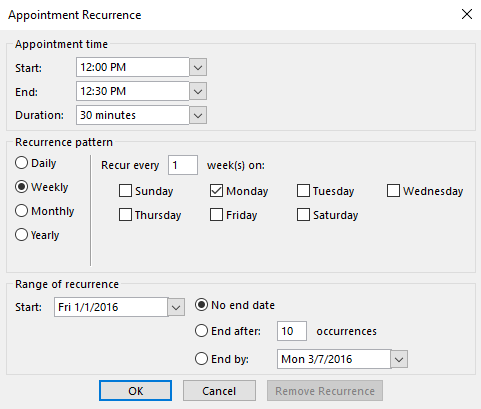
- Set Up Recurrence (Optional): If the meeting happens regularly, you can set it up as a recurring event. Click on the Recurrence button and select the frequency (daily, weekly, monthly, etc.), along with start and end dates.
- Add Online Meeting (Optional): If you are conducting the meeting virtually, you can add an online meeting link by clicking on Teams Meeting or Skype Meeting, depending on your organization’s setup. This automatically adds a link for attendees to join the meeting.
- Send the Invitation: After filling in all the details, click on Send to invite your participants. They will receive an email with the meeting details and a link to accept, decline, or propose a new time.
4. How To Edit or Update a Meeting in Outlook
Sometimes plans change, and you may need to update a meeting’s details. Luckily, Outlook makes it easy to modify meetings.
Steps to Edit a Meeting:
- Open the Calendar: Go to the Calendar section of Outlook.
- Find the Meeting: Locate the meeting you wish to edit.
- Edit the Meeting:
- Double-click the meeting to open it.
- Modify the necessary fields, such as the date, time, or attendees.
- Send Updates: After making the changes, click Send Update to notify all attendees of the changes.
5. How To Delete or Cancel a Meeting in Outlook
Sometimes, you may need to cancel a meeting or remove it from your calendar. You can do this easily in Outlook.
Steps to Delete a Meeting:
- Open the Calendar: Navigate to your calendar in Outlook.
- Select the Meeting: Find the meeting you want to delete.
- Delete or Cancel:
- Right-click on the meeting and select Delete.
- If it’s a recurring meeting, you’ll be asked if you want to delete only this instance or the entire series.
- Send a Cancellation Notice: If you’re the organizer, click Send Cancellation to inform the attendees that the meeting has been canceled.
6. How To Set Up Reminders for Meetings and Appointments
To ensure you never miss an important meeting or appointment, you can set up reminders in Outlook.
Steps to Set Reminders:
- Open a Meeting or Appointment: Either create a new meeting or appointment, or open an existing one.
- Set the Reminder: In the meeting or appointment window, you’ll see a reminder drop-down menu. You can select when you want to be reminded (e.g., 15 minutes, 30 minutes, 1 hour before).
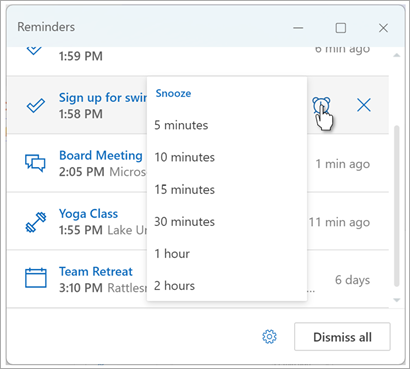
- Save the Reminder: Once set, click Save & Close. The reminder will alert you at the chosen time.
7. How To View and Manage Your Outlook Calendar
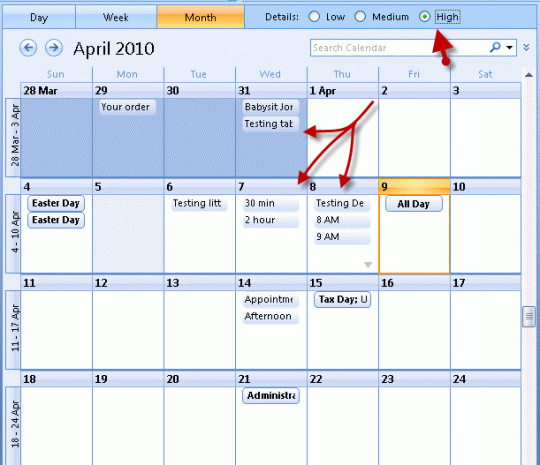
Outlook’s calendar view provides an easy way to manage your meetings and appointments. You can choose to view your calendar by day, week, or month, and easily navigate through different time periods.
Viewing Your Calendar:
- Day View: Shows events for the selected day.
- Work Week View: Displays a week of business hours.
- Week View: Displays all 7 days of the week.
- Month View: Displays an entire month of events.
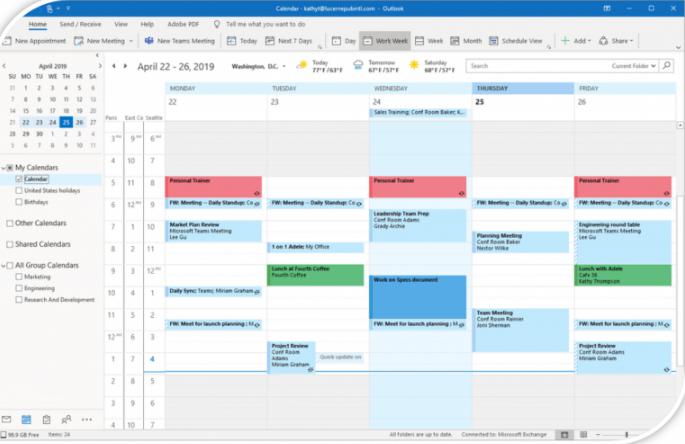
You can also color-code events, categorize them, and filter by specific calendars if you manage multiple schedules.
Conclusion
Creating and managing meetings and appointments in Microsoft Outlook is essential for staying organized in both your personal and professional life. By following the steps outlined in this guide, you can set up appointments, invite participants to meetings, manage calendar events, and make adjustments as necessary. With its powerful scheduling and reminder features, Outlook is an invaluable tool for maintaining your calendar and staying on top of your commitments.
