How to Make a Hanging Indent in Microsoft Word
A hanging indent is a formatting style where the first line of a paragraph aligns with the left margin, and each subsequent line is indented. This style is commonly used in bibliographies, reference lists, and certain types of documents. Microsoft Word makes it easy to create hanging indents with just a few clicks, whether you’re using Word on Windows or Mac. Let’s explore the different methods to achieve this.
What is a Hanging Indent?
In a hanging indent, the first line of the paragraph starts at the left margin, while all the other lines are indented. Here’s a simple visual example:
First line of the paragraph is here, aligned with the left margin.
All other lines are indented to give a “hanging” effect.
This format is especially useful for organizing sources in MLA, APA, or other citation styles, where each entry’s first line starts at the margin, and the rest of the text is indented.
Method 1: Creating a Hanging Indent Using the Ruler
If the ruler is visible in Microsoft Word, you can create a hanging indent directly by adjusting the markers on the ruler.
Steps:

- Open Your Document: Open your Microsoft Word document, and make sure the text you want to format is highlighted.
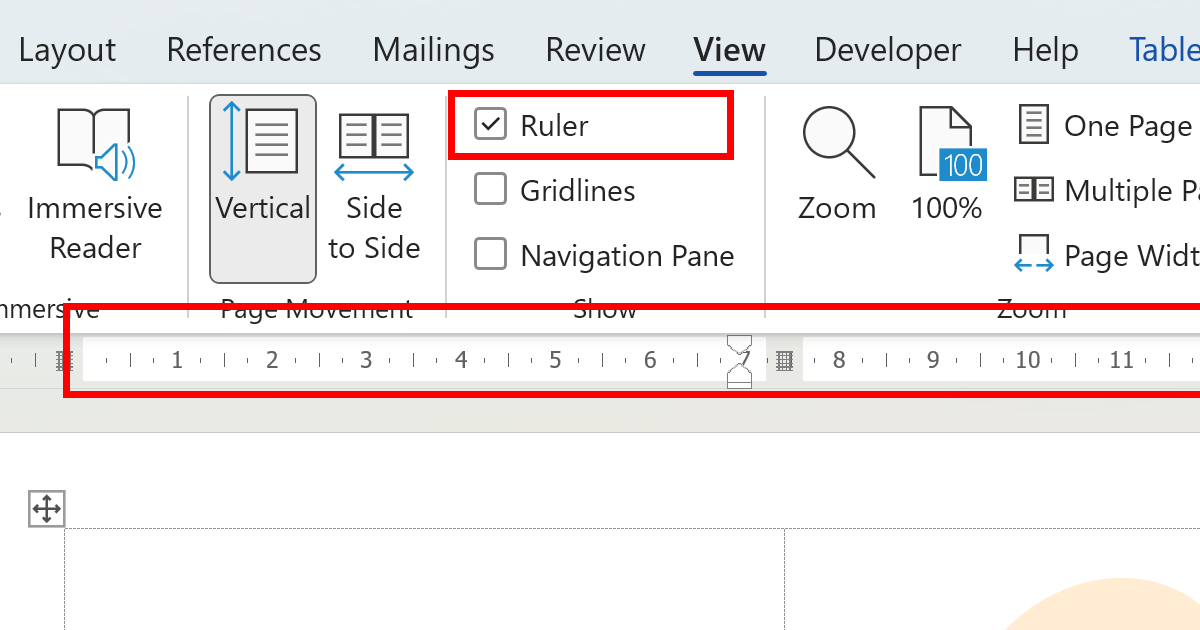
- Show the Ruler: If the ruler isn’t already visible, go to the View tab in the top toolbar and check the Ruler box.
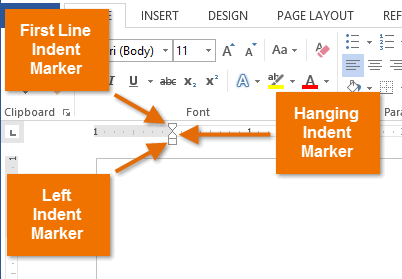
- Adjust the Indent Markers:
- Look for the small blue or gray triangular markers on the horizontal ruler at the top of your document. There are two markers: Top Triangle (First Line Indent) and Bottom Triangle (Hanging Indent).
- Drag the Bottom Triangle (Hanging Indent marker) to the right to set the indentation level for all lines except the first.
- The Top Triangle should remain at the left margin position.
- Check Your Indent: After adjusting the ruler, your selected text will display a hanging indent with the first line aligned to the left margin and the rest of the lines indented.
Tip: You can adjust the position of the hanging indent marker to increase or decrease the indent level.
Method 2: Creating a Hanging Indent Through Paragraph Settings
If you prefer using menu options instead of the ruler, you can easily set a hanging indent through the Paragraph settings.
Steps:
- Highlight the Text: Select the paragraph(s) or text where you want the hanging indent.
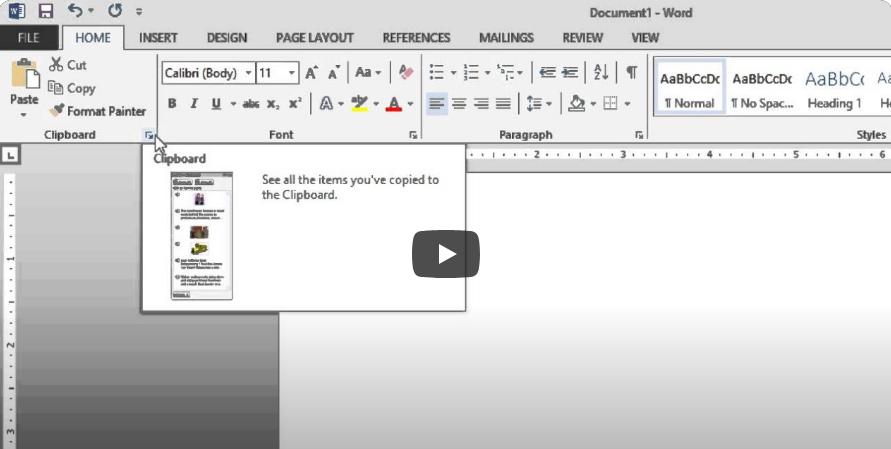
- Open the Paragraph Dialog Box:
- Go to the Home tab, then look for the Paragraph group.
- Click on the small arrow in the bottom-right corner of the Paragraph group to open the Paragraph Settings dialog box.
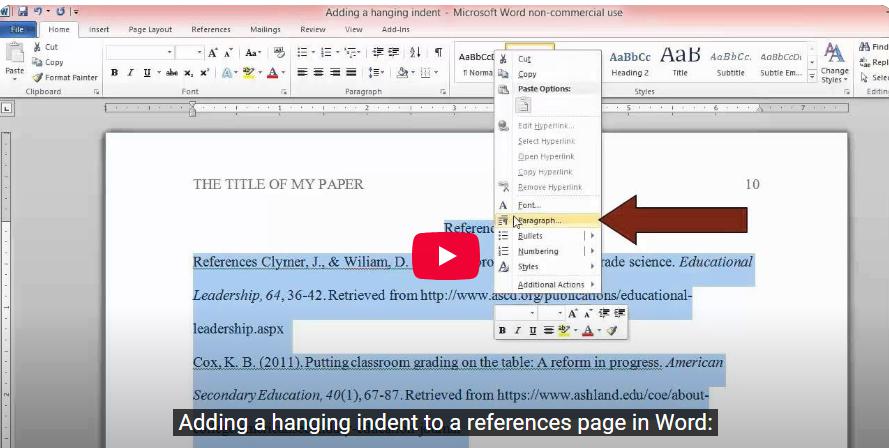
- Set the Hanging Indent:
- In the Paragraph Settings dialog, go to the Indentation section.
- Under Special, select Hanging from the dropdown menu.
- Set the By value to determine how far the indent will be (typically 0.5 inches for most citation formats).
- Click OK: After setting the indent, click OK to apply the hanging indent to your selected text.
Note: This method is particularly useful when you need to apply a hanging indent to multiple paragraphs or if you’re working with citations in a bibliography.
Method 3: Applying a Hanging Indent Using the Format Painter
The Format Painter is a tool that allows you to copy and paste formatting. If you’ve already applied a hanging indent to one section and want to apply it to others, this tool is very helpful.
Steps:

- Select Formatted Text: First, select the text that already has the hanging indent applied.
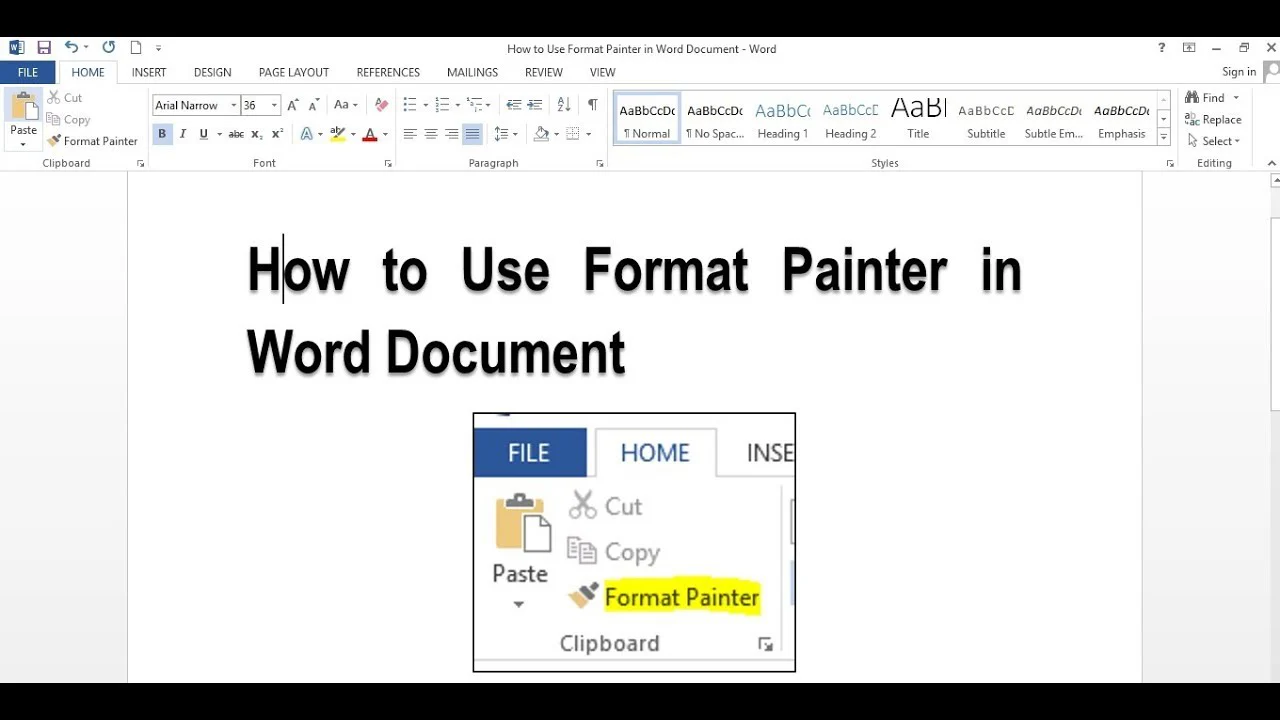
- Click on Format Painter: Go to the Home tab and click on the Format Painter icon (paintbrush symbol).

- Apply to New Text: Highlight the text you want to format. The hanging indent will automatically apply.
Method 4: Using Keyboard Shortcuts to Create a Hanging Indent
If you’re comfortable with keyboard shortcuts, here’s a quick way to create a hanging indent:
- Highlight the Paragraph: Select the paragraph where you want to apply the indent.
- Press Ctrl + T (on Windows) or Command + T (on Mac): This shortcut automatically creates a hanging indent with a 0.5-inch indentation.
Tip: You can press the shortcut multiple times to increase the indentation level.
Frequently Asked Questions
Q: Can I Adjust the Indent Level?
Yes, you can adjust the indentation level manually through the ruler or by setting a specific value in the Paragraph Settings dialog box.
Q: Does a Hanging Indent Apply to Bulleted or Numbered Lists?
No, the hanging indent is typically applied to plain text paragraphs. For lists, Word has separate formatting options.
Q: How Do I Remove a Hanging Indent?
To remove a hanging indent, open the Paragraph Settings dialog box, set Special to None, and click OK.
Conclusion
Creating a hanging indent in Microsoft Word is straightforward and can be done in several ways, whether you use the ruler, Paragraph settings, Format Painter, or keyboard shortcuts. A hanging indent is essential for properly formatting references and citations in many academic and professional documents. Following the steps outlined here will help you apply this formatting quickly and efficiently, enhancing the organization and readability of your document.
