How to Make a Document in Microsoft Word
Microsoft Word is one of the most popular word-processing tools used for creating a wide range of documents, from resumes and reports to essays and business letters. This guide will walk you through the process of creating a document in Word, including tips and best practices to ensure your work is professional and well-organized.
Step 1: Open Microsoft Word
Before creating a document, you need to open the Word application. Here’s how:
On a Windows PC:
- Click the Start Menu or use the Search Bar.
- Type Microsoft Word and select the application from the results.
- Word will open to its home screen.
On a Mac:
- Go to the Applications folder.
- Locate and double-click Microsoft Word.
Using a Shortcut:
If you have a shortcut on your desktop or taskbar, click it to launch Word.
Step 2: Create a New Document
After opening Microsoft Word, you’ll be presented with several options for creating a document.
Option 1: Create a Blank Document
- On the Word home screen, click Blank Document.
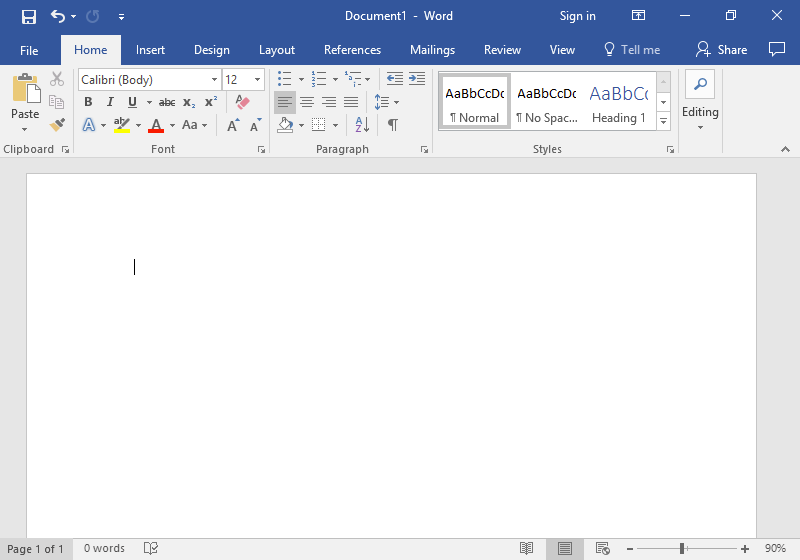
- A new blank document will open, ready for you to start typing.
Option 2: Use a Template
- Browse through the pre-designed templates, such as resumes, business letters, or reports.
- Click on a template to open it.
- Modify the template as needed to fit your purpose.
Templates are particularly useful for creating professional-looking documents quickly.
Step 3: Familiarize Yourself with the Interface
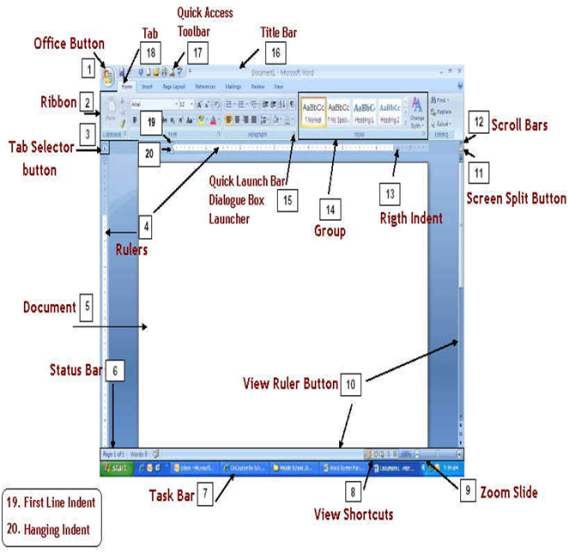
The Microsoft Word interface is user-friendly and packed with tools. Key components include:
- Ribbon: The toolbar at the top, organized into tabs such as Home, Insert, Layout, and Review. Each tab contains related tools and commands.
- Document Area: The blank space where you type and edit your content.
- Quick Access Toolbar: Located in the upper-left corner, it provides shortcuts for frequently used actions like saving, undoing, and redoing.
- Status Bar: At the bottom of the screen, it shows information like word count and page number.
Step 4: Add and Format Text
Typing Text
- Place your cursor in the document area.
- Start typing to add content.
Formatting Text
You can enhance your text using the Home tab:
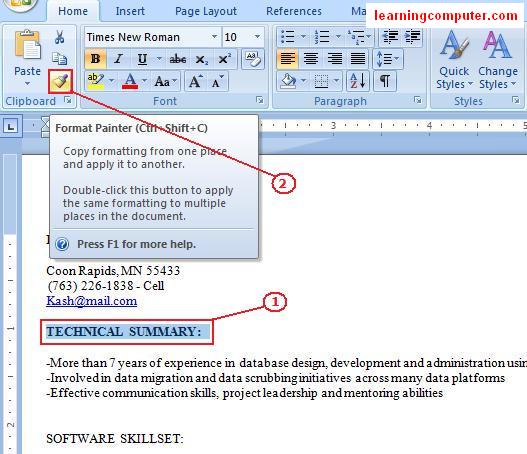
- Change Font Style and Size: Highlight your text, then select a font and size from the dropdown menus.
- Apply Bold, Italic, or Underline: Use the corresponding icons in the toolbar.
- Adjust Alignment: Align text to the left, center, or right, or justify it for a clean look.
- Apply Colors: Highlight text and choose a font color from the palette.
Step 5: Save Your Document
Saving your work ensures you won’t lose progress. Follow these steps:
To Save for the First Time:
- Click File > Save As.
- Choose a location (e.g., your computer or cloud storage like OneDrive).
- Enter a file name.
- Select the file format (e.g., Word Document or PDF).
- Click Save.
To Save Updates:
- Click File > Save, or use the shortcut Ctrl + S (Windows) or Cmd + S (Mac).
Saving frequently is a good habit to prevent data loss.
Step 6: Insert Elements
Adding Images
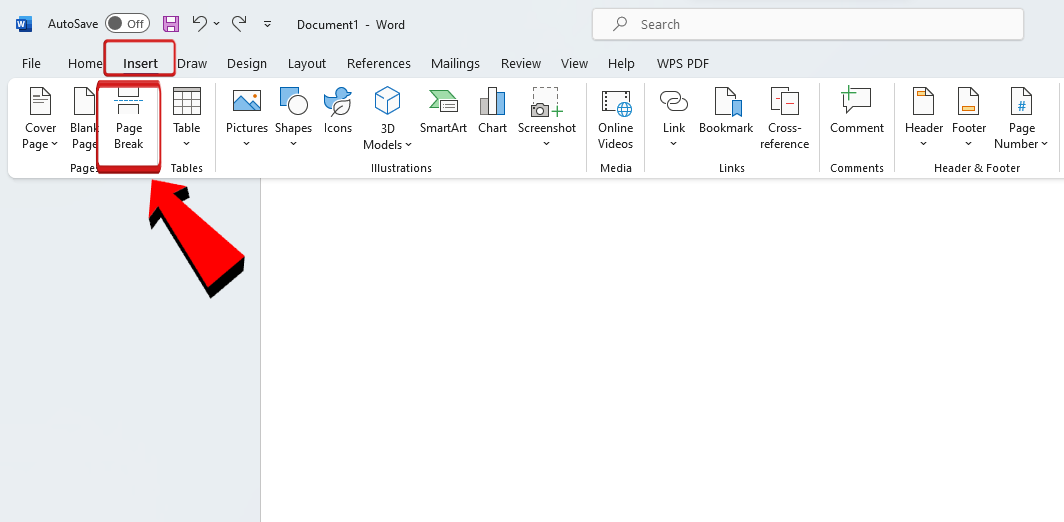
- Go to the Insert tab.
- Click Pictures and choose an image from your computer.
- Adjust the image size and position by clicking and dragging its corners.
Inserting Tables
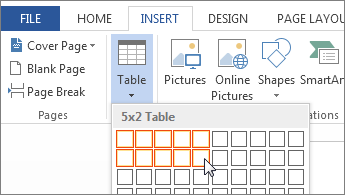
- Click Insert > Table.
- Select the number of rows and columns.
- Fill in the table with your data.
Inserting Shapes or Icons
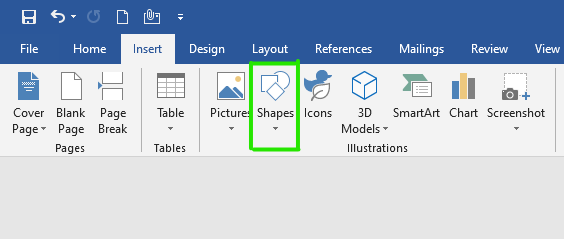
- Go to the Insert tab and choose Shapes or Icons.
- Select the desired shape or icon and draw it in the document.
Step 7: Review and Edit Your Document
Use Spell Check
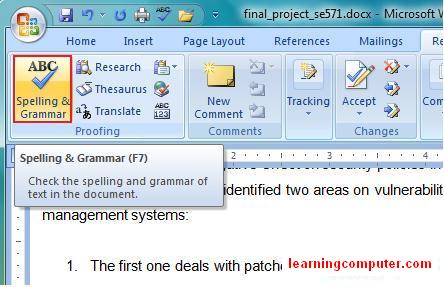
- Click the Review tab.
- Select Spelling & Grammar to identify and correct errors.
Track Changes
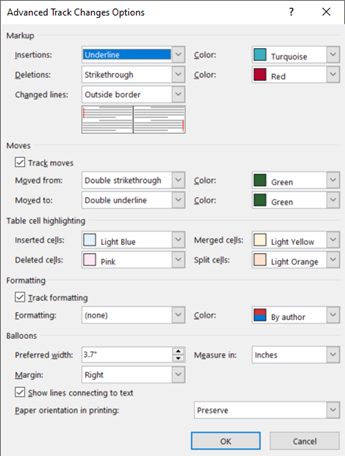
- In the Review tab, click Track Changes to monitor edits made to the document.
Add Comments
- Highlight the text you want to comment on.
- Click New Comment in the Review tab and type your note.
Step 8: Print Your Document
To print your document:
- Click File > Print.
- Adjust print settings, such as the number of copies and page orientation.
- Click Print to send the document to your printer.
Step 9: Share Your Document
Share via Email
- Save the document.
- Open your email app and attach the file.
Share via OneDrive
- Save the document to OneDrive.
- Click Share in the top-right corner of Word.
- Enter the recipient’s email address and send.
Tips for Creating a Professional Document
- Use Styles: Apply heading styles (e.g., Heading 1, Heading 2) for a consistent layout.
- Add a Table of Contents: Use the References tab to insert a table of contents.
- Set Margins and Spacing: Use the Layout tab to adjust margins and line spacing.
- Check Word Count: Monitor the word count in the status bar to meet any length requirements.
Conclusion
Creating a document in Microsoft Word is simple and versatile. With the steps outlined in this guide, you can create anything from basic letters to detailed reports. Explore Word’s features to enhance your documents and improve your productivity. Practice regularly, and soon you’ll master Microsoft Word!
