How to Resolve “Your Computer is Low on Memory” Issue in Windows 10
When you see the error “Your computer is low on memory” in Windows 10, it typically means your system is running out of RAM or virtual memory. This guide provides actionable steps to resolve this issue effectively.
Step 1: Close Resource-Intensive Applications

Running too many programs simultaneously can exhaust system memory.
- Open Task Manager:
- Press Ctrl + Shift + Esc or right-click the taskbar and select Task Manager.
- Check for High Usage:
- Go to the Processes tab.
- Look for apps consuming high memory under the Memory column.
- End Resource-Intensive Tasks:
- Select the app and click End Task.
Step 2: Increase Virtual Memory
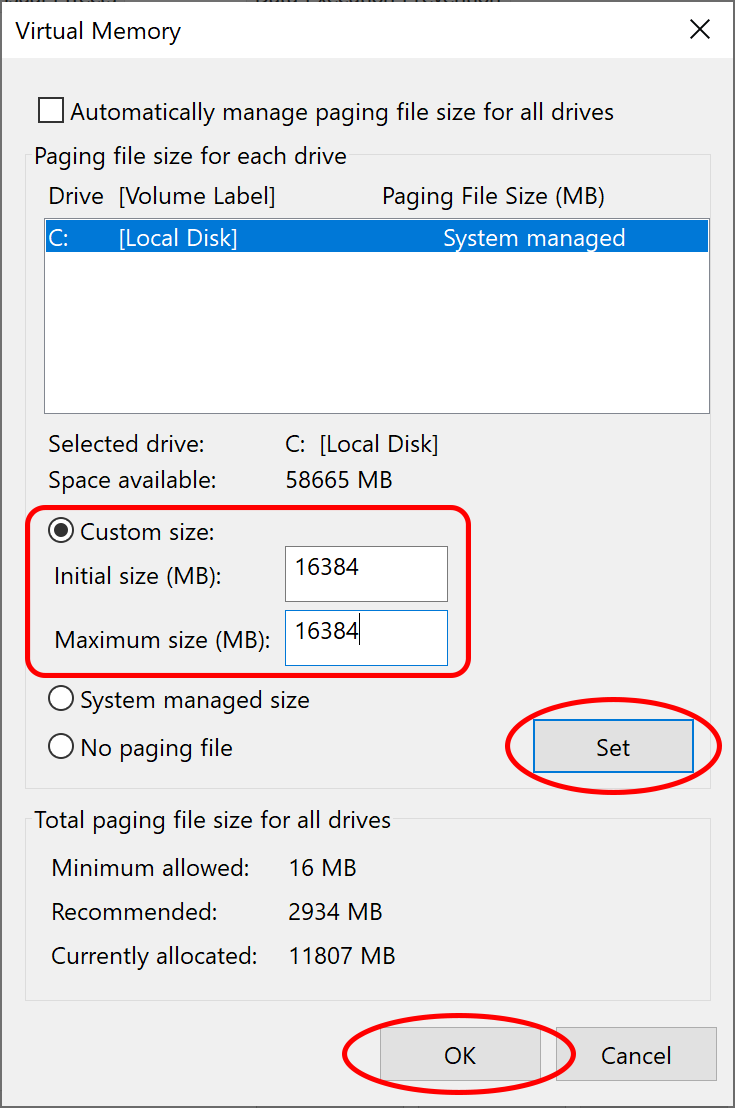
Virtual memory acts as additional memory when RAM is full.
- Open System Settings:
- Press Windows + R, type
sysdm.cpl, and press Enter.
- Press Windows + R, type
- Adjust Virtual Memory:
- Go to the Advanced tab.
- Under Performance, click Settings.
- In the new window, go to Advanced > Change under Virtual Memory.
- Customize Settings:
- Uncheck Automatically manage paging file size for all drives.
- Select your system drive, choose Custom size, and set the values:
- Initial size: 1.5x your RAM.
- Maximum size: 3x your RAM.
- Apply and Restart:
- Click Set, then OK. Restart your computer.
Step 3: Scan for Malware
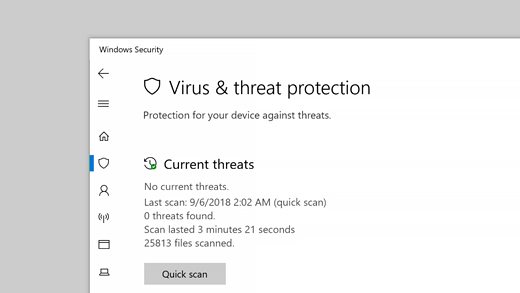
Malware can consume system resources and cause memory issues.
- Open Windows Security:
- Press Windows + I, navigate to Update & Security, and click Windows Security.
- Run a Quick Scan:
- Click Virus & threat protection > Quick Scan.
- Perform a Full Scan:
- Select Scan options > Full scan for deeper checks.
Step 4: Disable Startup Programs
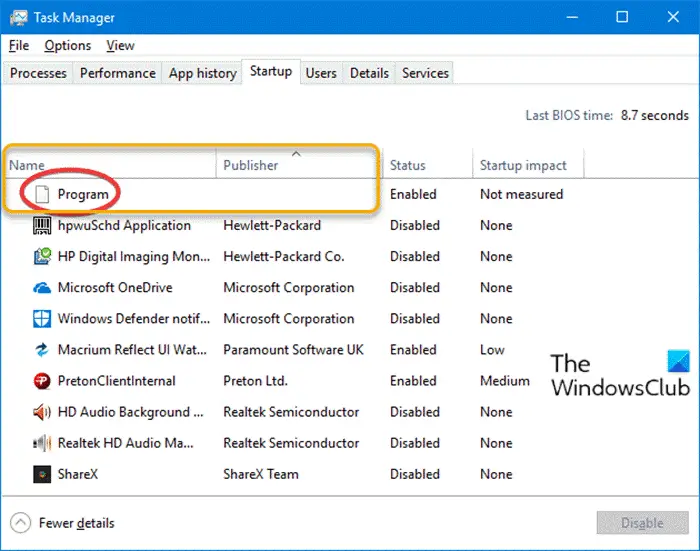
Unnecessary startup programs can overload memory.
- Access Startup Settings:
- Open Task Manager (Ctrl + Shift + Esc).
- Go to the Startup tab.
- Disable Unnecessary Programs:
- Select a program and click Disable.
Step 5: Upgrade RAM (if applicable)
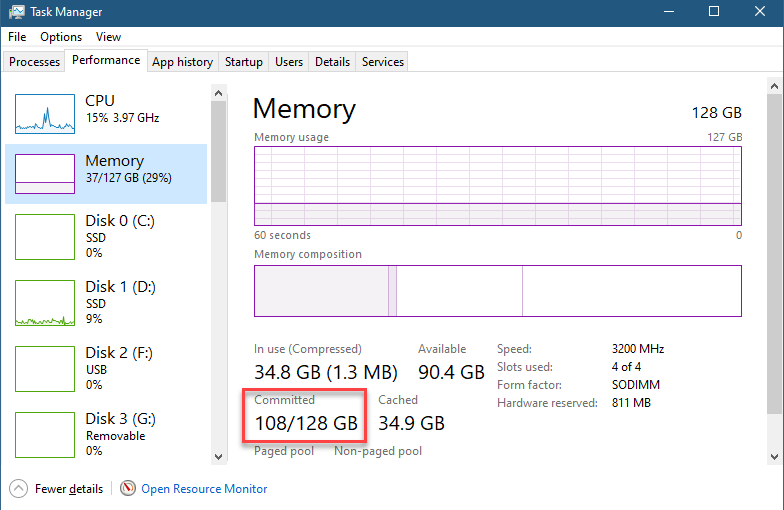
If your system frequently encounters low memory errors, consider upgrading your RAM.
- Check Current RAM:
- Open Task Manager and navigate to the Performance tab.
- Look for Memory to see installed RAM.
- Purchase Compatible RAM:
- Use your motherboard’s specifications to buy compatible RAM modules.
- Install RAM:
- Refer to your device manual for installation instructions or seek professional help.
Step 6: Update Windows
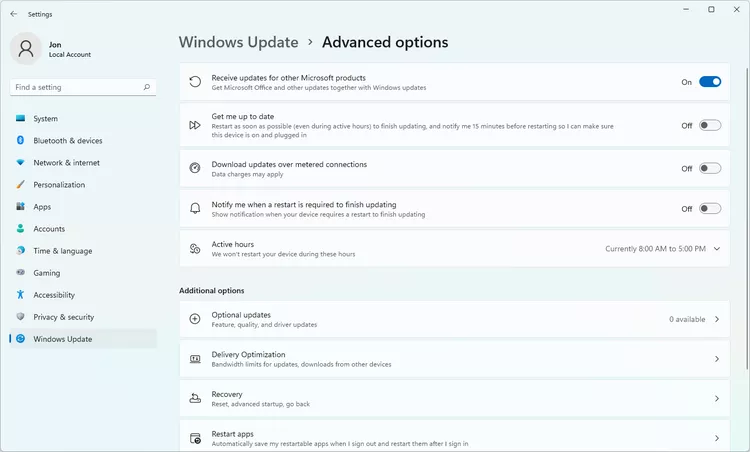
Outdated software can contribute to memory leaks.
- Check for Updates:
- Press Windows + I > Update & Security > Windows Update.
- Click Check for updates.
- Install Updates:
- Download and install available updates. Restart your system afterward.
Step 7: Troubleshoot for “Netio.sys” Blue Screen Errors
Sometimes, low memory issues may coincide with errors like “Netio.sys.”
Follow the solutions from the detailed guide above, such as updating network drivers, running System File Checker, and checking RAM health using Windows Memory Diagnostic Tool.
Conclusion
By implementing these steps, you can resolve “Your Computer is Low on Memory” errors and prevent further occurrences. If the problem persists, consult a professional or consider upgrading your hardware.
