How to Modify the Language of Widgets in Windows 11
Windows 11 offers a variety of features, one of which is the Widgets panel. This panel provides personalized content, including news, weather updates, calendar events, and more. However, you may want to change the language of the Widgets to suit your preferences or needs. This guide will walk you through the process of changing the language for Widgets on Windows 11.
1. Access the Settings Menu

To begin, you need to access the Settings menu in Windows 11, where you can change various system settings, including language preferences.
Steps:
- Click on the Start button (Windows icon) located on the taskbar.
- Select Settings (the gear icon) from the Start menu.
2. Navigate to Time & Language
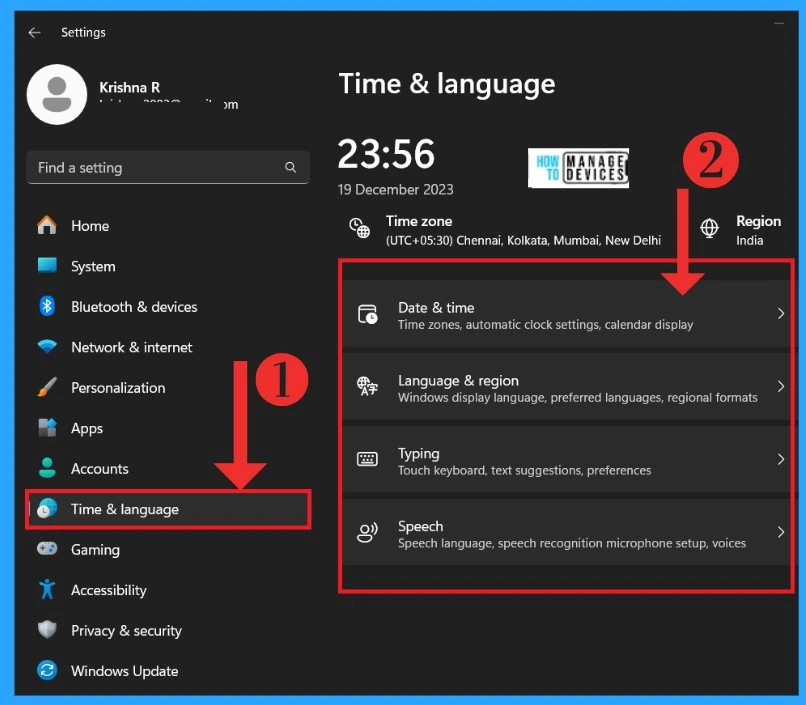
In the Settings window, you will find several categories. To change the language, you need to go to the Time & Language section.
Steps:
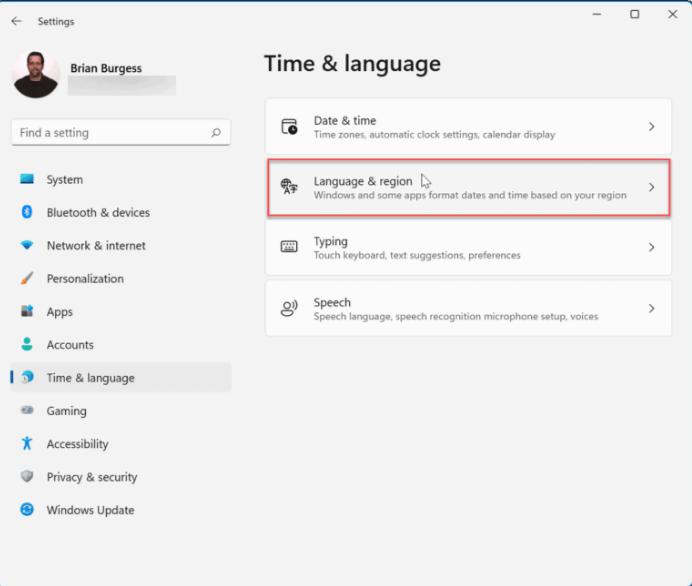
- In the left sidebar, click on Time & language.
- Then select Language & region from the options on the right.
3. Change the Windows Display Language
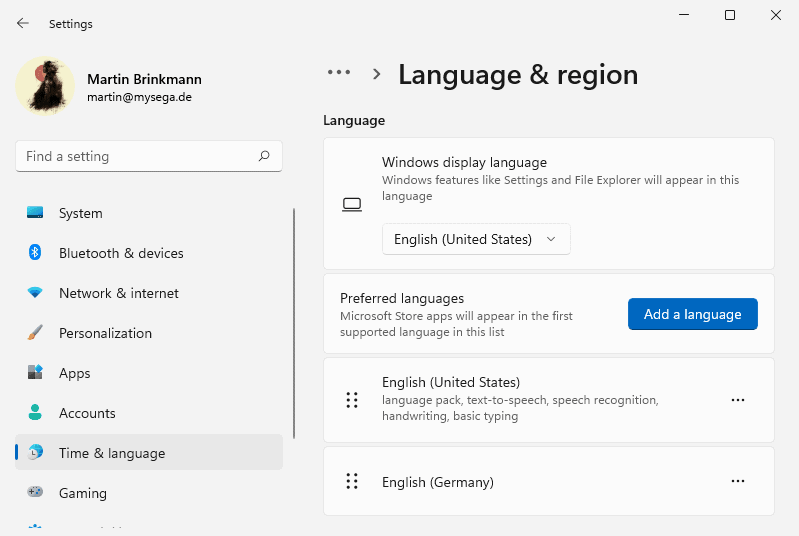
The Widgets language is linked to the Windows display language. Changing this setting will also affect the language used in Widgets.
Steps:
- Under the Language section, you will see the option for Windows display language.
- Click on the drop-down menu and select your desired language from the list.
- If the language you want is not listed, you may need to add it. Click on the Add a language button, select your language, and follow the prompts to install it.
4. Set Regional Format
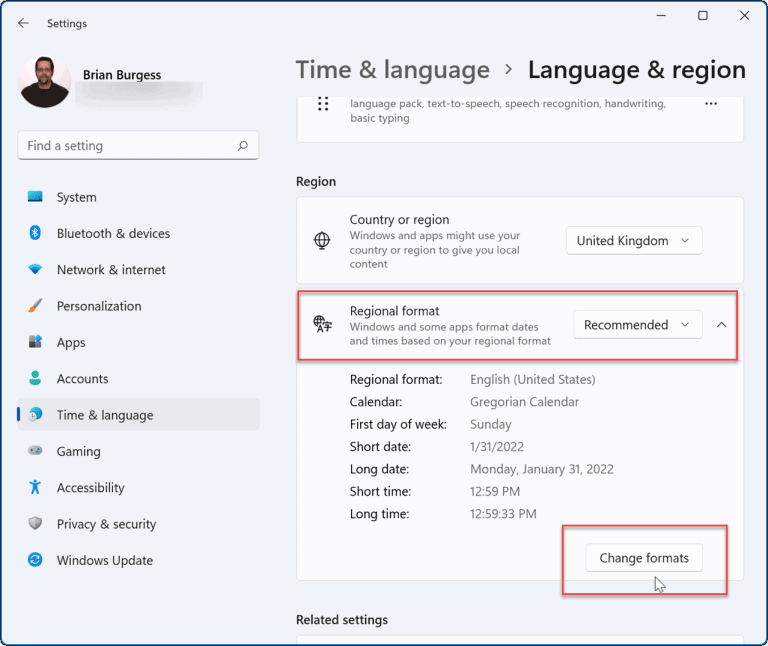
After changing the Windows display language, you should also check the regional format, as it affects the language used in Widgets.
Steps:
- Scroll down to the Regional format section.
- Choose your preferred format from the drop-down menu. This may include options for dates, times, and numbers, which can also influence the language settings in Widgets.
5. Restart Your Device
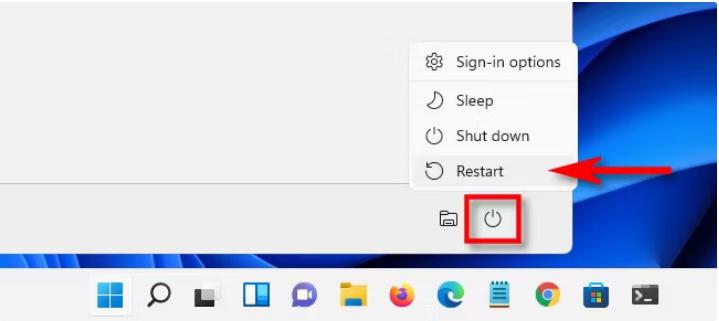
For the changes to take effect, it’s often necessary to restart your device. This ensures that all applications, including Widgets, are updated with the new language settings.
Steps:
- Click on the Start button again.
- Select the Power icon and choose Restart.
6. Check the Widgets Language
Once your device restarts, it’s time to check if the Widgets language has been updated successfully.
Steps:
- Click on the Widgets icon on the taskbar (it looks like a small rectangle).
- Review the content in the Widgets panel to see if it reflects the new language settings.
7. Additional Language Settings (Optional)
If you want to customize the language settings further, you can also adjust additional language preferences:
Steps:
- In the Language & region section, scroll down to Related settings.
- Click on Language options for your selected language.
- Here, you can add specific keyboard layouts or input methods that suit your language needs.
Conclusion
Changing the language of Windows 11 Widgets is a straightforward process that involves adjusting the display language and regional settings. By following these steps, you can personalize your Windows experience to better suit your language preferences. Whether for personal use or to accommodate family members or colleagues, having the Widgets in your preferred language can enhance usability and accessibility. If you have any issues or if the language doesn’t change, ensure that your Windows updates are current and that all necessary language packs are installed. Enjoy your personalized Widgets experience!
