How to Resolve IRQL NOT LESS OR EQUAL Blue Screen Error on Windows 10
The IRQL_NOT_LESS_OR_EQUAL error is a common Blue Screen of Death (BSOD) issue in Windows 10. This error occurs when the system tries to access memory with a high Interrupt Request Level (IRQL) without proper authorization. It can be caused by a wide range of issues, including corrupted system files, faulty drivers, or hardware problems.
In this guide, we’ll go over several effective methods to fix the IRQL_NOT_LESS_OR_EQUAL blue screen error, helping you get your system back up and running smoothly.
What Causes the IRQL_NOT_LESS_OR_EQUAL Error?
Before we jump into the solutions, let’s explore some common causes of the IRQL_NOT_LESS_OR_EQUAL error:
- Outdated or corrupted drivers.
- Faulty hardware components such as RAM or hard drives.
- Corrupted system files.
- Overclocking or incompatible settings in the BIOS.
- Software conflicts or antivirus issues.
Method 1: Update Device Drivers
Faulty or outdated drivers are a common cause of the IRQL_NOT_LESS_OR_EQUAL error. Updating your drivers can often fix the problem.
Steps to Update Drivers:

- Open Device Manager:
- Press
Windows + Xand select Device Manager from the list.

- Press
- Look for Problematic Drivers:
- In Device Manager, check for any drivers with a yellow exclamation mark. These indicate problematic drivers.

- Update the Drivers:
- Right-click on the problematic driver and select Update driver.
- Choose Search automatically for updated driver software and let Windows find and install the latest version.
- Restart Your PC:
- Once the drivers are updated, restart your PC and check if the error persists.
Method 2: Run the Memory Diagnostic Tool
Faulty RAM can lead to the IRQL_NOT_LESS_OR_EQUAL error. Running the Windows Memory Diagnostic Tool can help identify memory-related issues.
Steps to Run the Memory Diagnostic Tool:

- Open the Tool:
- Press
Windows + R, type mdsched.exe, and hit Enter.
- Press
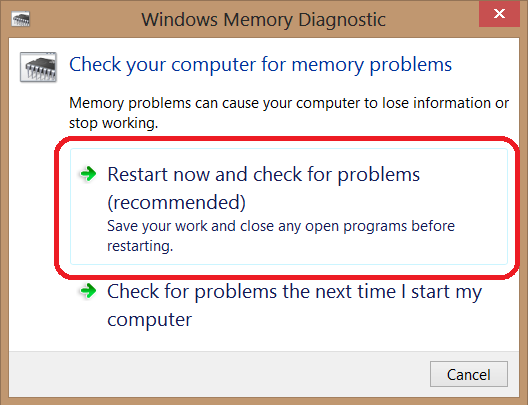
- Restart and Check for Problems:
- Select Restart now and check for problems. Your computer will restart and run a memory diagnostic test.
- Wait for Results:
- The diagnostic process may take some time. Once completed, your PC will restart and display the results.
- Replace Faulty RAM (if necessary):
- If the tool detects any issues with your RAM, consider replacing the faulty RAM stick to resolve the error.
Method 3: Run the System File Checker (SFC)
Corrupted or missing system files can also cause the IRQL_NOT_LESS_OR_EQUAL error. Running the System File Checker (SFC) tool will help fix corrupted files.
Steps to Run SFC:

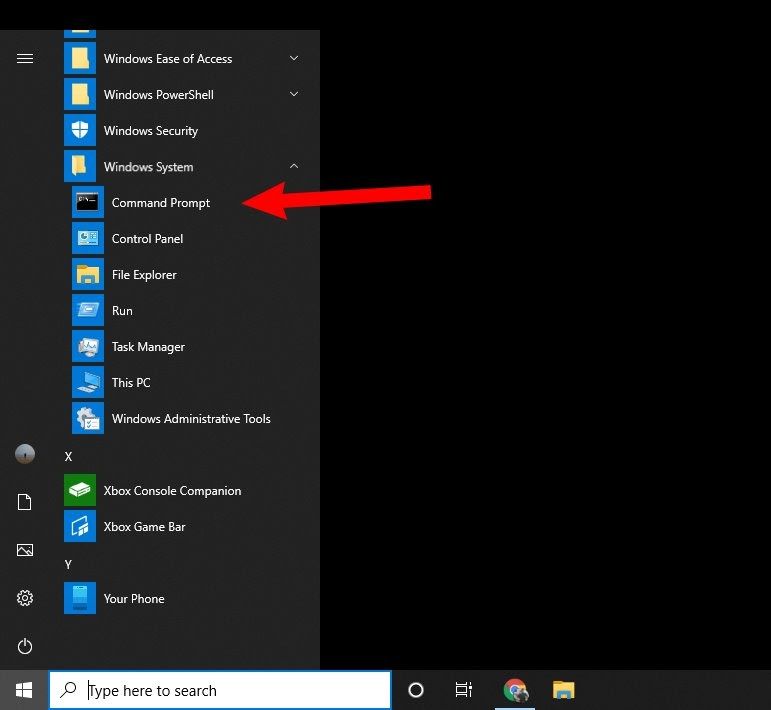
- Open Command Prompt as Admin:
- Press
Windows + Xand select Command Prompt (Admin).
- Press
- Run the SFC Command:
- In the Command Prompt, type the following command and press Enter:
bash
sfc /scannow
- In the Command Prompt, type the following command and press Enter:
- Wait for the Scan to Complete:
- The scan will check for corrupted system files and automatically attempt to repair them. Once done, restart your PC.
Method 4: Run a Check Disk (CHKDSK) Scan
Issues with your hard drive can also trigger the IRQL_NOT_LESS_OR_EQUAL error. Running the Check Disk (CHKDSK) tool will help identify and fix any disk-related issues.
Steps to Run CHKDSK:
- Open Command Prompt as Admin:
- Press
Windows + Xand select Command Prompt (Admin).
- Press
- Run the CHKDSK Command:
- Type the following command and press Enter:
bash
chkdsk /f /r
- Type the following command and press Enter:
- Confirm Disk Check:
- If prompted, press Y to schedule the disk check for the next restart.
- Restart Your PC:
- Restart your computer and allow CHKDSK to scan your hard drive for errors.
Method 5: Disable Overclocking in BIOS
Overclocking your CPU or GPU can lead to stability issues, including the IRQL_NOT_LESS_OR_EQUAL error. If your system is overclocked, you can disable it in the BIOS.
Steps to Disable Overclocking:

- Enter BIOS:
- Restart your PC and press the designated key (usually F2, Del, or Esc) during startup to enter the BIOS.
- Find Overclocking Settings:
- Navigate to the Advanced or Overclocking section in the BIOS.
- Disable Overclocking:
- If overclocking is enabled, set it back to default settings or Auto.
- Save and Exit:
- Save the changes and exit the BIOS. Your computer will restart, and the issue may be resolved.
Method 6: Perform a Clean Boot
If software conflicts are causing the error, performing a Clean Boot can help you identify which programs are responsible.
Steps to Perform a Clean Boot:

- Open System Configuration:
- Press
Windows + R, type msconfig, and press Enter.
- Press
- Disable Non-Essential Services:
- In the Services tab, check Hide all Microsoft services and then click Disable all.
- Disable Startup Programs:
- Go to the Startup tab and click Open Task Manager. Disable all non-essential startup programs.
- Restart Your PC:
- After making these changes, restart your computer. If the error is resolved, you can re-enable services and startup programs one by one to identify the culprit.
Method 7: Perform a System Restore
If the IRQL_NOT_LESS_OR_EQUAL error started after a recent update or software installation, performing a System Restore can revert your PC to a previous state.
Steps to Perform a System Restore:
- Open System Restore:
- Press
Windows + Sand type System Restore. Select Create a restore point from the results.
- Press
- Launch System Restore:
- In the System Protection tab, click System Restore.
- Choose a Restore Point:
- Follow the on-screen instructions to choose a restore point from a time when your system was functioning correctly.
- Restore Your System:
- After restoring your system, restart your PC and check if the error is resolved.
Conclusion
The IRQL_NOT_LESS_OR_EQUAL error on Windows 10 can be caused by various issues, from faulty drivers to hardware malfunctions. By following the methods outlined in this guide—updating drivers, running diagnostic tools, disabling overclocking, and performing a system restore—you should be able to resolve the issue and get your system back to normal.
If the problem persists, consider consulting a professional for hardware diagnostics or performing a fresh installation of Windows 10.
