How to Install DirectPlay on Windows 10
DirectPlay is a legacy API that was part of Microsoft DirectX, primarily used by older games and applications to handle networking and multiplayer features. While newer systems no longer rely on DirectPlay, some older games still require it to function correctly. Fortunately, Windows 10 supports DirectPlay as an optional feature that you can enable manually.
This guide will walk you through the steps to get DirectPlay on Windows 10.
What Is DirectPlay?
DirectPlay is a component of Microsoft DirectX that facilitates communication for games and apps by providing network connectivity, voice communication, and more. While it has been replaced by modern networking solutions, many classic games still need DirectPlay to work.
If you encounter errors or messages asking for DirectPlay when running an old game, follow the instructions below to enable it.
Steps to Enable DirectPlay on Windows 10
Step 1: Open the Control Panel

- Press Windows + R to open the Run dialog box.
- Type
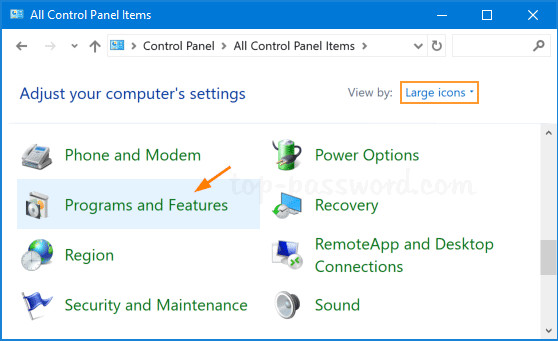
controland press Enter. - In the Control Panel, navigate to Programs > Programs and Features.
Step 2: Access Windows Features
- In the Programs and Features window, click Turn Windows features on or off in the left-hand menu.
- Wait for the Windows Features dialog box to load.
Step 3: Enable DirectPlay

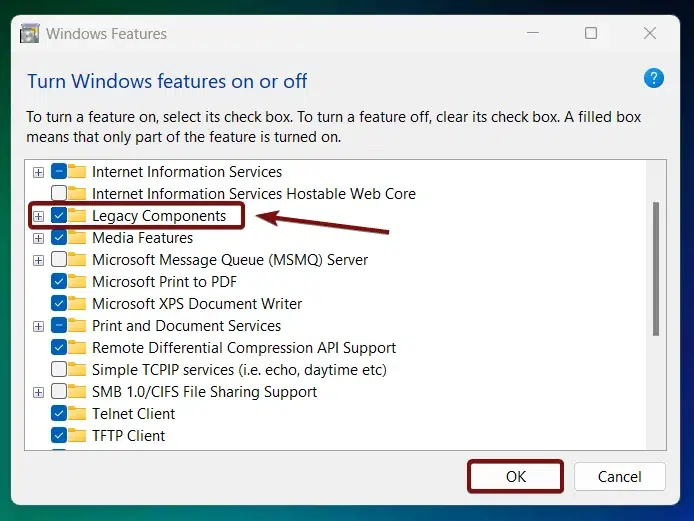
- Scroll down and locate Legacy Components.
- Click the + icon to expand it.
- Check the box next to DirectPlay.
- Click OK to confirm.
Windows will now install the necessary files. This process may take a few minutes.
Step 4: Restart Your Computer
Once the installation is complete, restart your computer to ensure the changes take effect.
Verifying DirectPlay Installation

To confirm that DirectPlay is enabled:
- Open the Run dialog box by pressing Windows + R.
- Type
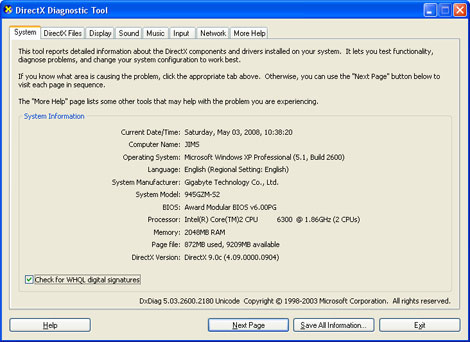
dxdiagand press Enter to open the DirectX Diagnostic Tool. - Navigate to the System or Input tab and look for DirectPlay-related entries.
If you see DirectPlay listed, it’s successfully installed and ready to use.
Troubleshooting Common Issues
If you encounter problems while enabling DirectPlay or running older games, try the following solutions:
1. Run the Game in Compatibility Mode
- Right-click the game’s shortcut or executable file.
- Select Properties.
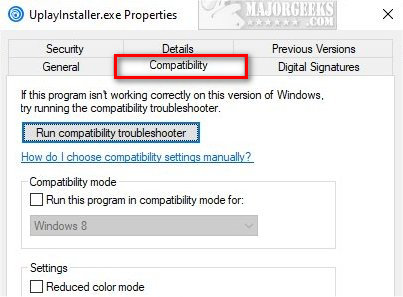
- Go to the Compatibility tab.
- Check Run this program in compatibility mode for: and select an older version of Windows (e.g., Windows XP or Windows 7).
- Click Apply and OK.
2. Disable Antivirus Software Temporarily
Some antivirus programs may block DirectPlay or older games. Temporarily disable your antivirus software and check if the issue resolves. Remember to re-enable it afterward.
3. Update Graphics and Network Drivers
Ensure your graphics and network drivers are up to date. Visit the manufacturer’s website to download and install the latest versions.
4. Run the Game as Administrator

- Right-click the game’s shortcut.
- Select Run as administrator.
This can bypass permission-related issues that might interfere with DirectPlay.
Why Use DirectPlay in 2024?
While modern APIs have replaced DirectPlay, many classic games from the early 2000s or late 1990s depend on it to run properly. Enabling DirectPlay ensures compatibility with these nostalgic titles, allowing you to relive old gaming experiences.
Conclusion
Enabling DirectPlay on Windows 10 is straightforward and can help you run older games and applications smoothly. Follow the steps outlined above to activate it and troubleshoot any related issues. Enjoy your retro gaming adventures with full functionality!
