How to Check Your Hard Drive Speed on Windows 11/10

Testing the speed of your hard drive is essential to ensure that your system is performing optimally. Whether you’re using an HDD, SSD, or an external drive, knowing the read and write speeds can help diagnose performance issues and determine if it’s time for an upgrade. In this guide, we’ll walk you through the process of testing your hard drive speed on Windows 11/10 using built-in tools and third-party software.
1. Why Test Your Hard Drive Speed?
Understanding your hard drive speed is crucial for several reasons:
- Performance Monitoring: Regular speed checks help monitor your drive’s performance over time.
- Troubleshooting: Identifying performance bottlenecks can help troubleshoot slow system speeds or loading times.
- Upgrade Decisions: Speed tests can inform whether an upgrade to an SSD or a faster HDD is necessary.
2. Using Windows Task Manager to Check Disk Speed

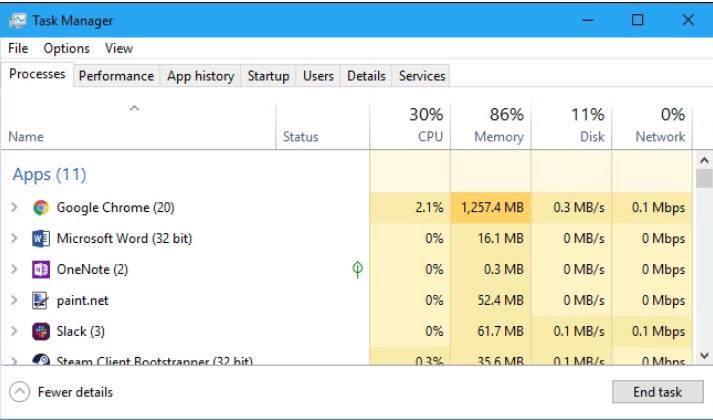
Windows 11/10 includes basic disk speed monitoring through the Task Manager.
Steps to Check Disk Speed Using Task Manager:
- Open Task Manager:
- Right-click on the taskbar and select Task Manager, or press Ctrl + Shift + Esc.
- Navigate to the Performance Tab:
- Click on the Performance tab, then select Disk from the left sidebar. Here, you’ll see live data on disk activity, including read and write speeds.
- Analyze Disk Performance:
- While this provides a basic overview of current disk activity, it doesn’t give precise speed metrics. For more detailed results, use a dedicated tool.
3. Testing Hard Drive Speed with CrystalDiskMark

CrystalDiskMark is a popular, free tool that provides detailed read and write speed measurements for your drives.
Steps to Use CrystalDiskMark:
- Download CrystalDiskMark:
- Visit the CrystalDiskMark official website and download the latest version compatible with your system.
- Install CrystalDiskMark:
- Run the installer and follow the on-screen instructions to complete the installation.
- Run a Speed Test:
- Launch CrystalDiskMark and select the drive you want to test from the dropdown menu.
- Start the Test:
- Click on the All button to run a comprehensive test that includes Sequential (SEQ) and Random (RND) read and write speeds.
- Sequential Read/Write: Tests the speed of reading and writing large contiguous blocks of data.
- Random Read/Write: Tests the speed of reading and writing small, scattered blocks of data, which is crucial for real-world performance.
- Review the Results:
- Once the test completes, the results will display the read and write speeds in MB/s. These results can be used to compare with the specifications of your drive.
4. Using Windows PowerShell for Disk Speed Test

For a more technical approach, Windows PowerShell can also be used to test hard drive speed.
Steps to Use PowerShell:
- Open PowerShell:
- Search for PowerShell in the Start menu, right-click, and select Run as administrator.
- Run the Disk Speed Test Command:
- Enter the following command to test your drive speed:
powershell
winsat disk -drive c
- Replace
cwith the letter of the drive you want to test. This command runs the Windows System Assessment Tool (WinSAT) to measure the disk performance.
- Enter the following command to test your drive speed:
- Analyze the Results:
- PowerShell will output the results, showing the sequential read and write speeds. This method provides a quick look at your drive’s performance without installing additional software.
5. Testing Speed with ATTO Disk Benchmark
ATTO Disk Benchmark is another reliable tool used to measure disk speed performance.
Steps to Use ATTO Disk Benchmark:
- Download ATTO Disk Benchmark:
- Visit the ATTO official website and download the tool.
- Install and Open ATTO Disk Benchmark:
- Follow the installation instructions and open the tool after installation.
- Configure the Test:
- Select the drive you want to test. You can adjust the file size and test length based on your requirements.
- Start the Benchmark:
- Click the Start button to begin the test. ATTO will display read and write speeds in various block sizes, giving a comprehensive view of performance.
- Review the Benchmark Results:
- The results will display in a graph format, showing how your drive performs with different file sizes.
6. Troubleshooting Common Hard Drive Speed Issues
If your hard drive’s speed is slower than expected, consider these troubleshooting steps:
- Check for Fragmentation: For HDDs, disk fragmentation can significantly reduce performance. Use the built-in Defragment and Optimize Drives tool in Windows.
- Update Drivers: Ensure your disk drivers are up to date. You can update them via Device Manager or by visiting the manufacturer’s website.
- Check for Errors: Run chkdsk to check for disk errors that might be affecting performance. Use the command:
cmd
chkdsk c: /f
Replace
c:with your drive letter.
Conclusion
Testing your hard drive speed on Windows 11/10 is an essential step in maintaining system performance and ensuring your hardware is operating as expected. By using tools like CrystalDiskMark, ATTO Disk Benchmark, and built-in Windows utilities, you can gain valuable insights into your drive’s performance. Regular testing helps identify issues early, informs upgrade decisions, and ensures your system runs smoothly. Whether you’re dealing with sluggish performance or just curious about your hardware’s capabilities, these tests provide the data you need to keep your PC in top shape.
