Resolved: External Hard Drive Not Appearing on Mac
An external hard drive not showing up on your Mac can be frustrating, especially when you need quick access to important files. This issue can arise due to several reasons, including connectivity problems, disk format incompatibilities, or corrupted drives. Thankfully, there are several solutions to help you fix the problem and get your external drive working again.
In this guide, we will walk you through multiple troubleshooting steps to resolve the issue of an external hard drive not appearing on your Mac.
Common Causes of External Hard Drive Not Showing Up
Before diving into the solutions, it’s helpful to understand why your external hard drive might not be appearing:
- Connection Issues: A faulty USB cable or port can prevent the drive from being detected.
- Incorrect Format: The drive may not be formatted in a Mac-compatible format.
- Mounting Issues: The drive might be detected but not properly mounted.
- Corrupted File System: The drive could be corrupted, making it invisible to your Mac.
- System Preferences: External drives may be hidden from the Finder or desktop due to macOS settings.
Solution 1: Check USB Cable and Ports
The first step is to check the basic hardware components. A damaged USB cable or port can prevent the external hard drive from being recognized.
Steps to Check Connections:

- Try a different USB cable: Swap the current USB cable with a new or known-working one.
- Test another USB port: Plug the external drive into another USB port on your Mac.
- Check power supply: If your external hard drive requires external power, ensure the power cable is properly connected.
- If the drive is still not recognized, try connecting it to another computer to determine if the issue lies with the drive or your Mac.
Solution 2: Ensure the Drive is Properly Mounted
If the drive is not properly mounted, it may not appear in Finder or on the desktop, even though it is connected.
Steps to Mount an External Hard Drive:

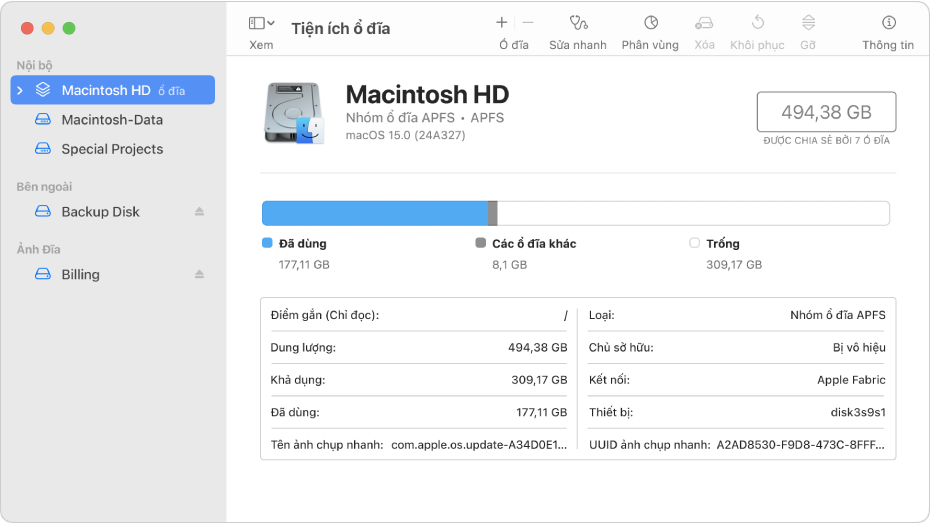
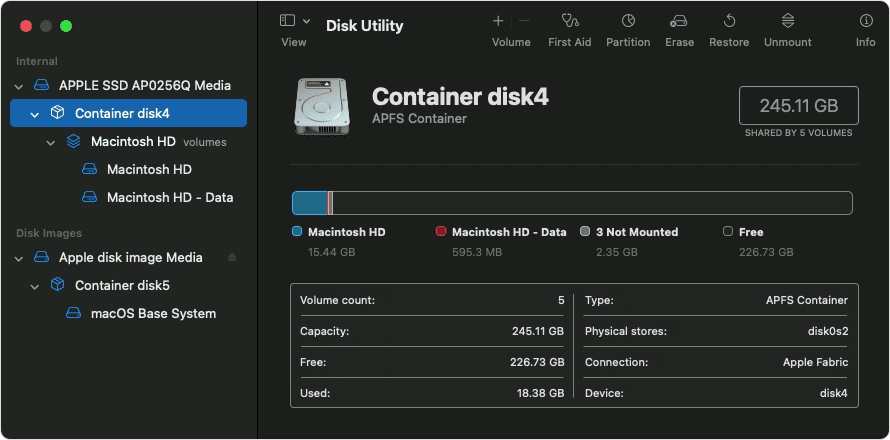
- Open Disk Utility from Applications > Utilities.
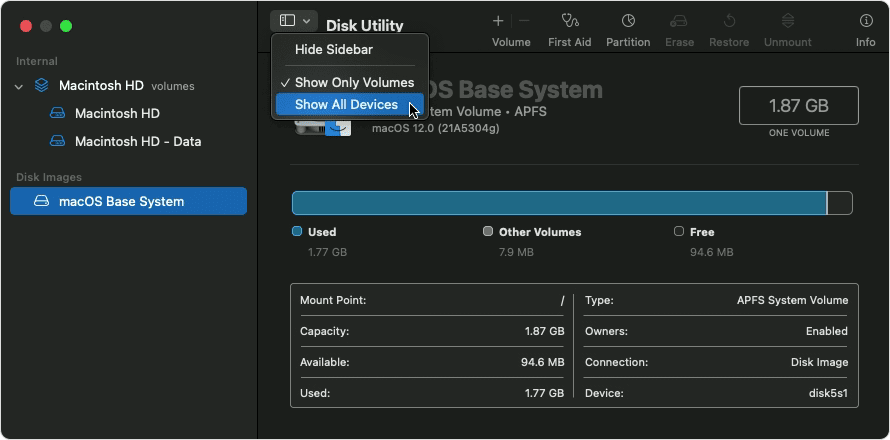
- In Disk Utility, you should see a list of drives on the left side. Locate your external hard drive.
- If the drive appears but is grayed out, it means the drive is not mounted.
- Select the drive and click the Mount button at the top of the window to mount the drive manually.
- Once the drive is mounted, it should appear in Finder and on your desktop.
Solution 3: Check Finder Preferences
Your Mac’s settings may be configured to hide external drives from Finder or the desktop. You can adjust Finder Preferences to display external drives.
Steps to Show External Drives in Finder:

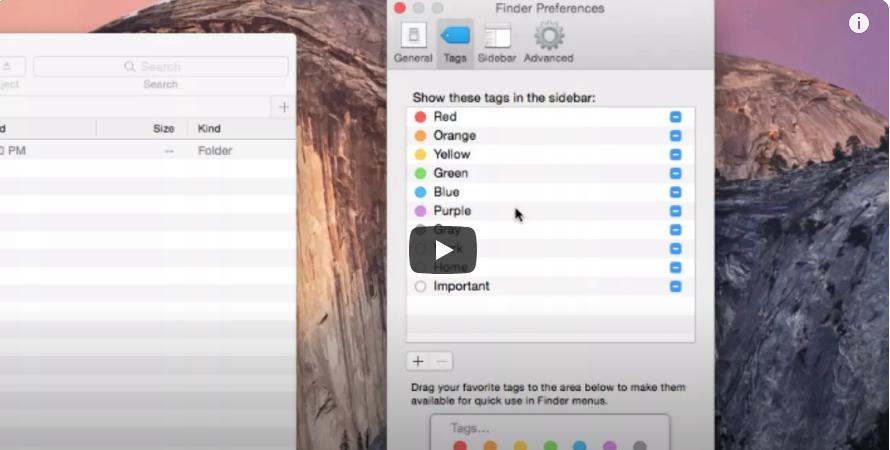
- Open Finder and go to Finder in the menu bar.
- Select Preferences.
- Under the General tab, ensure that External disks is checked under the “Show these items on the desktop” section.
- Switch to the Sidebar tab and make sure External disks is checked under the Devices section.
- Your external drive should now appear in Finder’s sidebar or on the desktop.
Solution 4: Format the External Drive
If your drive is in a format that macOS cannot read, you may need to format it to a Mac-compatible format like exFAT or Mac OS Extended (Journaled). Be aware that formatting the drive will erase all data on it, so make sure to back up important files beforehand.
Steps to Format an External Drive on Mac:

- Open Disk Utility from Applications > Utilities.
- In the list of drives on the left, select your external hard drive.
- Click the Erase button at the top of the window.
- Choose a format from the drop-down menu:
- Mac OS Extended (Journaled) for exclusive Mac use.
- exFAT for cross-platform compatibility between Mac and Windows.
- Name the drive and click Erase to format it.
Solution 5: Repair the External Drive with First Aid
If the drive is detected but appears corrupted, you can use Disk Utility’s First Aid feature to repair the drive.
Steps to Run First Aid:
- Open Disk Utility from Applications > Utilities.
- Select your external hard drive from the list on the left.
- Click the First Aid button at the top of the window.
- Confirm by clicking Run. Disk Utility will scan the drive for errors and attempt to repair them.
- Once the process is complete, try accessing the external drive again.
Solution 6: Reset NVRAM/PRAM
Resetting the NVRAM/PRAM can resolve issues related to hardware settings, including external drives not showing up.
Steps to Reset NVRAM/PRAM:

- Shut down your Mac.
- Press the Power button, then immediately press and hold
Option + Command + P + R. - Keep holding the keys for about 20 seconds, then release them.
- Your Mac will restart, and the NVRAM/PRAM will be reset.
Conclusion
When your external hard drive is not showing up on your Mac, it can be due to various causes, including connectivity issues, mounting problems, or corrupted drives. By following the steps outlined in this guide—such as checking connections, mounting the drive, adjusting Finder preferences, formatting the drive, or repairing it using Disk Utility—you should be able to resolve the issue.
If none of these solutions work, the drive may have a hardware failure, and you may need to consult a professional or consider data recovery services. Always remember to back up important files to avoid data loss in the future.
