How to Fix Wi-Fi Issues After a Windows 10 Update
If your Wi-Fi stops working after updating Windows 10, it can be quite frustrating. This issue is often caused by driver incompatibility, settings changes, or misconfigured network adapters. Fortunately, there are several troubleshooting steps you can take to get your Wi-Fi back up and running smoothly.
In this guide, we will walk you through the steps to fix Wi-Fi issues that occur after a Windows 10 update.
Common Causes of Wi-Fi Issues After a Windows 10 Update
Before diving into the solutions, it’s important to understand the common causes of this issue:
- Outdated or incompatible network drivers: A Windows update may install incompatible drivers for your Wi-Fi adapter.
- Disabled Wi-Fi adapter: The update may have turned off or disabled the Wi-Fi adapter in your device.
- Changed network settings: Network configurations may get reset after the update.
- Antivirus or firewall interference: Sometimes, security software interferes with network connections after an update.
Fix 1: Update or Reinstall Wi-Fi Drivers
An outdated or incompatible Wi-Fi driver is one of the most common reasons for Wi-Fi problems after a Windows update.
Steps to Update or Reinstall Wi-Fi Drivers:
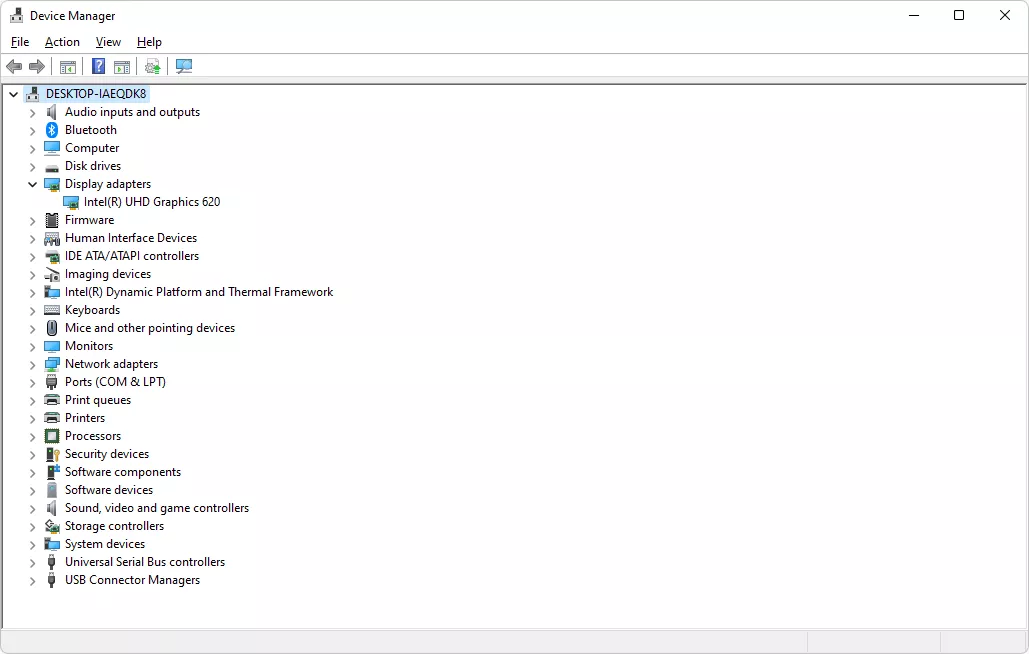
- Open Device Manager:
- Press
Windows + Xand select Device Manager from the list.
- Press
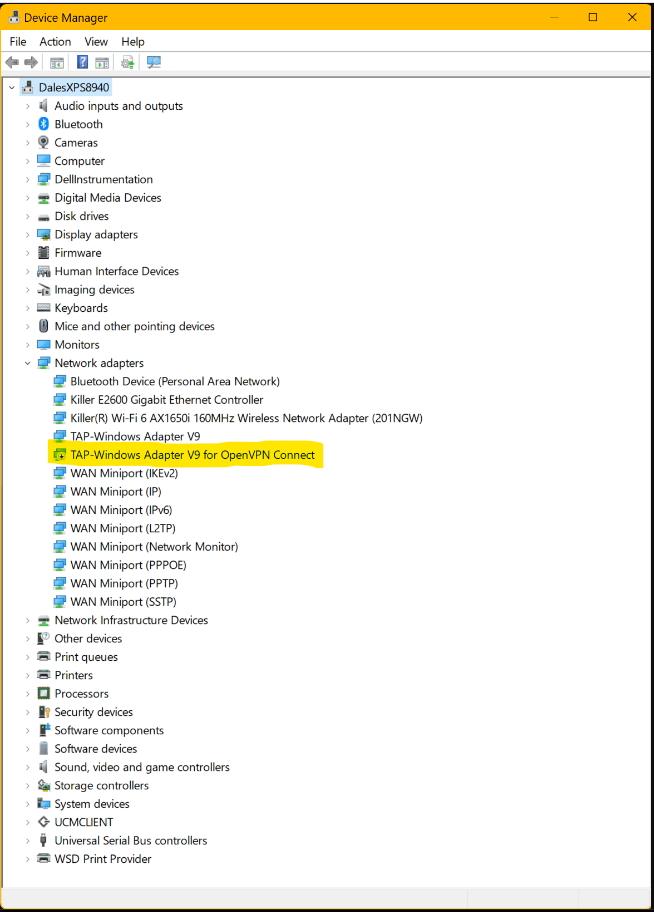
- Locate the Network Adapters Section:
- Expand the Network adapters section and find your Wi-Fi adapter (it might be named something like Intel Wireless or Realtek Wi-Fi Adapter).
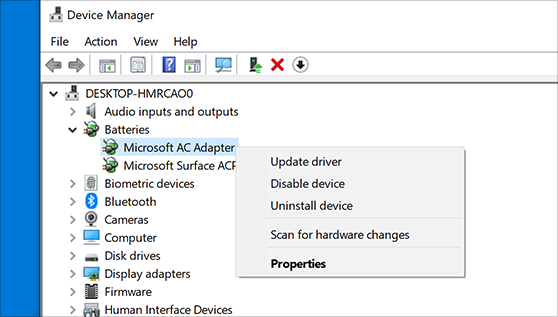
- Update or Reinstall the Driver:
- Right-click on your Wi-Fi adapter and choose Update driver.
- Select Search automatically for updated driver software to allow Windows to find and install the latest drivers.
If no update is found, you can choose Uninstall device to remove the driver, then restart your computer. Windows will reinstall the driver automatically upon reboot.
- Restart Your Computer:
- Once the driver is updated or reinstalled, restart your computer and check if the Wi-Fi issue is resolved.
Fix 2: Enable Wi-Fi Adapter in Device Manager
Sometimes, the Wi-Fi adapter might be disabled after a Windows update. Enabling the adapter should fix the issue.
Steps to Enable Wi-Fi Adapter:
- Open Device Manager:
- Press
Windows + Xand click Device Manager.
- Press
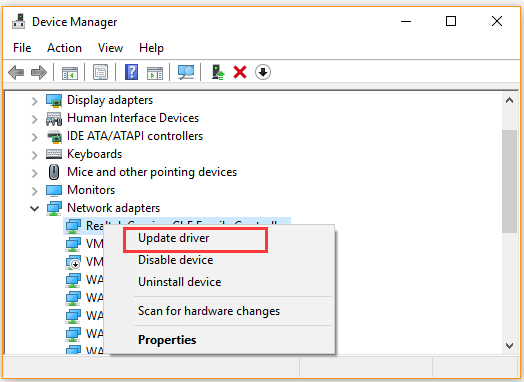
- Find Your Wi-Fi Adapter:
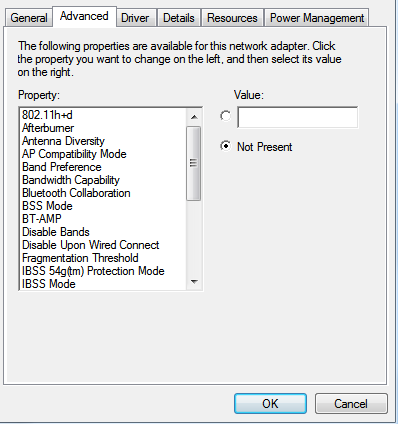
- In the Network adapters section, find your Wi-Fi adapter. If the adapter is disabled, it will have a downward arrow next to it.
- Enable the Adapter:
- Right-click on the Wi-Fi adapter and choose Enable device.
- Restart Your Computer:
- After enabling the adapter, restart your PC and test the Wi-Fi connection.
Fix 3: Run Network Troubleshooter
Windows has a built-in Network Troubleshooter that can automatically detect and fix common network issues.
Steps to Run the Network Troubleshooter:
- Open Windows Settings:
- Press
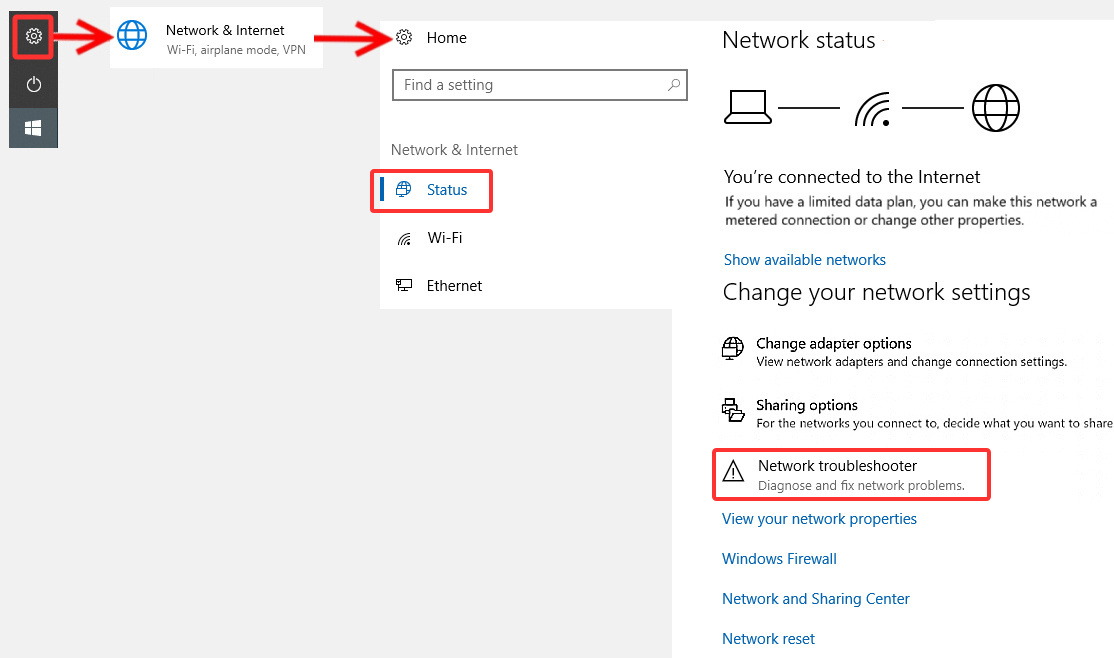
Windows + Ito open Settings and navigate to Network & Internet.
- Press
- Run the Troubleshooter:
- In the Status section, click on Network troubleshooter under the Advanced network settings.
- Follow the Instructions:
- The troubleshooter will scan for network issues and offer possible fixes. Follow the on-screen instructions to apply the solutions.
Fix 4: Reset Network Settings
Resetting network settings will clear any configurations that might have been affected by the update.
Steps to Reset Network Settings:
- Open Network Settings:
- Press
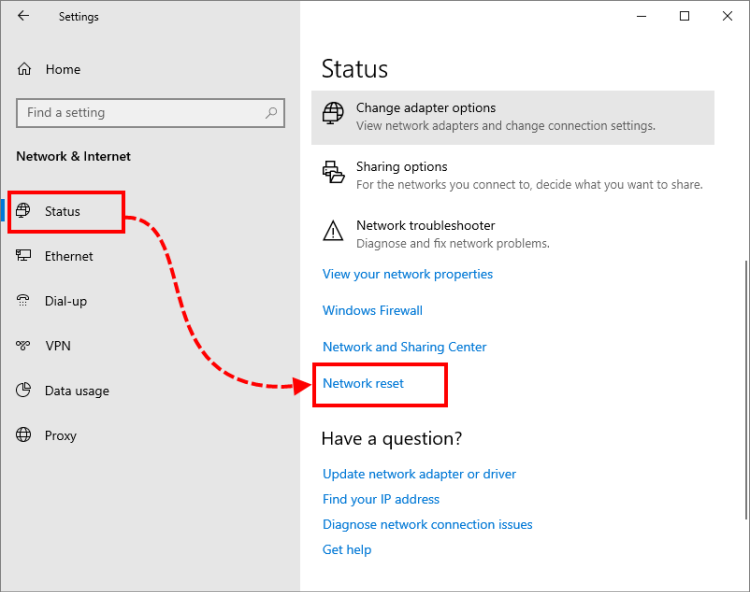
Windows + Iand go to Network & Internet > Status.
- Press
- Choose Network Reset:
- Scroll down and click Network reset.
- Confirm Network Reset:
- Click Reset now to reset all network settings. This will reinstall network adapters and reset all network settings to default.
- Restart Your Computer:
- After the reset, restart your PC and reconnect to your Wi-Fi network.
Fix 5: Disable Power Saving Mode for Wi-Fi Adapter
Windows may turn off your Wi-Fi adapter to save power, which can cause connectivity issues after an update. Disabling this feature can resolve the problem.
Steps to Disable Power Saving Mode for Wi-Fi Adapter:
- Open Device Manager:
- Press
Windows + Xand select Device Manager.
- Press
- Go to Wi-Fi Adapter Properties:
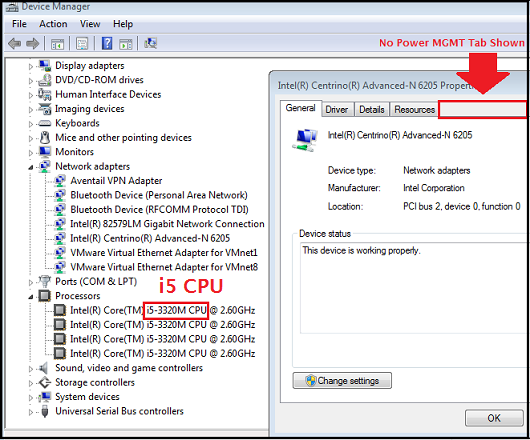
- In the Network adapters section, right-click on your Wi-Fi adapter and select Properties.
- Disable Power Saving:
- Go to the Power Management tab and uncheck Allow the computer to turn off this device to save power.
- Apply Changes:
- Click OK and restart your computer to check if the Wi-Fi issue is fixed.
Fix 6: Uninstall Recent Windows Updates
If the Wi-Fi issue started immediately after a recent Windows update, you can try uninstalling the update to see if it resolves the problem.
Steps to Uninstall Recent Windows Updates:
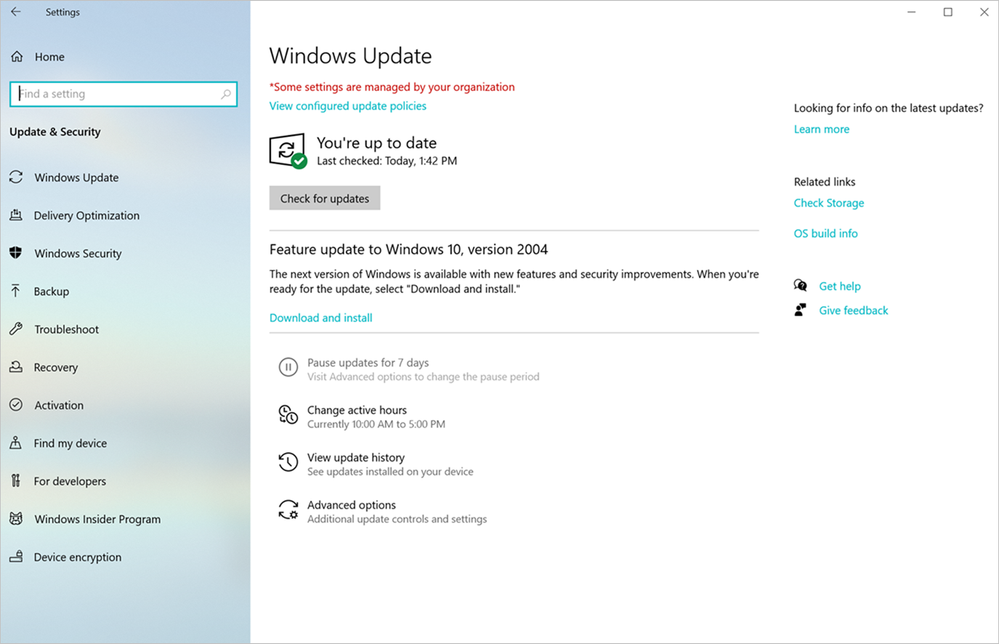
- Open Settings:
- Press
Windows + Iand go to Update & Security > Windows Update.
- Press
- View Update History:
- Click on View update history, then select Uninstall updates.
- Uninstall the Latest Update:
- Find the most recent update, select it, and click Uninstall.
- Restart Your Computer:
- After uninstalling the update, restart your computer and check if the Wi-Fi problem is resolved.
Conclusion
Wi-Fi not working after updating Windows 10 can be caused by various factors, from driver issues to network settings changes. By following the steps in this guide, you should be able to troubleshoot and fix the problem effectively. Whether it’s updating drivers, resetting network settings, or running the network troubleshooter, one of these solutions should restore your Wi-Fi connection.
If the issue persists, consider contacting your computer’s manufacturer or technical support for further assistance.
