Exporting Specific Columns from Excel to CSV: A Detailed Tutorial

CSV (Comma Separated Values) is a widely used file format for storing tabular data. It’s a simple, universal format that can be easily imported into various applications and databases. In Excel, you can easily save selected columns as CSV, allowing you to extract and share specific data sets efficiently.
Why Save Selected Columns as CSV?
- Data Sharing: Easily share specific data subsets with colleagues, clients, or other applications.
- Data Transfer: Transfer data between different software programs or databases.
- Data Analysis: Isolate specific columns for further analysis or manipulation in other tools.
- Data Backup: Create backups of important data in a simple and portable format.
Methods to Save Selected Columns as CSV
Method 1: Copy and Paste (Simple but Limited)
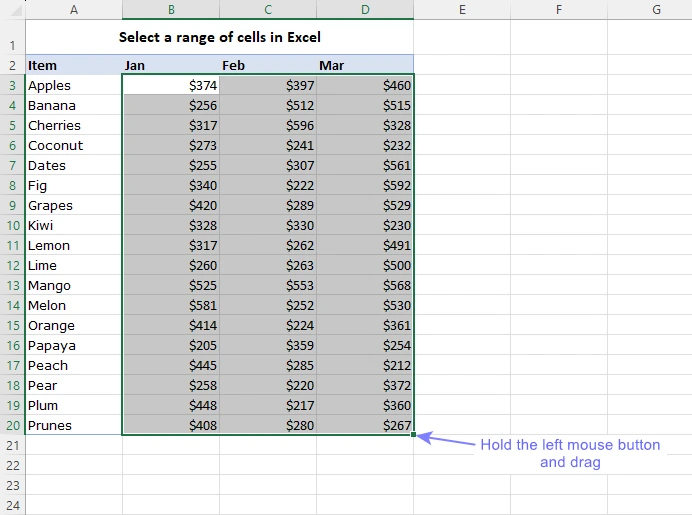
- Select Columns: Highlight the columns you want to save.

-
Copy: Press Ctrl+C (or Cmd+C on Mac) to copy the selected columns.
-
Open a New Workbook: Create a new Excel workbook.
-
Paste: Press Ctrl+V (or Cmd+V on Mac) to paste the copied columns into the new workbook.
-
Save as CSV: Go to “File” > “Save As” and choose “CSV (Comma delimited)” as the file type.

Method 2: Using Power Query (More Flexible)
-
Select Columns: Highlight the columns you want to save.
-
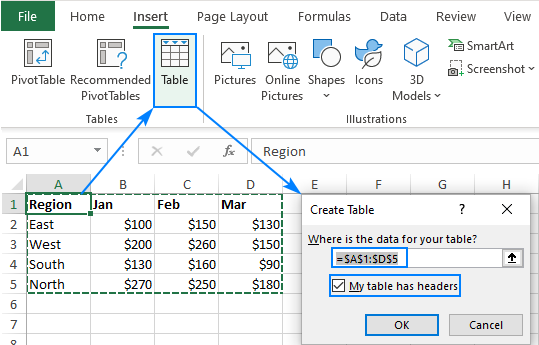
Create a Table: Go to the “Insert” tab and click “Table” to convert the selected data into a table.

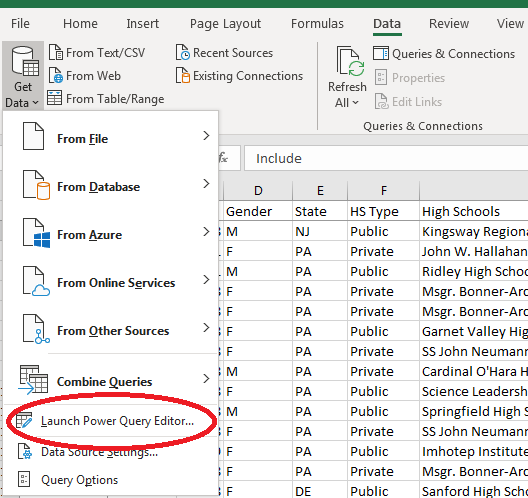
- Open Power Query Editor: Go to the “Data” tab and click “From Table/Range” to open the Power Query Editor.

-
Remove Other Columns: In the Power Query Editor, right-click on the column headers you want to keep and select “Remove Other Columns.”
-
Close & Load: Click “Close & Load” to create a new worksheet with only the selected columns.
-
Save as CSV: Go to “File” > “Save As” and choose “CSV (Comma delimited)” as the file type.
Important Considerations
- Delimiters: CSV files use commas to separate values. If your data contains commas within cells, consider using a different delimiter (e.g., semicolon) or enclosing the values in quotation marks.
- Encoding: Choose the appropriate encoding (e.g., UTF-8) to ensure compatibility with different systems and software.
- Headers: Decide whether you want to include the column headers in your CSV file.
Conclusion
Saving selected Excel columns as CSV is a simple yet powerful technique for data management and sharing. By mastering these methods, you can easily extract and manipulate specific data sets, making your workflow more efficient and productive.
Related articles
» How to Recover Unsaved Excel File: Step-by-Step Guide
» How to View Your Saved Passwords in Microsoft Edge
» Excel Formulas Not Working? Here’s How to Fix Them
