How to Modify the Default Font in Microsoft Word
Changing the default font in Microsoft Word allows you to personalize your documents with a style that suits you. Whether you’re working on professional reports, personal projects, or academic papers, adjusting the default font ensures a consistent look throughout your documents. This guide will walk you through the process of changing the default font in Microsoft Word for different versions.
Step 1: Open Microsoft Word
- Launch Microsoft Word by clicking on its icon in the Start menu or taskbar.
- Open a new blank document or any document you want to modify.

Step 2: Go to the Home Tab
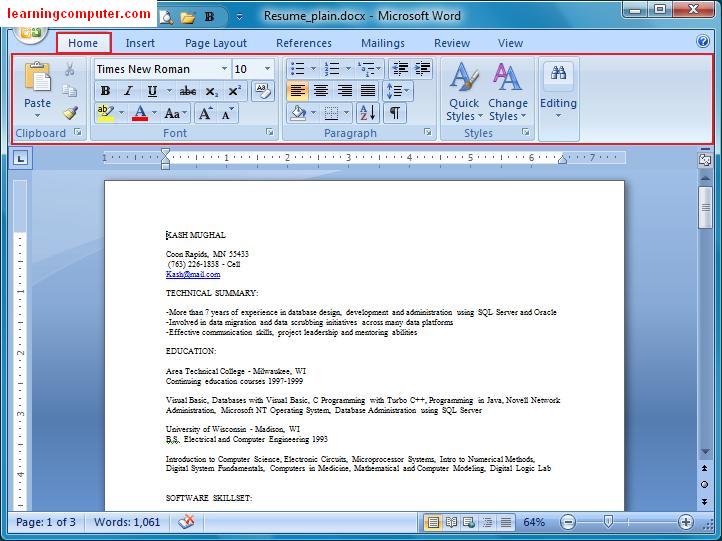
- In the Word interface, locate and click on the Home tab at the top of the window. This tab contains options for font formatting, including font type, size, and style.

Step 3: Open the Font Dialog Box
- In the Home tab, find the Font section, which displays the current font settings.
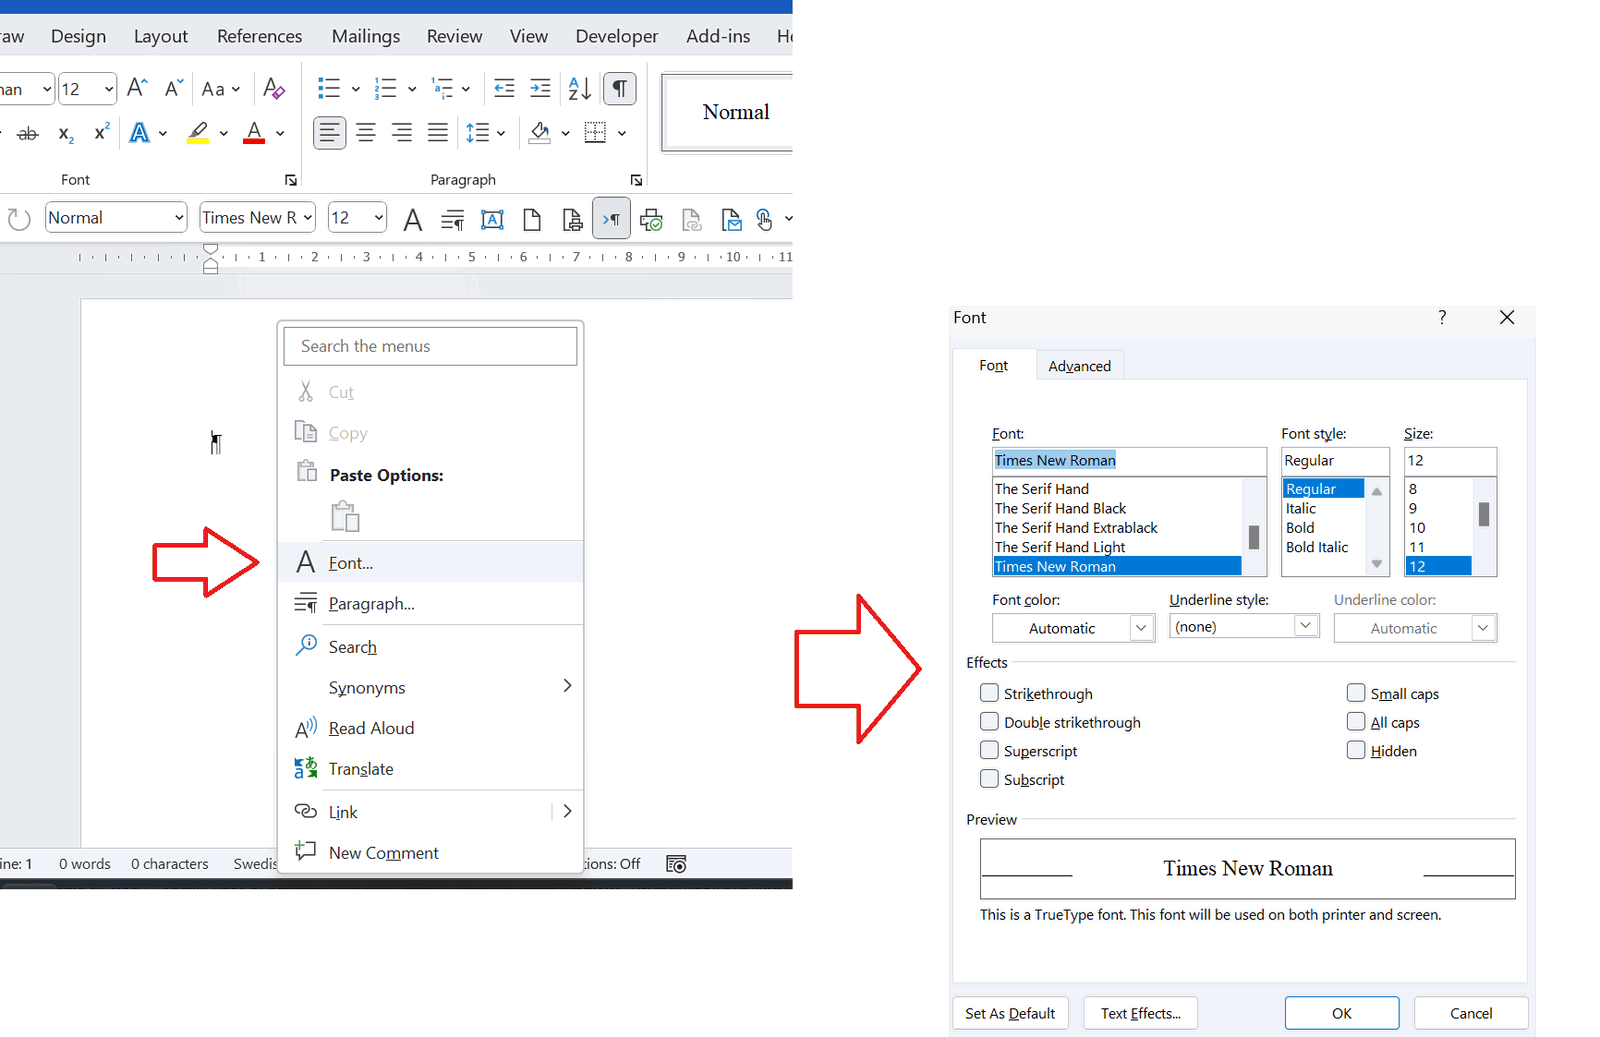
- Click the small arrow in the bottom-right corner of the Font section to open the Font Dialog Box. This arrow is often referred to as the “Font settings” button.

Step 4: Select Your Preferred Font
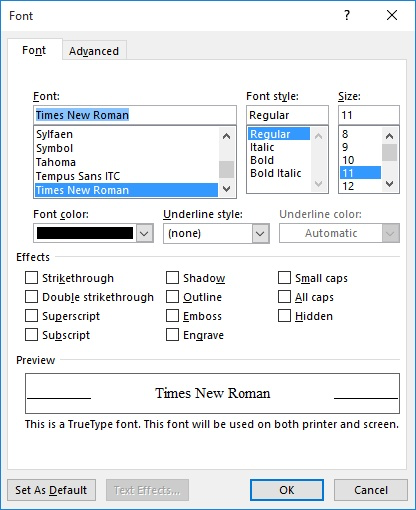
- In the Font Dialog Box, you will see various options like font style, size, and effects.
- From the Font dropdown menu, choose the font you want to set as the default. You can scroll through a list of available fonts and select the one that best suits your needs.
- Adjust the Font Size if necessary.
- You can also apply other settings such as Bold, Italic, or Underline, depending on your preference.

Step 5: Set as Default Font
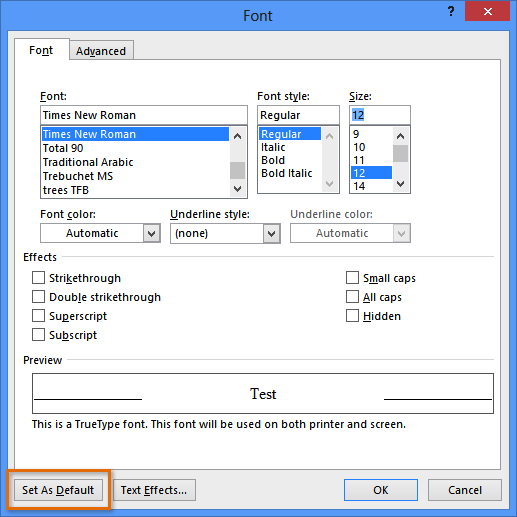
- Once you’ve selected your preferred font, look to the bottom of the Font Dialog Box.
- Click on Set As Default.
- A prompt will appear asking if you want to set this font as the default for all documents or just the current one. Choose All documents based on the Normal template to make this font the default for every new document you create.

Step 6: Confirm and Apply
- After selecting your preferred option, click OK.
- Your new font choice will now be applied to all new documents created in Microsoft Word.
Additional Tips for Changing Fonts in Word
Changing the Font for an Individual Document
If you want to change the font for a specific document rather than setting it as the default for all new documents:
- Simply highlight the text you wish to change.
- Use the Font section in the Home tab to adjust the font style and size.
Using Styles for Consistency
For even more consistency across your document, you can modify a Style (such as the Normal style) to apply the new font.
- In the Home tab, find the Styles section.
- Right-click on Normal or any other style you wish to change and select Modify.
- In the dialog box that appears, change the font settings to your preferred choices.
- Check New documents based on this template if you want this to apply to all future documents.
Troubleshooting Font Issues
Font Not Appearing
If your selected font doesn’t appear as expected, ensure that the font is installed on your system. If it’s a downloaded font, make sure you’ve properly installed it on your computer through the Fonts folder in the Control Panel.
Font Compatibility
If you’re sharing documents with others, keep in mind that the recipient may not have the same font installed. In such cases, consider using widely available fonts like Arial, Calibri, or Times New Roman to ensure compatibility.
Conclusion
Changing the default font in Microsoft Word is an excellent way to personalize your documents and create a consistent style for all your work. By following the steps outlined in this guide, you can set the font that best suits your needs, whether it’s for business, school, or personal use. Adjusting the font will also save you time when creating new documents, as you won’t need to manually change the font each time.
