How to Customize the Taskbar in Windows 11
The Windows 11 Taskbar is a central part of the user experience, offering quick access to your most used apps and system tools. Unlike Windows 10, the taskbar in Windows 11 comes with a centered layout by default, and many of its settings are different. If you’re looking to customize your taskbar to suit your preferences, this guide will walk you through how to change the Windows 11 taskbar with step-by-step instructions.
From changing the position and size to adding or removing taskbar icons, we’ll cover everything you need to know to customize your Windows 11 taskbar.
How to Change the Position of the Taskbar Icons
By default, the taskbar icons are centered in Windows 11. However, you can move them back to the left, similar to the traditional layout in previous versions of Windows.
Steps to Move Taskbar Icons to the Left:
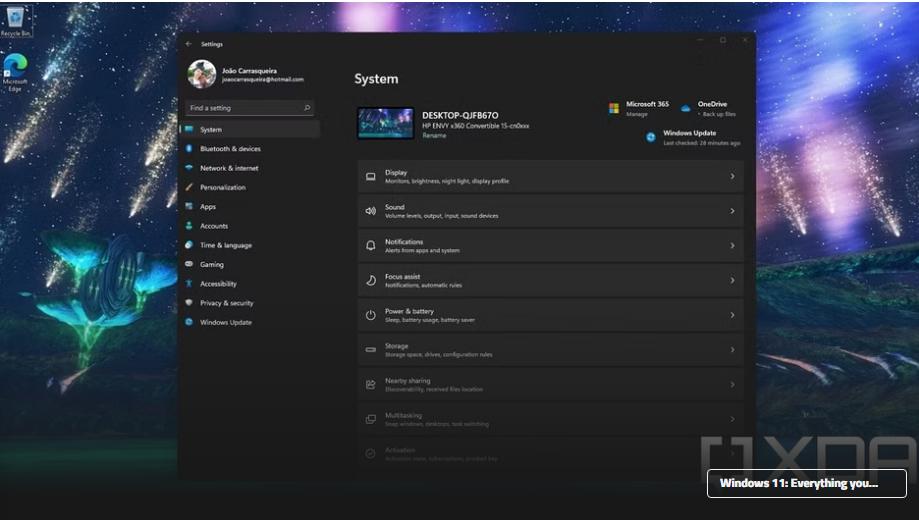
- Open Settings:
- Press
Windows + Ito open Settings.
- Press
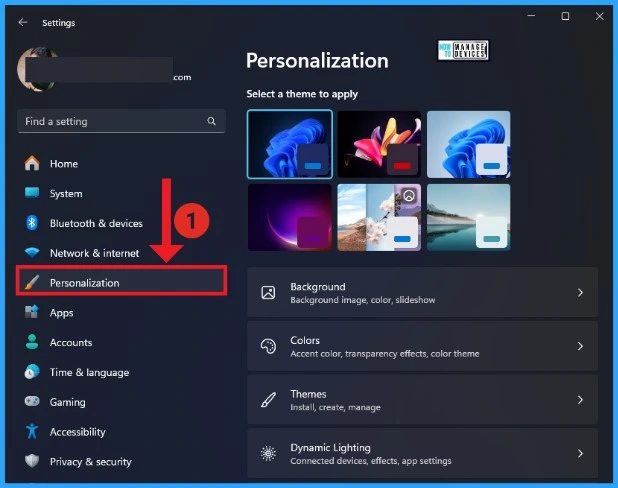
- Go to Personalization:
- In the Settings window, click on Personalization from the left-hand menu.
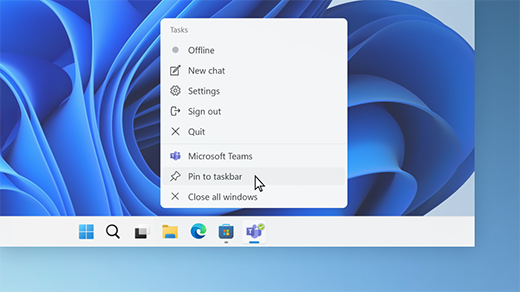
- Select Taskbar:
- Scroll down and select Taskbar from the list of options.
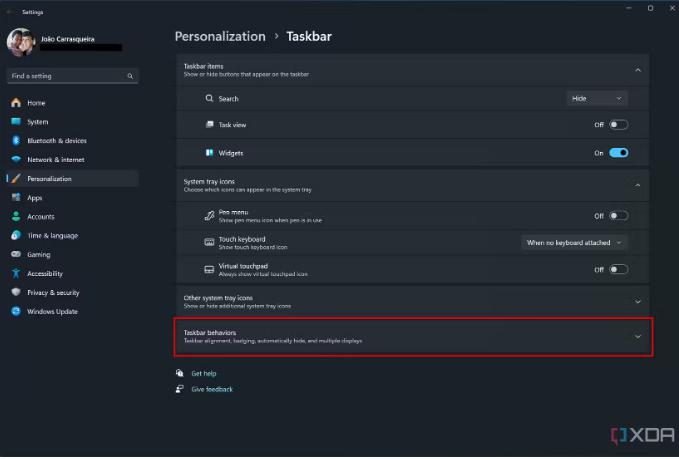
- Change Taskbar Behavior:
- In the taskbar settings, click on Taskbar behaviors to expand the section.
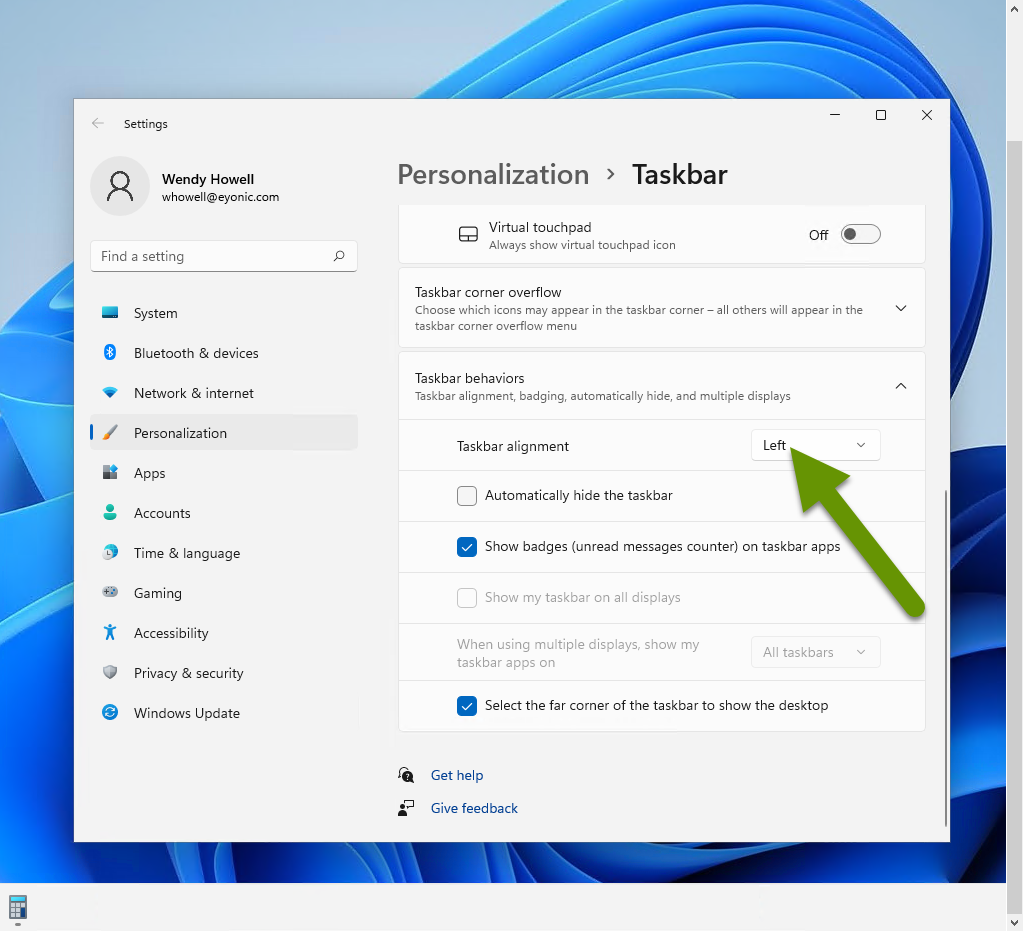
- Set Taskbar Alignment:
- Under Taskbar alignment, change the dropdown from Center to Left.
- Confirm the Changes:
- Your taskbar icons will instantly shift to the left side of the screen.
How to Change the Taskbar Size
Although Windows 11 doesn’t offer a built-in setting to adjust taskbar size, you can tweak the size through the Windows Registry Editor. This allows you to make the taskbar larger or smaller according to your preferences.
Steps to Change the Taskbar Size:
- Open Registry Editor:
- Press
Windows + R, type regedit, and press Enter to open the Registry Editor.
- Press
- Navigate to the Taskbar Registry Key:
- In the Registry Editor, navigate to the following path:
HKEY_CURRENT_USER\Software\Microsoft\Windows\CurrentVersion\Explorer\Advanced
- In the Registry Editor, navigate to the following path:
- Create a New DWORD Value:
- Right-click in the Advanced folder, select New, and then choose DWORD (32-bit) Value. Name the new value TaskbarSi.
- Set TaskbarSi Value:
- Double-click on TaskbarSi and set its value to one of the following:
- 0 for small taskbar size
- 1 for the default size
- 2 for a large taskbar size
- Double-click on TaskbarSi and set its value to one of the following:
- Restart Your Computer:
- After setting the value, close the Registry Editor and restart your PC to apply the changes.
How to Add or Remove Taskbar Icons
Windows 11 offers a range of system icons, such as Search, Task View, and Widgets, that you can choose to show or hide on the taskbar. You can also add or remove icons for pinned apps.
Steps to Add or Remove Taskbar Icons:
- Open Taskbar Settings:
- Right-click on the Taskbar and select Taskbar settings.
- Toggle System Icons:
- In the Taskbar settings, toggle on or off system icons like Search, Task View, Widgets, and Chat to show or hide them.
- Add App Icons:
- To pin an app to the taskbar, open the Start menu, right-click on the app, and select Pin to taskbar.
- Remove App Icons:
- To remove an icon, right-click on the pinned app in the taskbar and select Unpin from taskbar.
How to Change Taskbar Color and Transparency
Windows 11 allows you to customize the taskbar’s appearance by changing its color and enabling transparency effects.
Steps to Change Taskbar Color:
- Open Personalization Settings:
- Press
Windows + Ito open Settings, then click on Personalization.
- Press
- Select Colors:
- Under Personalization, click on Colors.
- Enable Dark or Light Mode:
- Choose your desired mode from Light, Dark, or Custom in the Choose your color dropdown.
- Select Accent Color:
- Scroll down to Accent color and select a custom color or choose from the suggested colors to change the taskbar’s color.
- Apply Accent Color to Taskbar:
- Toggle on Show accent color on Start and taskbar to apply the selected color to your taskbar.
Steps to Enable Taskbar Transparency:
- Open Transparency Settings:
- In the Colors menu under Personalization, scroll down to Transparency effects.
- Enable Transparency:
- Toggle the Transparency effects option to make your taskbar transparent.
How to Change the Taskbar Alignment and Overflow Settings
Windows 11 also gives users the option to change how apps behave in the taskbar, including alignment and overflow settings for when you have too many open apps.
Steps to Customize Taskbar Alignment and Overflow:
- Open Taskbar Settings:
- Right-click on the taskbar and select Taskbar settings.
- Change Alignment:
- Under Taskbar behaviors, you can select Center or Left to align your icons accordingly.
- Enable Taskbar Overflow:
- Scroll to Taskbar corner overflow to manage which icons appear in the system tray or overflow when there are too many apps open.
Conclusion
Customizing your Windows 11 taskbar gives you control over how your desktop looks and functions. Whether you’re adjusting the position, changing the size, tweaking the color, or enabling transparency, there are numerous ways to personalize the taskbar to suit your workflow and aesthetic preferences.
By following the steps outlined in this guide, you’ll have a customized taskbar that works for you, providing quick access to your favorite apps and a more efficient user experience.
