Building a Custom List in Excel: A Comprehensive Guide
Excel’s custom lists are a powerful feature that can save you time and effort when working with repetitive data. These lists allow you to define your own sorting orders or autofill sequences, going beyond the default options like days of the week or months of the year.
Why Create Custom Lists in Excel?
- Streamline Sorting: Sort data according to your specific categories or preferences.
- Simplify Data Entry: Autofill cells with items from your custom list, eliminating manual input.
- Enhance Consistency: Ensure consistent data entry and avoid errors by using predefined lists.
- Improve Productivity: Automate repetitive tasks and save valuable time.
How to Create a Custom List in Excel
-
- Prepare Your List:
- Create a list of items in the order you want them to appear in your custom list.
- Each item should be in a separate cell, either in a column or a row.
- Prepare Your List:
-
- Access Excel Options:
- Click on the “File” tab in the top-left corner.
- Select “Options” from the left-hand menu.
- Access Excel Options:
-
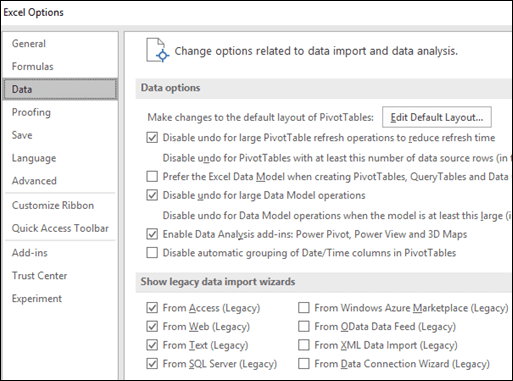
- Navigate to Advanced Options:
- In the Excel Options window, click on the “Advanced” tab.
- Scroll down to the “General” section.
- Navigate to Advanced Options:
-
- Edit Custom Lists:
- Click on the “Edit Custom Lists” button.
- A new window will appear.
- Edit Custom Lists:
-
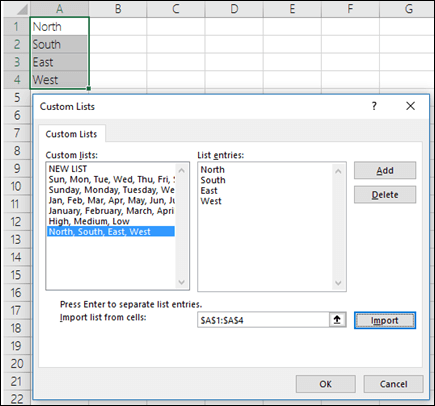
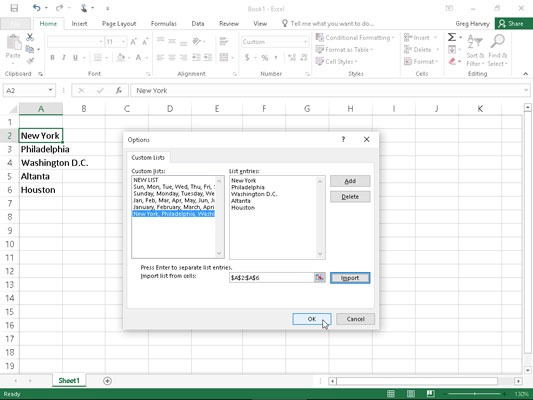
- Create Your Custom List:
- Click on the “New List” button.
- In the “List entries” box, enter the items from your list one by one, pressing “Enter” after each item.
- Alternatively, you can click on the “Import” button to select the range of cells containing your list.
- Create Your Custom List:
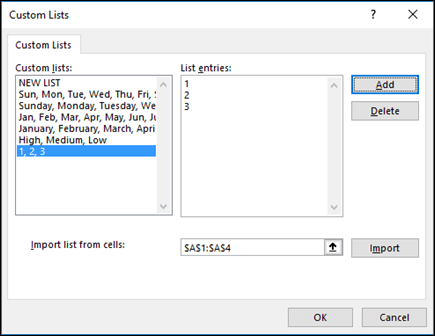
- Save and Apply:
- Click “Add” to add your new custom list.
- Click “OK” to close the Custom Lists window.
- Click “OK” again to close the Excel Options window.
Using Your Custom List
-
- Sorting:
- Select the data you want to sort.
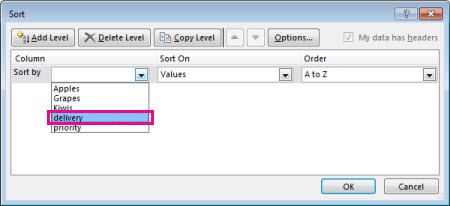
- Go to the “Data” tab and click on “Sort.”
- In the Sort dialog box, choose your custom list from the “Order” dropdown menu.
- Sorting:
-
- Autofill:
- Enter the first item from your custom list in a cell.
- Drag the fill handle (the small square at the bottom right corner of the cell) down or across to autofill the rest of the cells with the remaining items from your list.
- Autofill:
Tips for Creating and Using Custom Lists
- Keep It Organized: Maintain separate lists for different categories to avoid confusion.
- Update Regularly: Update your custom lists as needed to reflect changes in your data.
- Share with Others: You can share your custom lists with other Excel users by copying and pasting the list entries.
By mastering custom lists in Excel, you can streamline your workflow, improve data accuracy, and boost productivity. Whether you’re working with simple lists or complex data sets, this feature can be a valuable asset in your Excel toolkit.
Keep Learning
» Create Reports in Excel: A Guide for Effective Data Analysis
» Step-by-Step Tutorial: How to Create Drop Down List in Excel
» How to Create a Pie Chart Excel: Step-by-Step Guide
» How to Add a Drop Down List in Excel – Step-by-Step Guide


