How to Create a New Document in Microsoft Word
Creating a Word document is one of the most basic yet powerful tasks you can perform with Microsoft Word. Whether you are writing an essay, creating a resume, or drafting a professional report, this guide will show you how to start a Word document from scratch.
This tutorial will walk you through each step in detail, complete with visuals to help you easily follow along.
Opening Microsoft Word
Step 1: Locate the Microsoft Word Application
- Click on the Start button (Windows logo) at the bottom-left corner of your screen.
- In the search bar, type Microsoft Word and click on the app when it appears in the results.
Alternatively, if you have a Word shortcut on your desktop or taskbar, click on it to open the program.
Step 2: Choose How You Want to Start
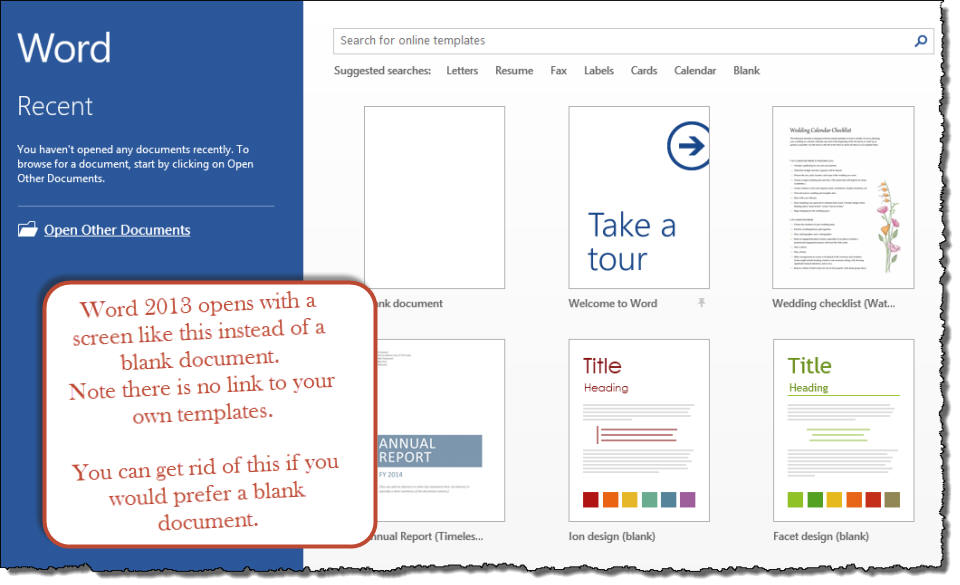
When Word launches, you’ll see the Start Screen, which presents several options:
- Blank Document: This is the most common choice for starting a new document.
- Templates: Select a template if you want a pre-designed layout for resumes, business letters, or other specific projects.
Click on Blank Document to begin writing your document from scratch.
Setting Up Your Document
Step 1: Adjust Margins and Orientation

- Go to the Layout tab in the ribbon at the top.
- Click on Margins to select pre-defined margin sizes or create custom margins.
- If needed, click Orientation to choose between Portrait and Landscape.
Step 2: Save Your Document
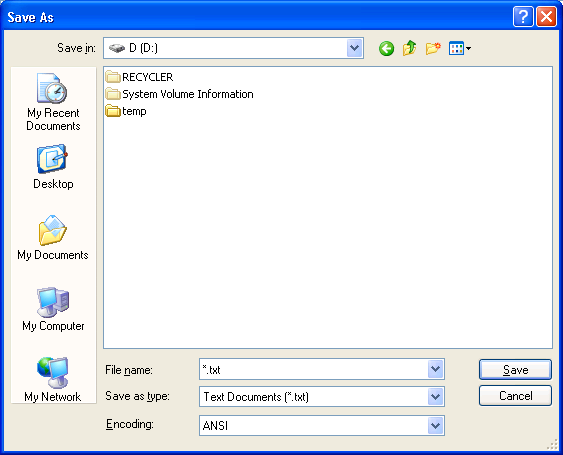
Before you proceed, save your work to avoid losing it.
- Click on File > Save As.
- Choose a location (e.g., your computer, OneDrive, or another cloud service).
- Enter a file name and click Save.
Adding Content
Step 1: Start Typing
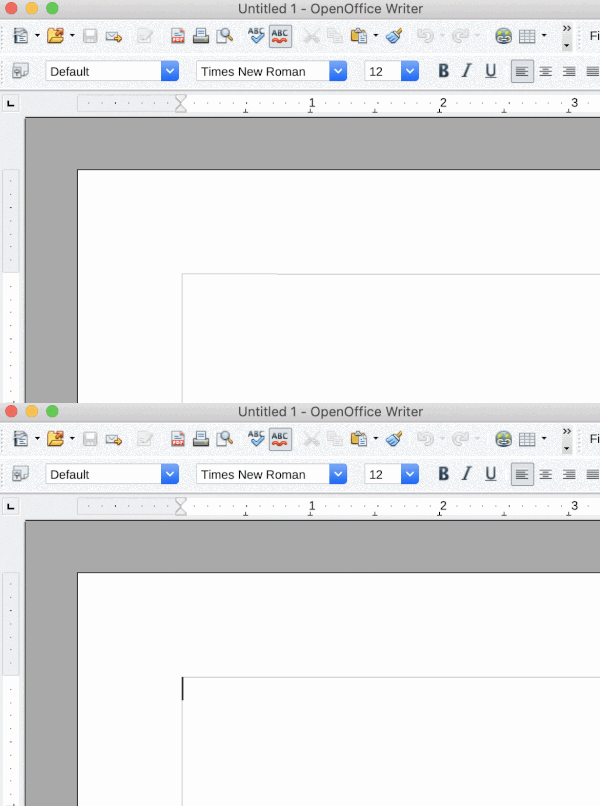
- Place your cursor on the blank page and begin typing.
- Use the Home tab to format your text. You can adjust the font, size, color, and alignment.
Step 2: Insert Elements
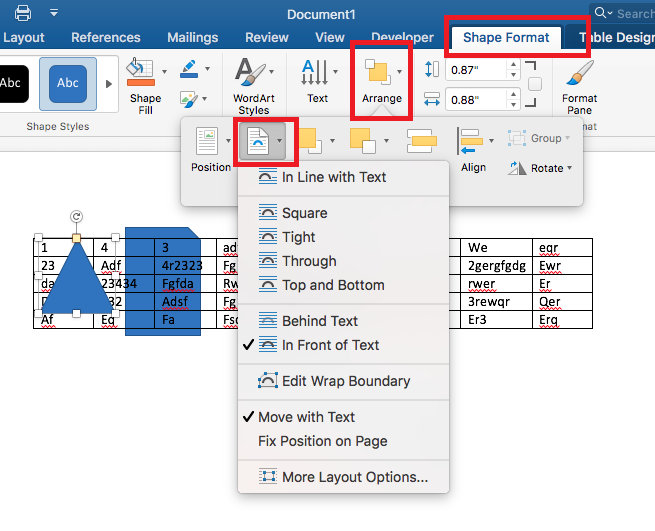
To enhance your document, you can add tables, images, or shapes:
- Insert Images: Go to the Insert tab and select Pictures to add images from your computer.
- Add Tables: Click on Table in the Insert tab, and choose the number of rows and columns.
Formatting Your Document
Step 1: Use Styles
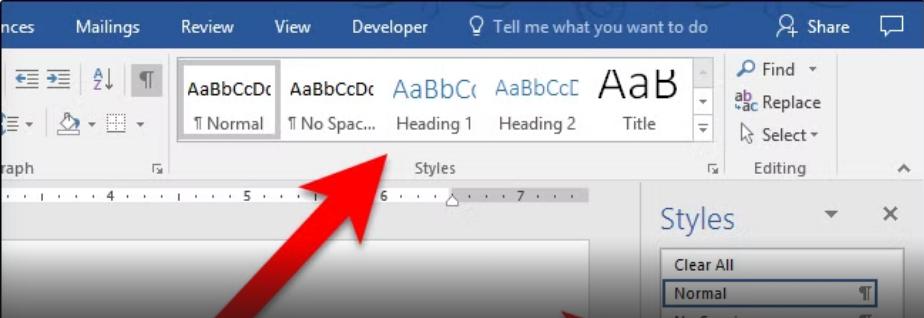
- On the Home tab, you’ll find the Styles section. Choose pre-defined styles such as Heading 1, Heading 2, or Normal to organize your text.
Step 2: Add Page Numbers
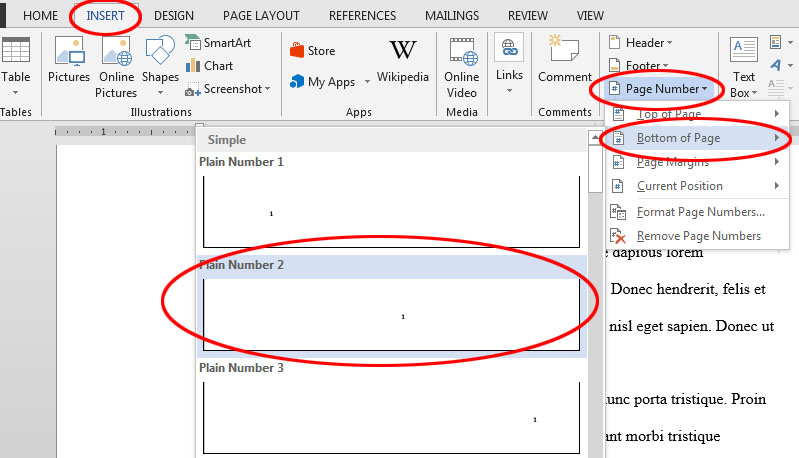
- Go to Insert > Page Number. Select a style and location for the page number (e.g., top right or bottom center).
Saving and Closing
Step 1: Save Your Work Regularly
- Use the keyboard shortcut Ctrl + S to save your document frequently.
Step 2: Exit Word
- When you’re done, click the X in the top-right corner of the Word window.
- If you haven’t saved the document, Word will prompt you to save it before exiting.
Tips for Getting Started
- Use Templates for Inspiration: If you’re unsure how to format your document, explore Word’s extensive library of templates.
- Experiment with Formatting Tools: Try different fonts, colors, and styles to make your document visually appealing.
- Save to the Cloud: If you’re working on multiple devices, save your document to OneDrive for easy access anywhere.
Conclusion
Starting a Word document is simple and intuitive, especially with the tools and features provided by Microsoft Word. By following the steps above, you can quickly create and format a professional-looking document for any purpose.
