How to Resolve Google Chrome Crashing Continuously on Windows 10
Google Chrome is one of the most popular web browsers, but it can occasionally encounter issues, including frequent crashes on Windows 10. This guide will help you troubleshoot and resolve this problem step-by-step, ensuring smoother performance.
Common Causes of Chrome Crashing
Before diving into fixes, understanding the common causes of Chrome crashing can help identify the solution:
- Outdated software: Chrome or Windows updates are not installed.
- Corrupted browser data: Cache, cookies, or settings causing instability.
- Extensions conflicts: Problematic extensions may lead to crashes.
- Hardware acceleration: This feature can sometimes cause performance issues.
Fix 1: Update Google Chrome
Keeping Chrome up to date ensures it has the latest bug fixes and performance improvements.
Steps to Update Chrome:
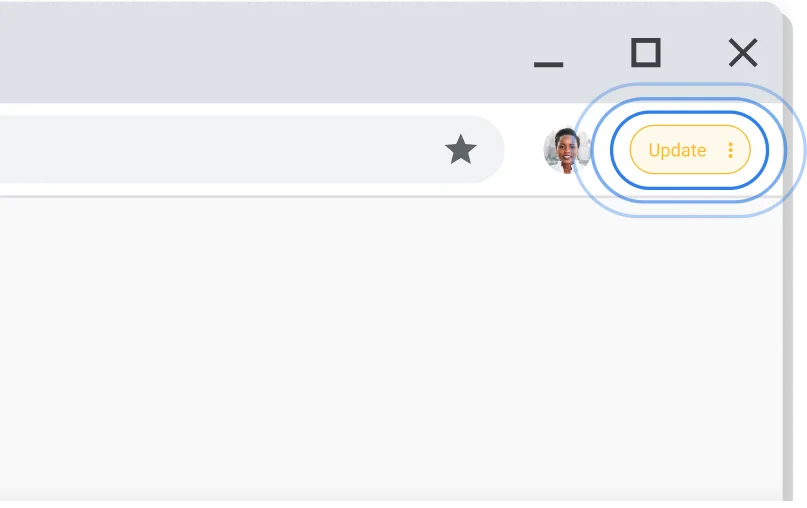
- Open Chrome and click on the three-dot menu in the top-right corner.
- Navigate to Help → About Google Chrome.
- Chrome will automatically check for updates and install them.
- Restart Chrome once the update completes.

Fix 2: Clear Cache and Cookies
Corrupted browsing data can cause Chrome to crash frequently.
Steps to Clear Cache and Cookies:
- Click on the three-dot menu and select Settings.
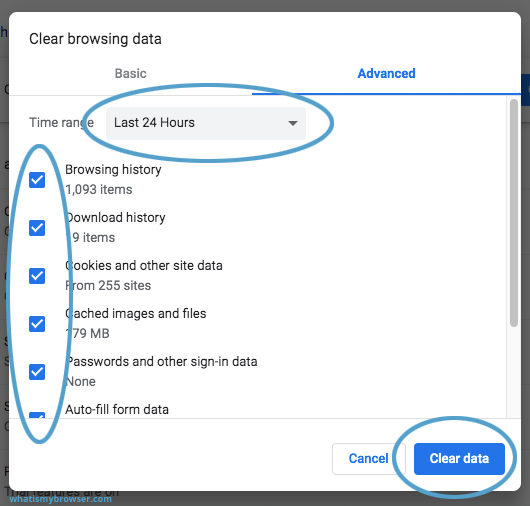
- Go to Privacy and Security → Clear Browsing Data.
- Choose All Time as the time range.
- Check the boxes for Cookies and other site data and Cached images and files.
- Click Clear Data.

Fix 3: Disable Extensions
Conflicting extensions can lead to browser instability.
Steps to Disable Extensions:
- Go to the three-dot menu → More tools → Extensions.
- Toggle off all extensions to disable them.
- Restart Chrome and check if the issue persists.
- Re-enable extensions one by one to identify the problematic one.

Fix 4: Disable Hardware Acceleration
Hardware acceleration can sometimes cause Chrome to crash, especially on older devices.
Steps to Disable Hardware Acceleration:
- Go to the three-dot menu → Settings.
- Scroll down to Advanced Settings.
- Under System, toggle off Use hardware acceleration when available.
- Restart Chrome.
Fix 5: Reset Chrome to Default Settings
If none of the above fixes work, resetting Chrome can resolve persistent issues.
Steps to Reset Chrome:
- Open Chrome and go to the three-dot menu → Settings.
- Scroll down to Advanced Settings → Reset and clean up.
- Select Restore settings to their original defaults and confirm.
Fix 6: Update Windows
An outdated version of Windows can cause compatibility issues with Chrome.
Steps to Update Windows:
- Press
Win + Ito open Settings. - Navigate to Update & Security → Windows Update.
- Click Check for Updates and install any available updates.
- Restart your PC.
Fix 7: Reinstall Google Chrome
If the issue persists, reinstalling Chrome might be necessary.
Steps to Reinstall Chrome:
- Press
Win + Ito open Settings → Apps. - Locate Google Chrome in the list, click Uninstall, and confirm.
- Download the latest version of Chrome from the official website.
- Install Chrome and sign back into your Google account.
Conclusion
Frequent crashes of Google Chrome on Windows 10 can be frustrating, but following these troubleshooting steps can help you identify and resolve the issue. Whether it’s updating Chrome, disabling extensions, or resetting the browser, these fixes cover most scenarios. Always ensure your browser and operating system are up to date for optimal performance.
