How to Resolve the “Cannot Connect Securely to This Website” Error in Microsoft Edge
The “Can’t Connect Securely to This Page” error is a common issue faced by users when browsing websites using Microsoft Edge. This error typically occurs when the browser is unable to establish a secure connection with the website, which is often due to issues related to the website’s security certificates, browser settings, or network configurations.
In this guide, we will explore the reasons behind this error and provide several methods to fix it, allowing you to browse websites securely in Microsoft Edge.
What Causes the “Can’t Connect Securely to This Page” Error?
Before diving into the solutions, let’s briefly go over the common causes of this error:
- Outdated or Invalid SSL Certificates: If the website you are trying to visit has an expired or misconfigured SSL certificate, Edge may block access.
- TLS Settings: Misconfigured Transport Layer Security (TLS) settings in the browser can prevent it from establishing a secure connection.
- Outdated Browser Version: Running an outdated version of Microsoft Edge can result in security protocol mismatches.
- Antivirus or Firewall Blocking: Overly aggressive security settings from your antivirus or firewall software can block the secure connection.
Fix 1: Check the Website’s SSL Certificate
Sometimes, the issue lies with the website itself, particularly with its SSL certificate. You can verify the security of the website to determine if the certificate is expired or invalid.
Steps to Check the SSL Certificate:

- Open Microsoft Edge:
- Navigate to the website that triggers the error message.
- View SSL Certificate Information:
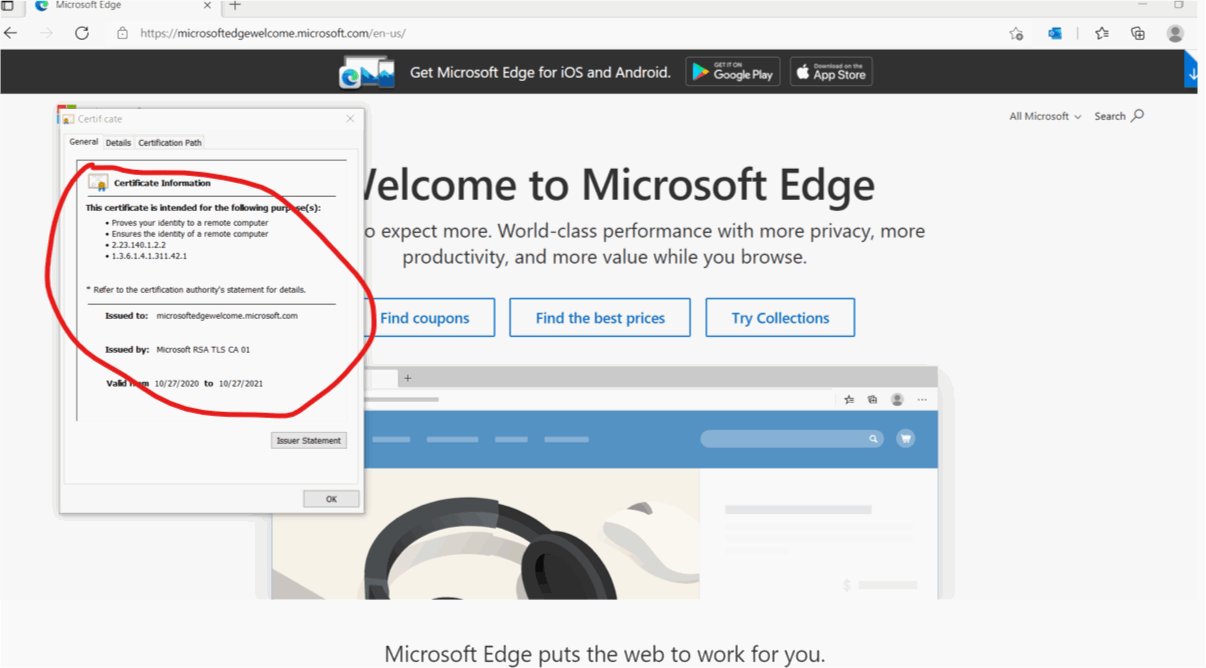
- Click on the padlock icon located in the address bar. This will open a small window with certificate details.
- Check if the certificate is valid, expired, or flagged with an error.
- Contact Website Administrator:
- If the certificate is expired or invalid, it is up to the website owner to resolve the issue. You can try visiting a different website to ensure that the problem is not on your side.
Fix 2: Enable TLS Protocols in Microsoft Edge
If the TLS protocols in Edge are not properly enabled, you may encounter the “Can’t Connect Securely to This Page” error. Enabling TLS 1.2 and TLS 1.3 can help resolve the issue.
Steps to Enable TLS in Microsoft Edge:
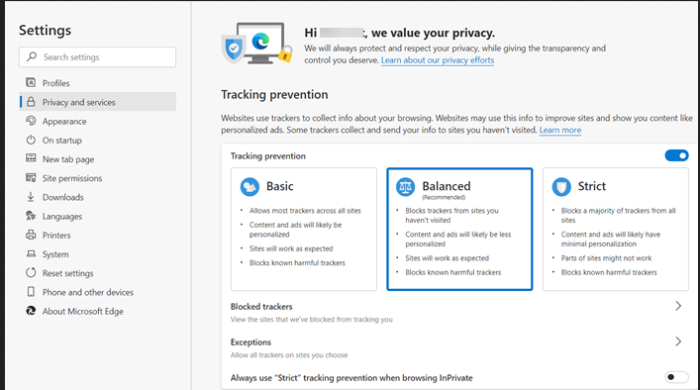
- Open Edge Settings:
- Click on the three dots in the top-right corner of Microsoft Edge and select Settings.
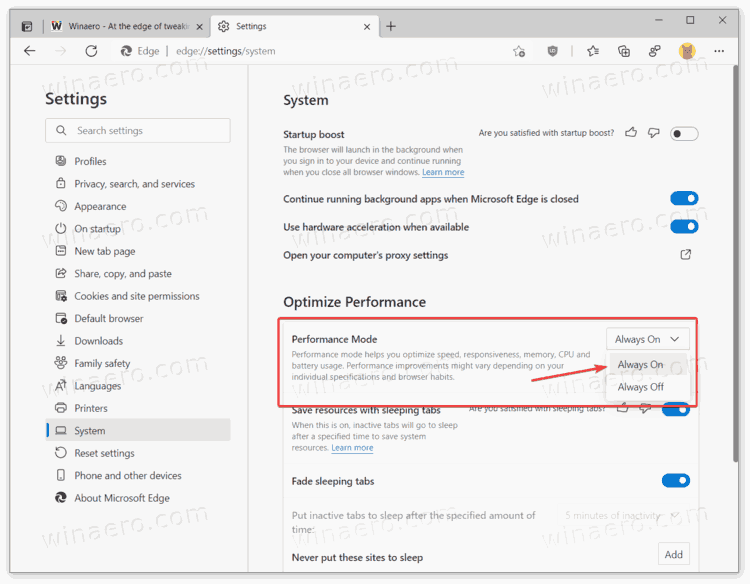
- Search for Advanced Settings:
- Scroll down and click on System and performance, then look for Open your computer’s proxy settings.
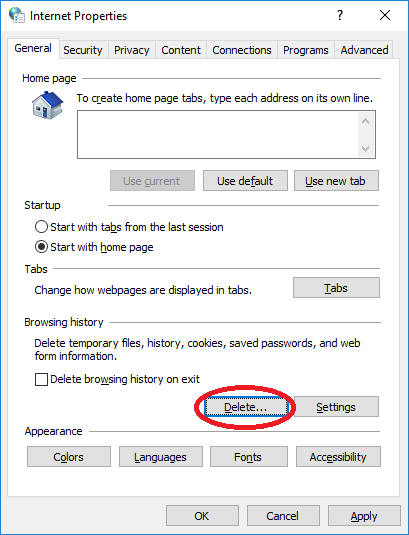
- Access Internet Properties:
- In the Internet Properties window, click on the Advanced tab.
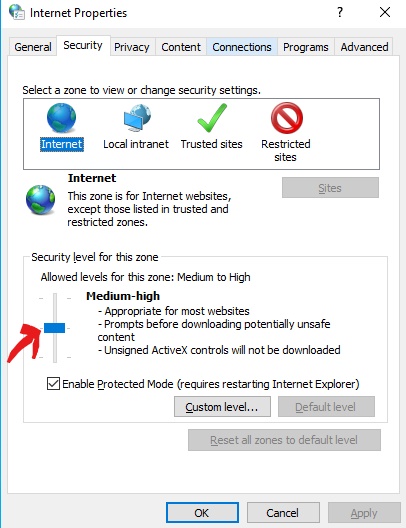
- Enable TLS Options:
- Scroll down to the Security section and ensure that TLS 1.2 and TLS 1.3 are checked. Uncheck SSL 3.0 and TLS 1.0 as they are outdated.
- Apply Changes and Restart Edge:
- Click Apply and OK, then restart Microsoft Edge to see if the issue is resolved.
Fix 3: Clear Browser Cache and Cookies
Outdated or corrupted cache and cookies can prevent Edge from loading a website securely. Clearing these can often resolve the issue.
Steps to Clear Cache and Cookies in Microsoft Edge:
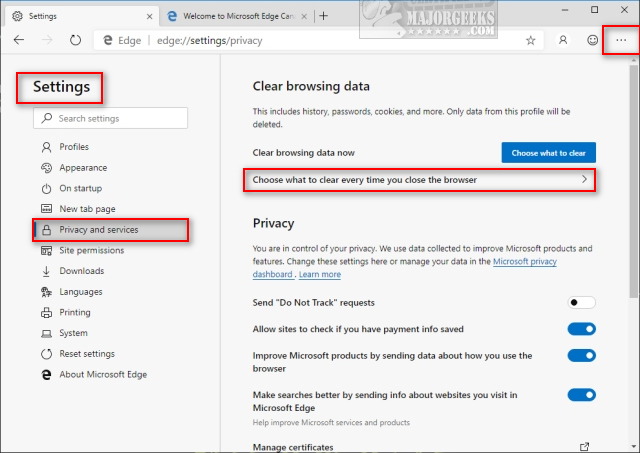
- Open Edge Settings:
- Click the three dots in the upper-right corner of Edge and select Settings.
- Go to Privacy, Search, and Services:
- On the left-hand side, click on Privacy, search, and services.
- Clear Browsing Data:
- Scroll down to Clear browsing data and click Choose what to clear.
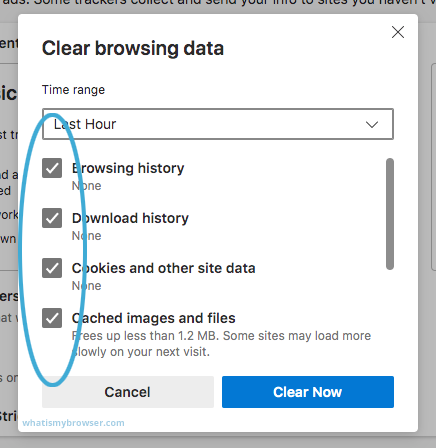
- Select Cache and Cookies:
- Select Cached images and files and Cookies and other site data, then click Clear now.
- Restart Edge:
- After clearing the data, restart Edge and try visiting the website again.
Fix 4: Update Microsoft Edge
Running an outdated version of Microsoft Edge can cause errors when trying to connect to secure websites. Updating to the latest version can resolve compatibility and security issues.
Steps to Update Microsoft Edge:
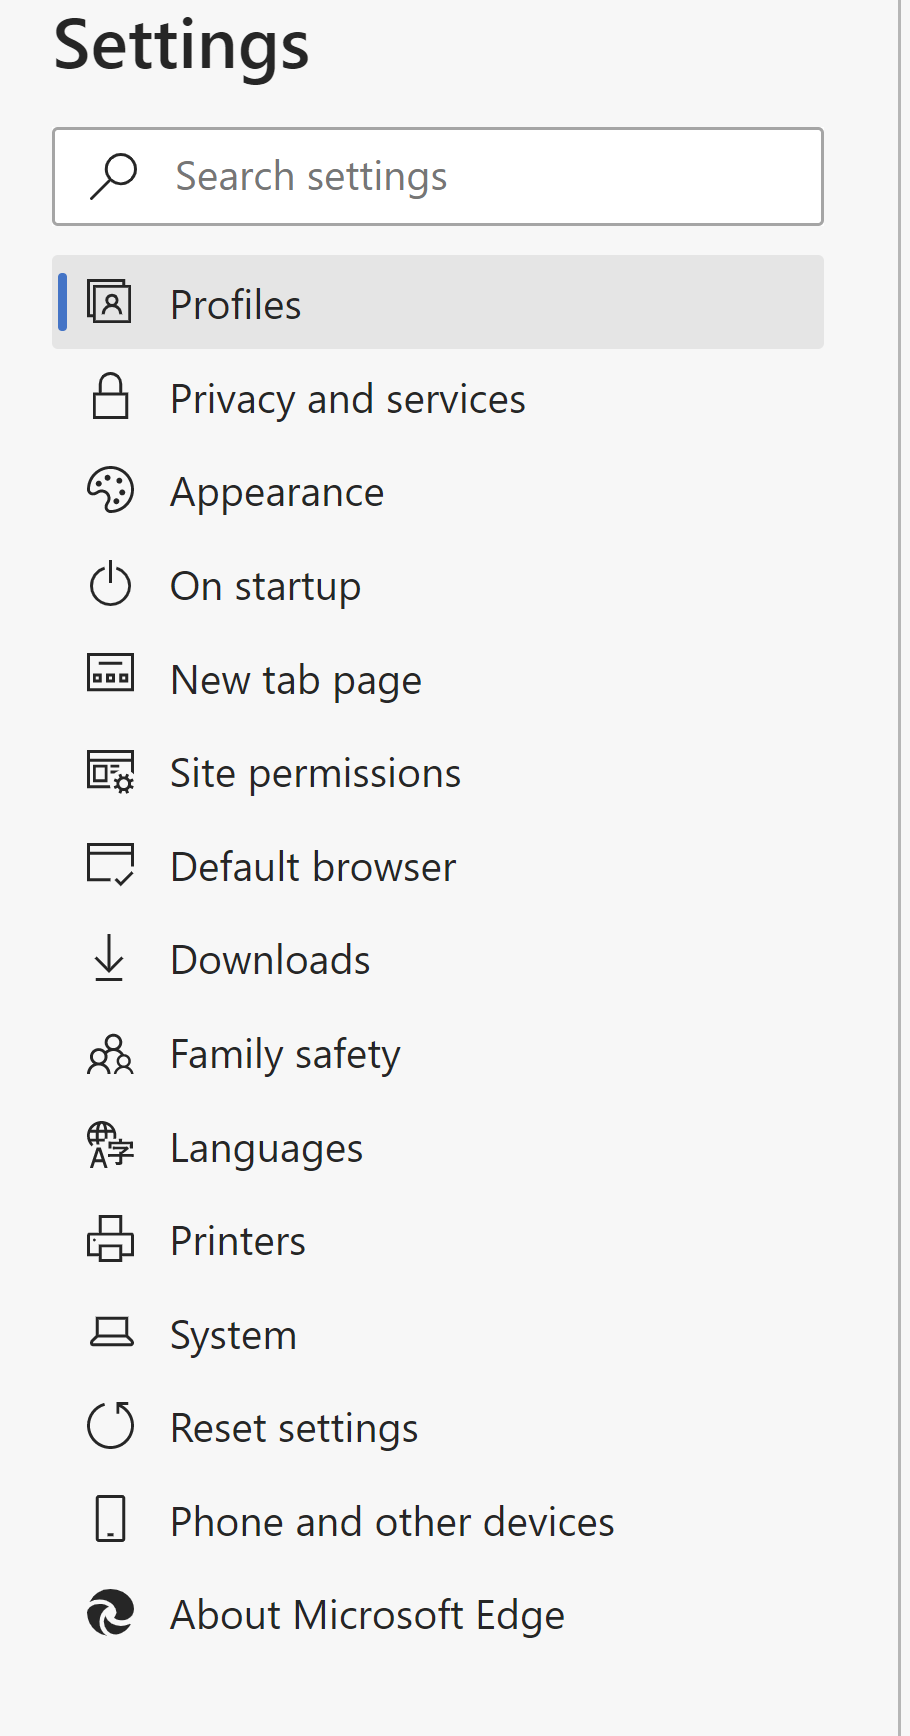
- Open Edge Settings:
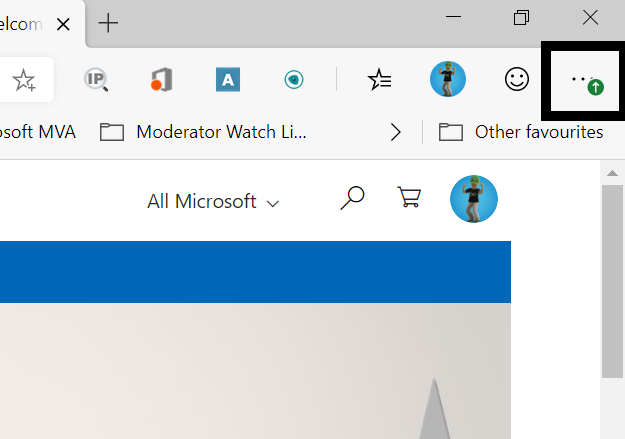
- Click on the three dots in the top-right corner and go to Settings.
- Go to About Microsoft Edge:
- On the left side, click on About Microsoft Edge. Edge will automatically check for updates.
- Install Available Updates:
- If an update is available, click Update and wait for the process to complete. Restart Edge once the update is installed.
Fix 5: Disable Antivirus or Firewall Temporarily
Sometimes, your antivirus or firewall software may block secure connections, resulting in the “Can’t Connect Securely to This Page” error. Temporarily disabling these features can help identify whether they are causing the issue.
Steps to Temporarily Disable Antivirus/Firewall:
- Open Your Antivirus Program:
- Open your antivirus or firewall software from the system tray or start menu.
- Turn Off Web Protection:
- Temporarily disable the web protection feature or turn off the firewall.
- Test the Website:
- Open Edge and try accessing the website again. If the error is resolved, you may need to adjust the settings of your antivirus software to avoid future blocking.
Note: Make sure to re-enable your antivirus or firewall after testing.
Fix 6: Reset Microsoft Edge
If none of the above methods work, you can try resetting Edge to its default settings. This will remove all customizations, extensions, and cached data, which may be causing the issue.
Steps to Reset Microsoft Edge:
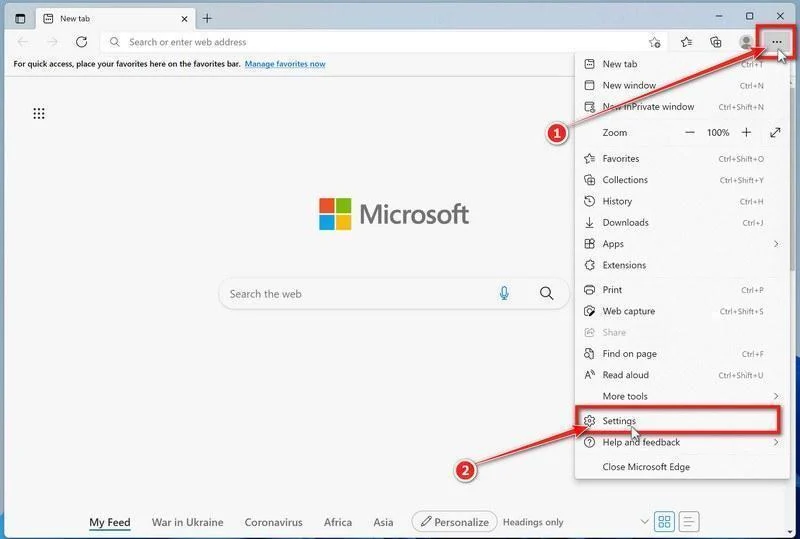
- Open Edge Settings:
- Click the three dots in the top-right corner and go to Settings.
- Reset Settings:
- Scroll down to the Reset settings section and click on Restore settings to their default values.
- Confirm Reset:
- Confirm the action by clicking Reset. Once Edge is reset, restart it and check if the issue is fixed.
Conclusion
The “Can’t Connect Securely to This Page” error in Microsoft Edge can be frustrating, but by following these solutions, you should be able to resolve the issue. Whether it’s enabling the correct TLS settings, clearing your browser cache, or temporarily disabling your antivirus, these methods can help restore secure browsing on Edge.
If the problem persists after trying these steps, you may want to reach out to the website administrator or consider contacting Microsoft support for additional assistance.
