How to Resolve the Issue of Brightness Control Not Functioning on Windows 10
The brightness control not working issue on Windows 10 is a frustrating problem for many users. This issue can occur for various reasons, such as incorrect display drivers, power settings, or system bugs. Fortunately, several methods can help you fix this problem and regain control over your screen brightness. This guide will walk you through various solutions to get your brightness controls functioning properly again.
1. Check Your Display Drivers
Outdated or corrupted display drivers are often the root cause of brightness control issues. To fix this, updating or reinstalling your graphics driver might solve the problem.
Steps to Update Your Display Drivers:
- Right-click on the Start button and select Device Manager.

- Expand the Display adapters section.
- Right-click on your display device (usually listed as Intel HD Graphics, NVIDIA, or AMD).
- Select Update Driver.
- Choose Search automatically for updated driver software. Let Windows search for the latest driver updates.
- If an update is found, follow the on-screen instructions to install it. Restart your computer once the update is complete.
If updating the drivers doesn’t solve the issue, try reinstalling them.
Steps to Reinstall Display Drivers:
- In Device Manager, right-click your display device again and select Uninstall device.
- After the driver is uninstalled, restart your PC, and Windows will automatically reinstall the necessary drivers.
2. Enable the Generic PnP Monitor
The Generic PnP Monitor feature is essential for controlling screen brightness, especially on laptops. If it’s disabled, your brightness control may not work correctly.
Steps to Enable Generic PnP Monitor:
- Right-click on the Start button and select Device Manager.
- Expand the Monitors section.
- Right-click on Generic PnP Monitor (or any monitor listed) and select Enable if it’s disabled.
- Restart your PC to apply the changes.
3. Use Windows Power Troubleshooter
Windows 10 includes a built-in troubleshooter that can detect and fix issues related to power settings and display controls. Running this tool can help solve brightness problems.
Steps to Run the Power Troubleshooter:
- Press
Windows + Ito open Settings. - Go to Update & Security > Troubleshoot.
- Click Additional troubleshooters.
- Scroll down and select Power, then click Run the troubleshooter.
- Follow the on-screen instructions and let Windows detect and fix any problems.
4. Adjust Power Settings
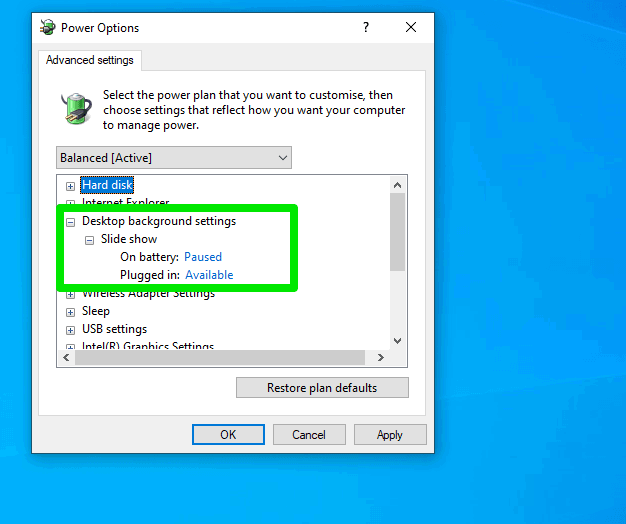
Windows 10 power settings can also influence the brightness controls. If you have configured a custom power plan or the default plan is malfunctioning, adjusting the power settings may resolve the issue.
Steps to Adjust Power Settings:
- Right-click on the Start button and select Power Options.
- Click on Additional power settings on the right-hand side.
- Ensure that Balanced (recommended) or Power Saver is selected.
- Click Change plan settings next to the selected plan.
- Check if the brightness setting appears here. Adjust it as needed.

Additionally, make sure that the adaptive brightness feature is enabled. This feature automatically adjusts the brightness based on ambient light.
5. Check the Battery Drivers
For laptops, faulty or outdated battery drivers may interfere with the brightness controls. Updating the battery driver can help restore functionality.
Steps to Update Battery Drivers:
- Right-click on the Start button and select Device Manager.
- Expand the Batteries section.
- Right-click on Microsoft ACPI-Compliant Control Method Battery and select Update Driver.
- Choose Search automatically for updated driver software.
- Restart your computer if the driver is updated.
6. Disable the Windows 10 Fast Startup Feature
Fast Startup is a feature in Windows 10 designed to help your PC boot faster. However, it can sometimes cause issues with hardware settings, including brightness controls.
Steps to Disable Fast Startup:
- Press
Windows + Xand select Power Options. - Click Choose what the power buttons do on the left panel.
- Click on Change settings that are currently unavailable.
- Scroll down and uncheck Turn on fast startup.
- Click Save changes and restart your computer.
7. Reset Windows 10 or Perform a System Restore
If none of the above solutions work, you may need to reset Windows 10 or perform a system restore to revert your computer to an earlier state when the brightness control worked correctly.
Steps to Reset Windows 10:
- Press
Windows + Ito open Settings. - Go to Update & Security > Recovery.
- Under Reset this PC, click Get started.
- Choose whether to keep your files or remove everything, then follow the instructions.
Steps to Perform a System Restore:
- Type System Restore in the Windows search bar and select Create a restore point.
- In the System Properties window, click System Restore.
- Follow the prompts to restore your system to an earlier point when the brightness control was functioning.
8. Update Windows 10
Sometimes, a bug or an issue with Windows 10 itself can interfere with the brightness control feature. Keeping your operating system updated can resolve this.
Steps to Update Windows 10:
- Press
Windows + Ito open Settings. - Go to Update & Security.
- Click Check for updates.
- Install any available updates and restart your PC.
Conclusion
The “brightness control not working” issue in Windows 10 can be frustrating, but with the steps above, you can usually solve it quickly. Start by ensuring your display drivers are up to date, check your power settings, and adjust hardware settings like the Generic PnP Monitor and battery drivers. If those don’t resolve the issue, consider resetting Windows or performing a system restore. By following these steps, you should be able to regain full control over your screen brightness and enjoy a seamless computing experience again.

