How to Apply Text Styles and Headings in Word
Text styles and headings in Microsoft Word are powerful tools that enhance document structure and formatting. Using these features allows you to create professional documents with consistent formatting, making your content easier to read and navigate. Below, you’ll find a detailed guide on how to use text styles and headings effectively.
What Are Text Styles and Headings?
- Text Styles: Predefined sets of formatting options that include font type, size, color, and alignment. Examples include Normal, Title, Subtitle, and Body Text.
- Headings: Specific text styles used to structure a document, such as Heading 1, Heading 2, and Heading 3. They help organize content hierarchically and enable features like navigation panes and automated tables of contents.
Why Use Styles and Headings?
- Consistency: Ensure uniform formatting throughout the document.
- Navigation: Quickly navigate through long documents using the navigation pane.
- Automation: Automatically generate tables of contents and update formatting.
- Accessibility: Improve readability for users and assistive technologies.
How to Apply Text Styles in Word
Step 1: Open the Styles Pane

- Locate the Styles Group:
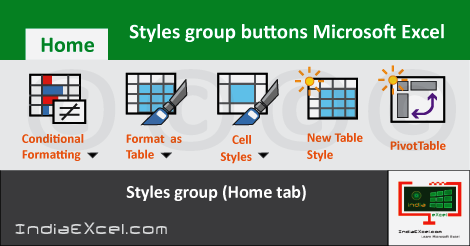
- On the Home tab, find the Styles group.
- Expand the Styles Gallery:
- Click the small dropdown arrow to view more styles or open the Styles Pane by clicking the arrow at the bottom right of the Styles group.
Step 2: Apply a Style to Text
- Select Text:
- Highlight the text you want to format.
- Choose a Style:
- Click a style in the Styles gallery, such as Normal, Title, or Body Text.
- Verify Formatting:
- The selected text will update with the chosen style.
Step 3: Modify an Existing Style

- Right-Click a Style:
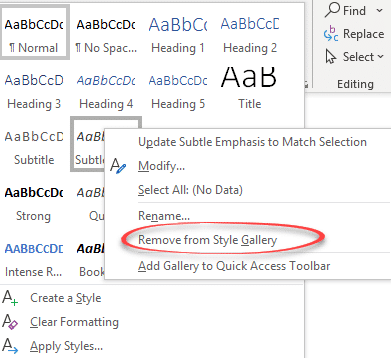
- In the Styles gallery, right-click a style (e.g., Heading 1).
- Choose “Modify”:
- Adjust font type, size, color, alignment, or other formatting options.
- Click OK:
- All text using that style will update automatically.
How to Use Headings in Word
Step 1: Apply Headings
- Highlight the Heading Text:
- Select the text you want to format as a heading.
- Choose a Heading Level:
- In the Styles gallery, click Heading 1, Heading 2, or another level based on the content’s hierarchy.
Step 2: Navigate Using the Navigation Pane

- Open the Navigation Pane:
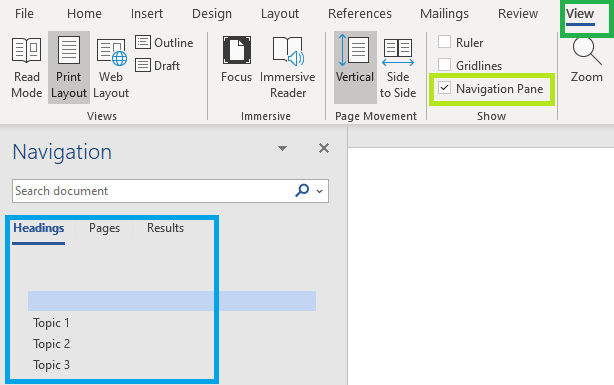
- Go to View > Show > Navigation Pane.
- View Headings:
- The headings will appear in the Navigation Pane, allowing you to jump to specific sections easily.
Step 3: Create a Table of Contents
- Go to the Desired Location:
- Place your cursor where you want to insert the Table of Contents.
- Insert the Table:
- Go to References > Table of Contents and choose a style.
- Update Automatically:
- If you edit your document, right-click the Table of Contents and select Update Field.
Practical Example
Suppose you are creating a report with sections like Introduction, Methodology, Results, and Conclusion. Here’s how to use headings:
- Apply Heading 1 to the main sections.
- Use Heading 2 for subsections under each main heading.
- Insert a Table of Contents to summarize the structure of your document.
Illustration
Here’s a visual representation of using text styles and headings in Word:
This image shows the Styles gallery and the Navigation Pane in Microsoft Word.
Common Issues and Solutions
- Styles Not Showing Correctly:
- Ensure you are working in the correct style by checking the Styles pane.
- Table of Contents Missing Entries:
- Verify that the text is formatted with Heading styles.
- Navigation Pane Empty:
- Apply Heading styles to your document for content to appear in the Navigation Pane.
Tips for Using Text Styles and Headings
- Use Short and Descriptive Headings:
- Make your headings clear and concise.
- Leverage Style Shortcuts:
- Use Ctrl + Alt + 1 for Heading 1, Ctrl + Alt + 2 for Heading 2, and so on.
- Customize for Branding:
- Modify styles to align with your organization’s branding guidelines.
Conclusion
Mastering text styles and headings in Microsoft Word streamlines document formatting and improves readability. Whether you’re working on a research paper, business proposal, or personal project, these tools make your work look polished and professional.
