How to Adjust Text Size and Font in Word
Changing the text size and font in Microsoft Word is a simple way to customize your document and enhance its readability or aesthetics. Whether you’re preparing a formal report, an email, or just a casual document, adjusting the font and text size allows you to make your content stand out. In this guide, we’ll walk you through the steps to change the font and text size in Microsoft Word.
Step 1: Open Microsoft Word

Before you can change the font and text size, ensure that Microsoft Word is open and that you have a document ready.
- Launch Microsoft Word
- Click on the Start menu, type Word in the search bar, and press Enter to open it.
- Open an Existing Document or Create a New One
- You can either open an existing document or create a new one by selecting New Document.
Step 2: Select the Text You Want to Modify
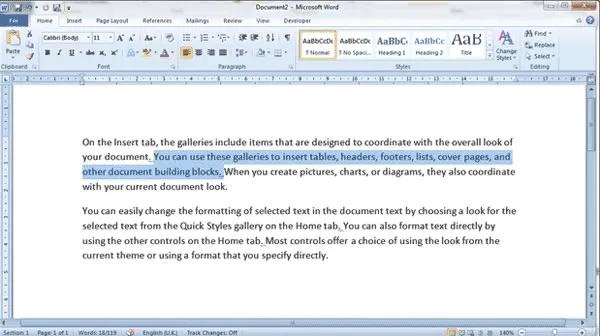
To change the font or text size, you need to select the text first.
- Highlight the Text
- Click and drag your mouse over the text you want to change. If you’re changing the entire document, press Ctrl + A (Windows) or Command + A (Mac) to select all the text.
Step 3: Change the Font
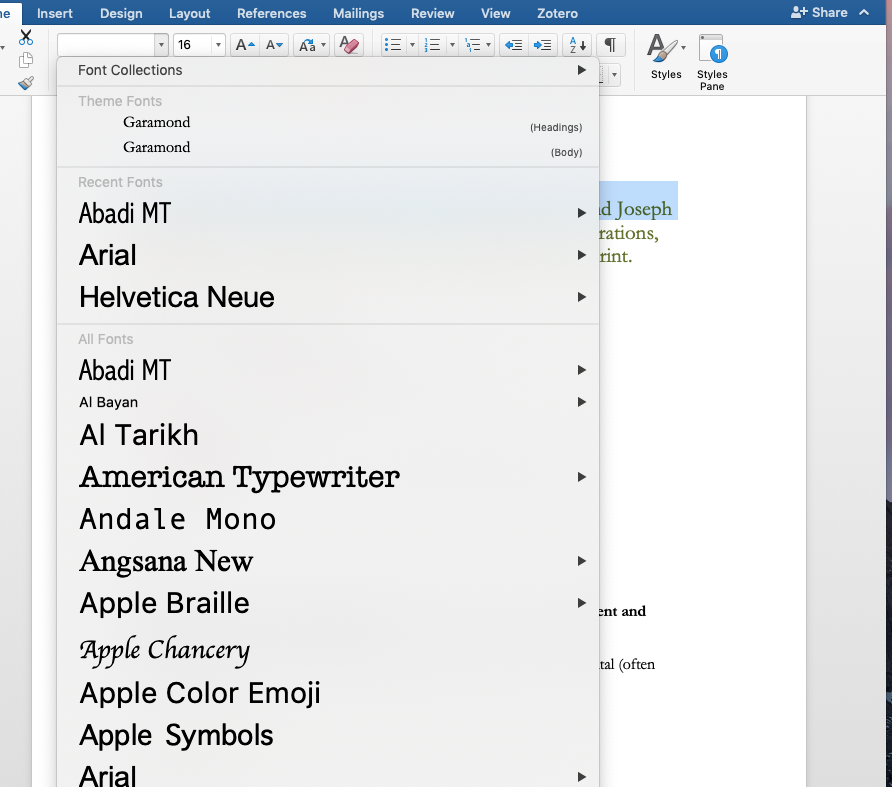
Once the text is selected, you can change the font style.
- Open the Font Drop-Down Menu
- On the Home tab in the ribbon, look for the Font group.
- Click on the drop-down arrow next to the current font name to open a list of available fonts.
- Select a New Font
- Scroll through the font list and select the one you prefer. Popular fonts include Arial, Times New Roman, Calibri, and Verdana.
- Once you click on a font, the selected text will immediately change to that font.
Step 4: Change the Text Size
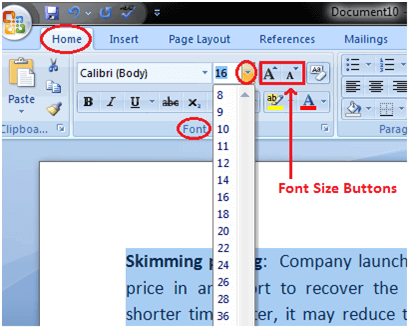
Now that you’ve selected the desired font, you can change the text size.
- Open the Font Size Drop-Down Menu
- In the same Font group on the Home tab, locate the Font Size box, next to the font drop-down menu.
- Choose a Size
- Click on the drop-down arrow to open a list of font sizes. Word typically offers a list of common sizes like 10, 11, 12, 14, 16, etc.
- You can either select a size from the list or manually enter a custom size. For example, you can type 18 to set the text size to 18 points.
- Apply the Size
- After selecting or entering a size, your selected text will adjust accordingly.
Step 5: Use the Increase or Decrease Font Size Buttons
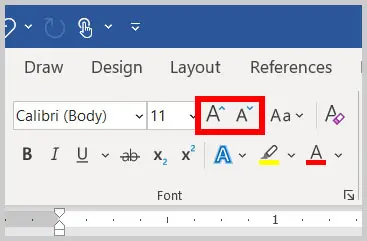
If you want to make quick adjustments to the text size without opening the drop-down menu, use the Increase Font Size and Decrease Font Size buttons.
- Increase Font Size
- Click the Increase Font Size button (represented by a large A with an upward arrow) in the Font group on the Home tab to make the text larger.
- Decrease Font Size
- Similarly, click the Decrease Font Size button (represented by a small A with a downward arrow) to make the text smaller.
Step 6: Change the Font Style (Bold, Italic, Underline)
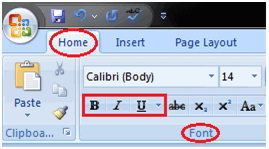
In addition to changing the font and size, you can further customize the text by applying formatting styles.
- Bold
- To make the selected text bold, click the B button in the Font group or press Ctrl + B (Windows) or Command + B (Mac).
- Italic
- To italicize the selected text, click the I button in the Font group or press Ctrl + I (Windows) or Command + I (Mac).
- Underline
- To underline the text, click the U button or press Ctrl + U (Windows) or Command + U (Mac).
Step 7: Set Default Font and Size
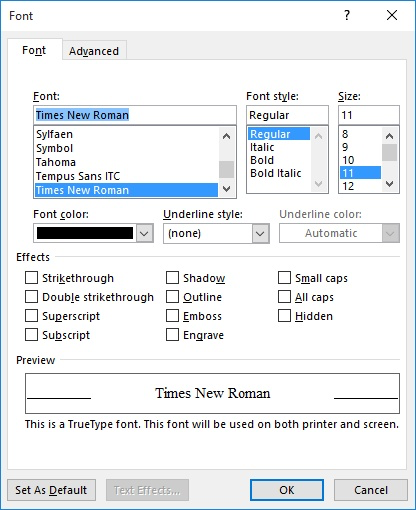
If you want to set a default font and size for all your future documents, you can customize Word’s settings.
- Open Font Settings
- Go to the Home tab, then click the small arrow at the bottom right of the Font group to open the Font dialog box.
- Set Default Font and Size
- In the Font dialog box, choose your preferred font and size, then click Set As Default at the bottom.
- Select the Scope
- Choose whether you want to apply these changes to This document only or All documents based on the Normal template.
- Click OK
- After confirming, click OK to save your changes.
Step 8: Additional Font Customization Options
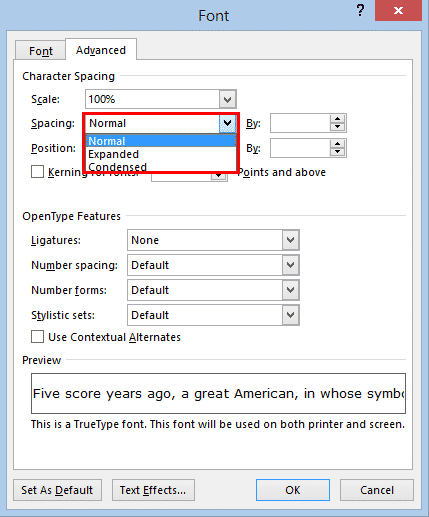
In addition to changing the basic font and size, Microsoft Word offers other options for customizing your text.
- Text Effects
- You can add text effects such as shadows, reflections, glows, and more by clicking on the Text Effects button in the Font group.
- Character Spacing
- Adjust character spacing (tracking) by clicking Advanced in the Font dialog box and modifying the Spacing option.
Conclusion
Changing the font and text size in Microsoft Word is a quick and easy process that can significantly enhance the appearance of your documents. Whether you need to format a professional report or create visually appealing content, adjusting the font and size allows you to make your text more legible and visually striking. With the steps provided, you can easily customize the font and size to suit your needs and even set a default style for all your future documents.
