SAAC's Team
November 17, 2024
Guide to Adding Fonts to Microsoft Word on Mac
Adding custom fonts to Microsoft Word on a Mac is a great way to enhance your documents and tailor them to your creative or professional needs. This guide will show you how to install fonts on your Mac and make them available for use in Microsoft Word. The process is simple and doesn’t require advanced technical skills.
What You Need to Install Fonts on Mac
- A Mac running macOS.
- A font file in one of these formats: OTF (OpenType Font), TTF (TrueType Font), or DFONT.
- A reliable source for downloading fonts, such as Google Fonts, DaFont, or Adobe Fonts.
Step-by-Step Guide to Install Fonts on Mac
Step 1: Download the Font File
- Visit a trusted font source like Google Fonts or DaFont.
- Search for the font you want and click Download.
- Locate the downloaded font file, which is often in a compressed ZIP format.

Step 2: Unzip the Font File
- Navigate to your Downloads folder or the location where the ZIP file was saved.
- Double-click the ZIP file to extract its contents. The extracted folder should contain the font file in formats like .otf or .ttf.

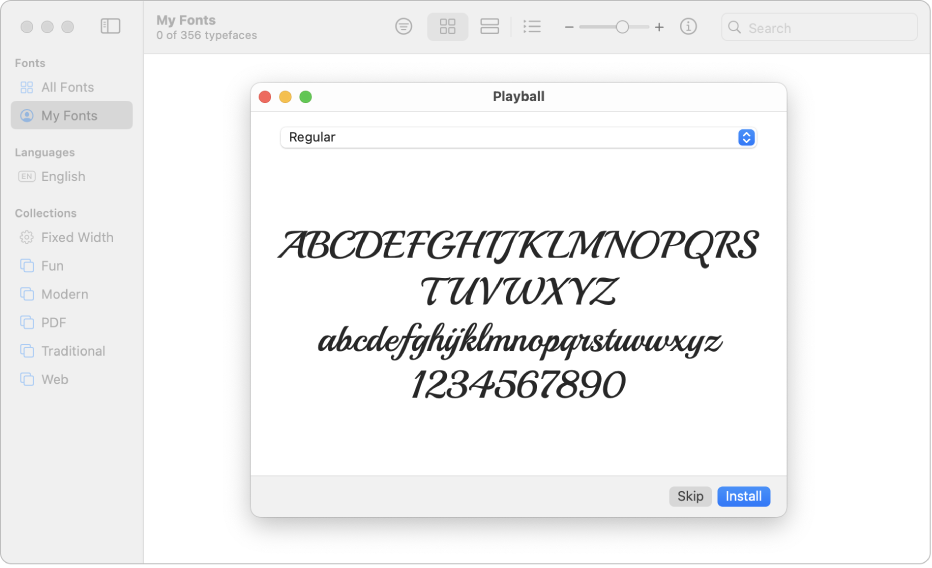
Step 3: Install the Font Using Font Book
Font Book is a built-in macOS application for managing fonts. Here’s how to use it:
- Open Font Book by searching for it in Spotlight (
Cmd + Space> Type “Font Book”). - Drag and drop the font file into the Font Book window, or click the Add (+) button and select the font file.
- Choose Install for All Users to make the font available system-wide, including in Microsoft Word.

Step 4: Verify the Font Installation
- Open Font Book and locate the installed font in the list.
- Ensure that there are no warnings or errors next to the font name. If you see any issues, try reinstalling the font or using another font file source.
Step 5: Use the Font in Microsoft Word
- Launch Microsoft Word on your Mac.
- Open an existing document or create a new one.
- Click on the Font dropdown in the toolbar and type the name of the installed font.
- Select the font to apply it to your text.
Troubleshooting Font Installation Issues
Problem: Font Not Appearing in Word
- Solution: Restart Word or your Mac to refresh the system font cache.
Problem: Corrupted Font File
- Solution: Re-download the font from a trusted source and reinstall it.
Problem: Font Not Available for All Users
- Solution: Reinstall the font in Font Book and select Install for All Users.
Tips for Managing Fonts on Mac
- Organize Fonts: Use Font Book to group your fonts into categories for better organization.
- Remove Unused Fonts: Uninstall unnecessary fonts to declutter your system.
- Back Up Fonts: Save copies of your favorite fonts in a separate folder for future use.
Conclusion
Installing custom fonts on your Mac for use in Microsoft Word is a quick and effective way to personalize your documents. By following this guide, you can easily download, install, and use any font you like. With just a few simple steps, your documents can stand out with unique typography tailored to your needs.
Subscribe
Login
0 Comments
Oldest
