How to Switch from 32-Bit to 64-Bit Version of Windows 10
Upgrading from the 32-bit version to the 64-bit version of Windows 10 can significantly improve your computer’s performance, especially if you have more than 4GB of RAM. A 64-bit operating system allows your system to use more memory and run more demanding applications efficiently. However, the process requires a clean installation since you can’t directly upgrade from a 32-bit to a 64-bit system.
In this guide, we’ll walk through the step-by-step process of upgrading from the 32-bit version to the 64-bit version of Windows 10, with detailed instructions and images to ensure a smooth upgrade.
Prerequisites Before Upgrading
Before upgrading from the 32-bit to the 64-bit version of Windows 10, there are a few things you need to check:
1. Ensure Your Processor Supports 64-Bit
To upgrade to the 64-bit version, your computer’s processor must be 64-bit compatible.
- Check CPU compatibility:
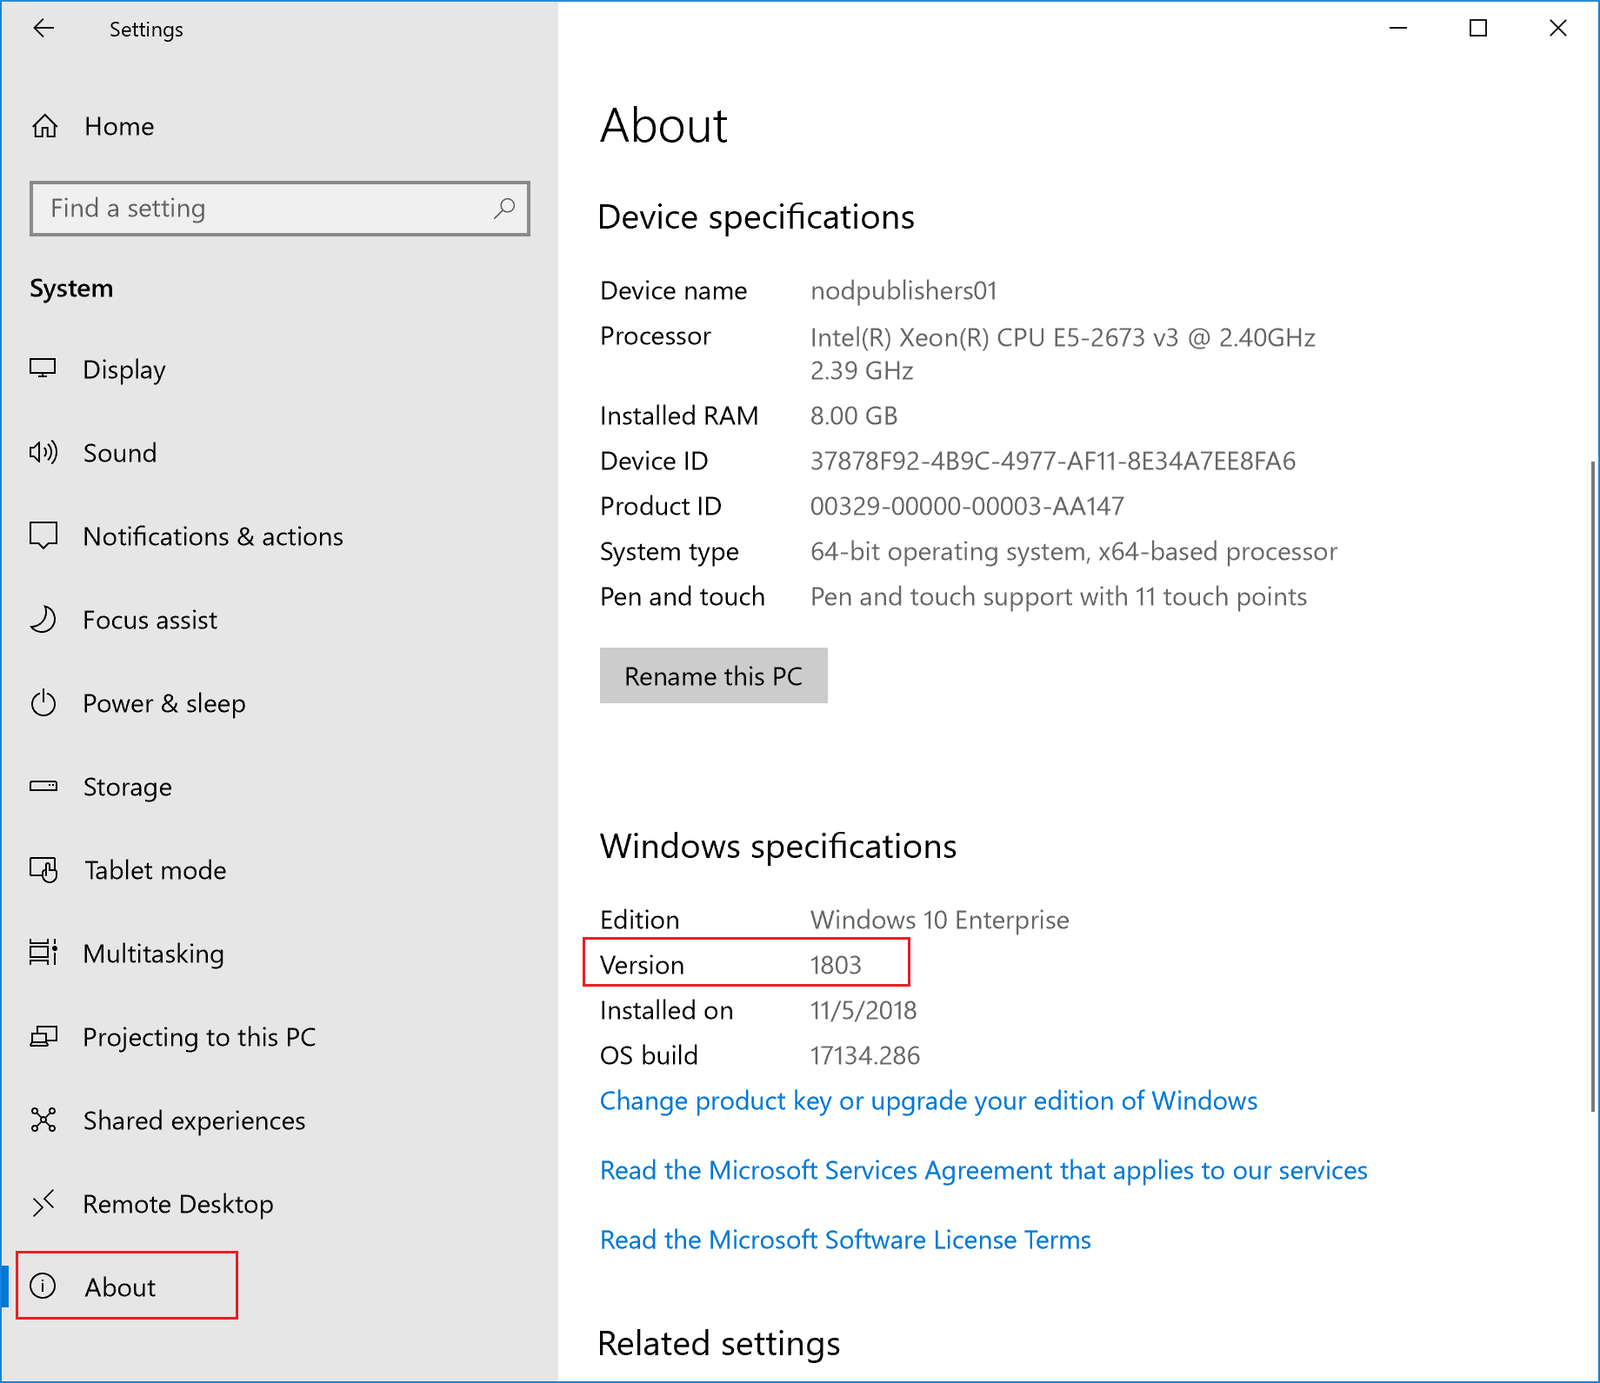
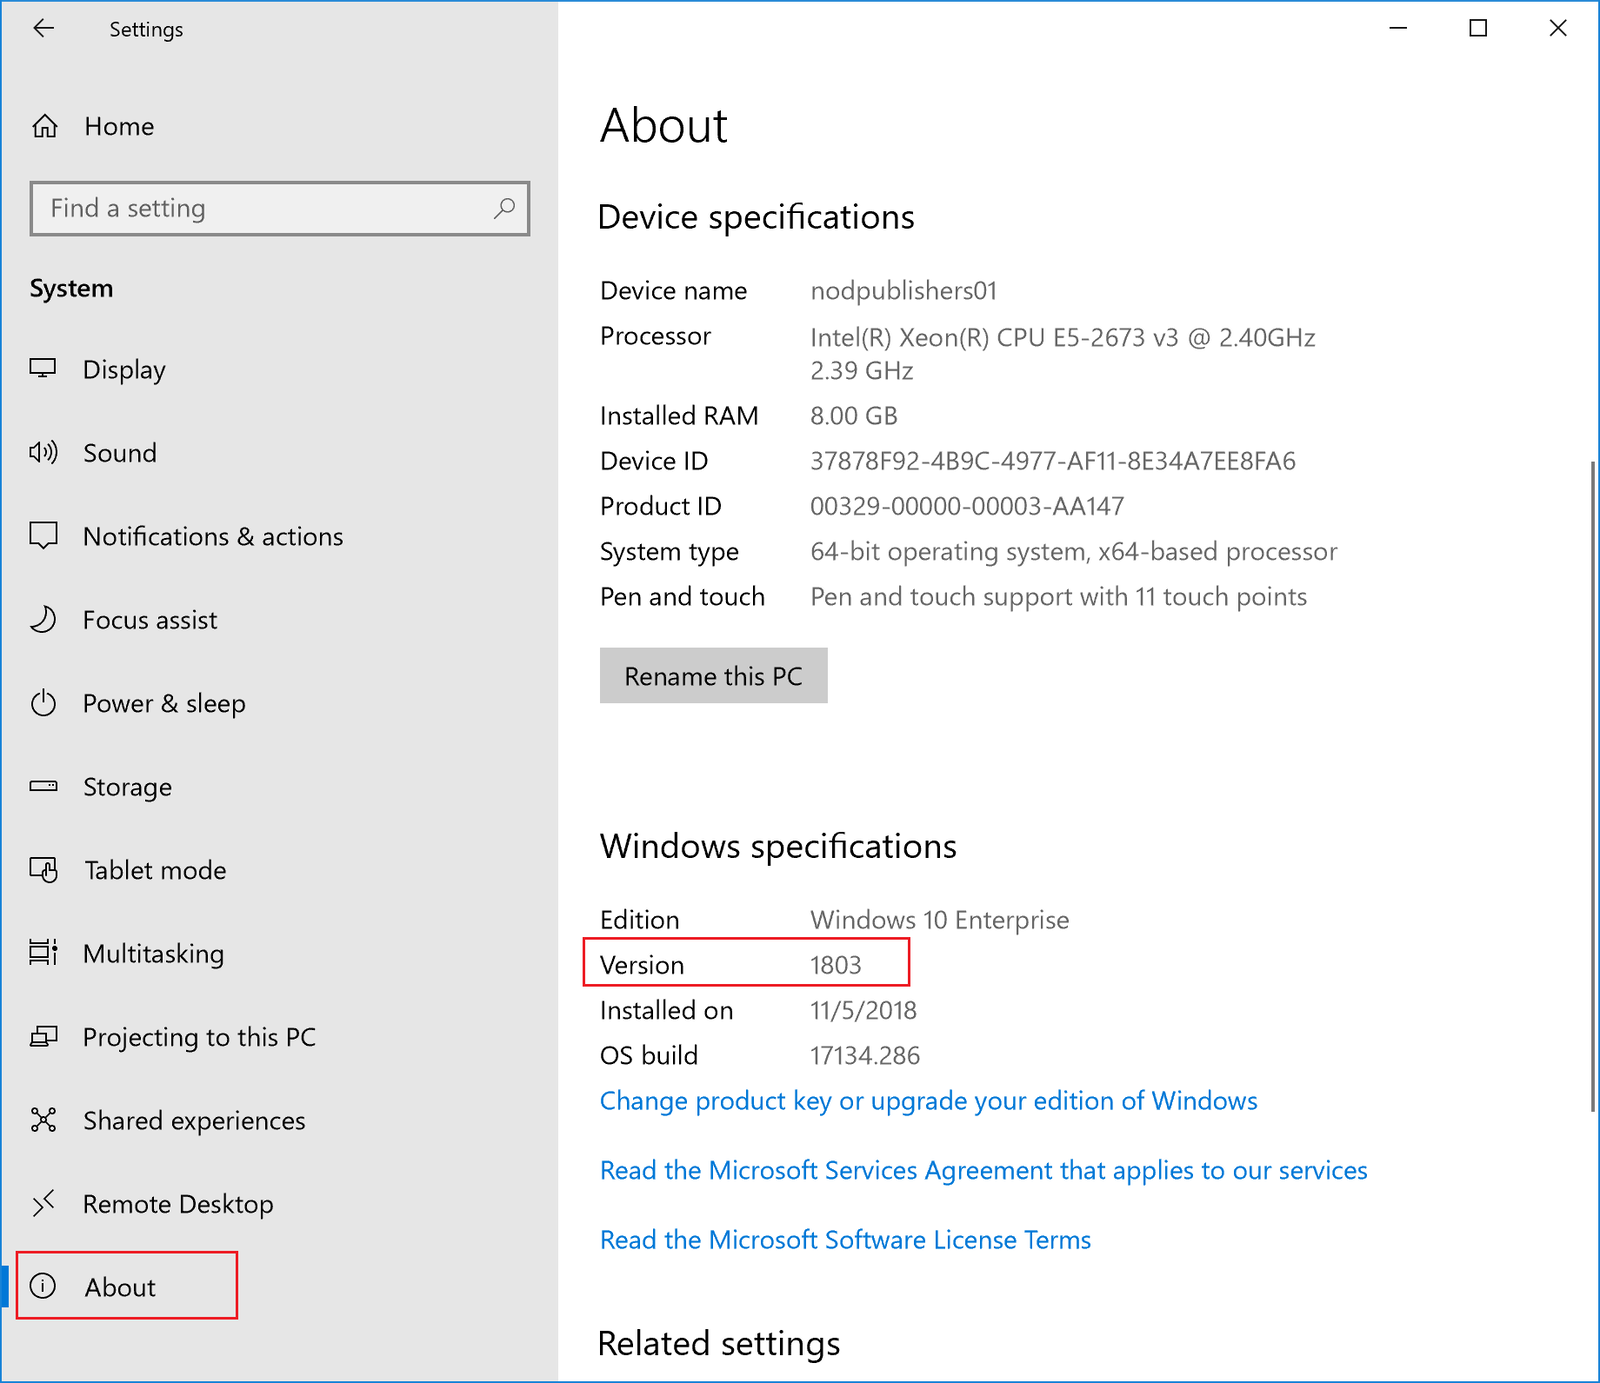
- Open Settings by pressing
Windows + Iand go to System. - Select About from the sidebar.
- Look for the System type entry. It will either say:
- 32-bit operating system, x64-based processor: You can upgrade to 64-bit.
- 32-bit operating system, x86-based processor: Your processor does not support 64-bit, and you cannot upgrade.
- Open Settings by pressing
2. Back Up Your Data
Since upgrading to 64-bit requires a clean installation, you will lose all your files and installed programs. Make sure to back up your important data using an external drive or cloud storage service.
3. Check Your Drivers
Ensure that the drivers for your hardware (e.g., printer, graphics card) are compatible with the 64-bit version of Windows 10. Most modern hardware should have 64-bit drivers available, but it’s worth checking with the manufacturers’ websites.
Step-by-Step Guide to Upgrade from 32-Bit to 64-Bit Windows 10
Step 1: Download the Windows 10 Media Creation Tool
The first step is to download the Windows 10 Media Creation Tool, which will help you create installation media for the 64-bit version of Windows 10.
- Go to the Microsoft Download Page:
- Visit the official Microsoft Windows 10 download page and click on Download tool now.
- Run the Media Creation Tool:
- Open the downloaded MediaCreationTool.exe file and allow it to run.
Step 2: Create Installation Media
You need to create installation media, such as a USB drive or DVD, that contains the 64-bit version of Windows 10.
- Select Create Installation Media:
- After the Media Creation Tool opens, select Create installation media (USB flash drive, DVD, or ISO file) for another PC, and click Next.
- Choose Language, Edition, and Architecture:
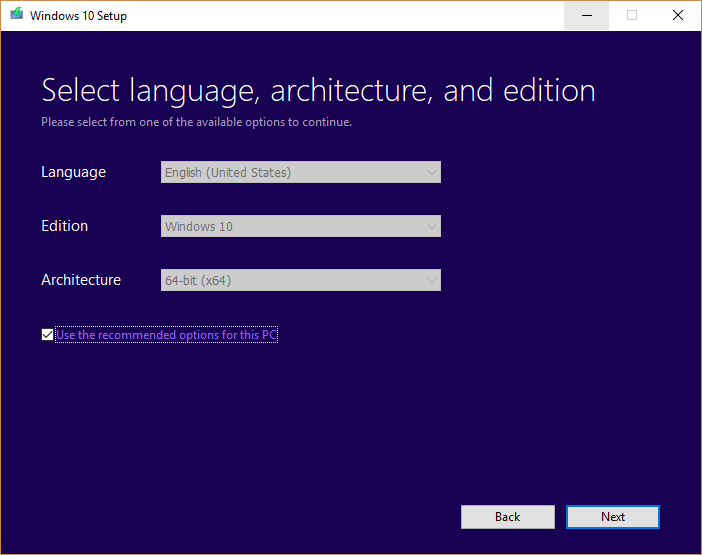
- In the next window, uncheck Use the recommended options for this PC.
- Set Architecture to 64-bit (x64). Ensure that Language and Edition are correct, then click Next.
- Select USB Flash Drive:
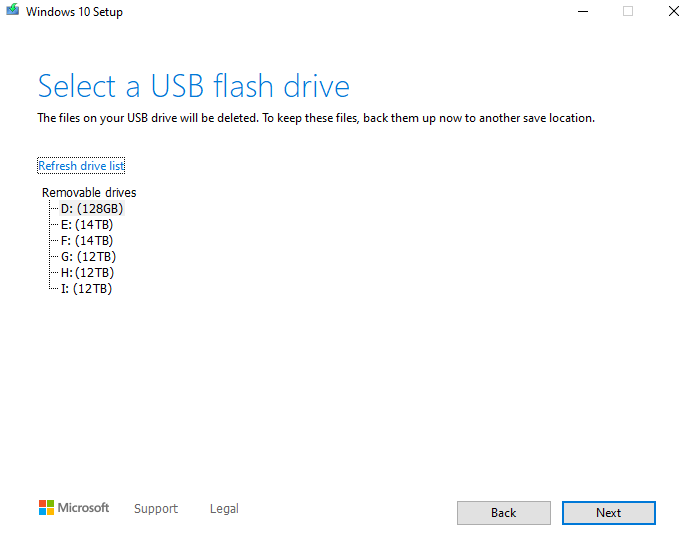
- Choose USB flash drive as the media type. Insert a blank USB drive (at least 8GB), then select it from the list and click Next.
- Wait for the Process to Complete:
- The tool will download the necessary files and create the installation media. This may take some time, depending on your internet speed.
Step 3: Boot From the USB Flash Drive
Now that you have the 64-bit installation media, you need to boot your computer from the USB flash drive.
- Insert the USB Flash Drive:
- Turn off your computer and insert the USB flash drive into a USB port.
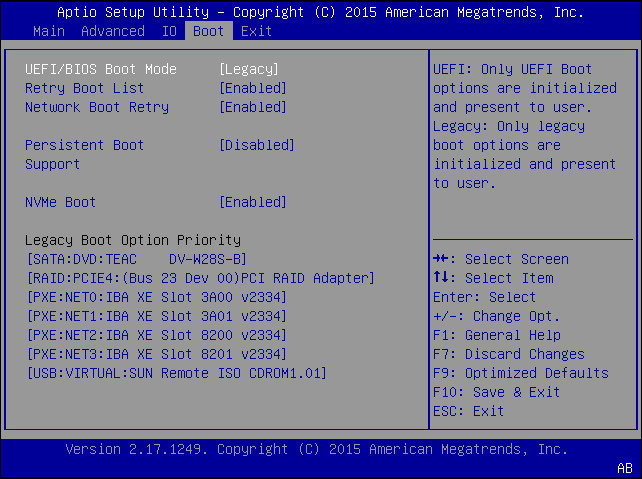
- Access the Boot Menu:
- Turn on your computer and press the Boot Menu key (usually
F12,Esc, orDeldepending on your PC) to access the boot options. - Select the USB flash drive as the boot device.
- Turn on your computer and press the Boot Menu key (usually
Step 4: Install 64-Bit Windows 10
- Start the Installation:
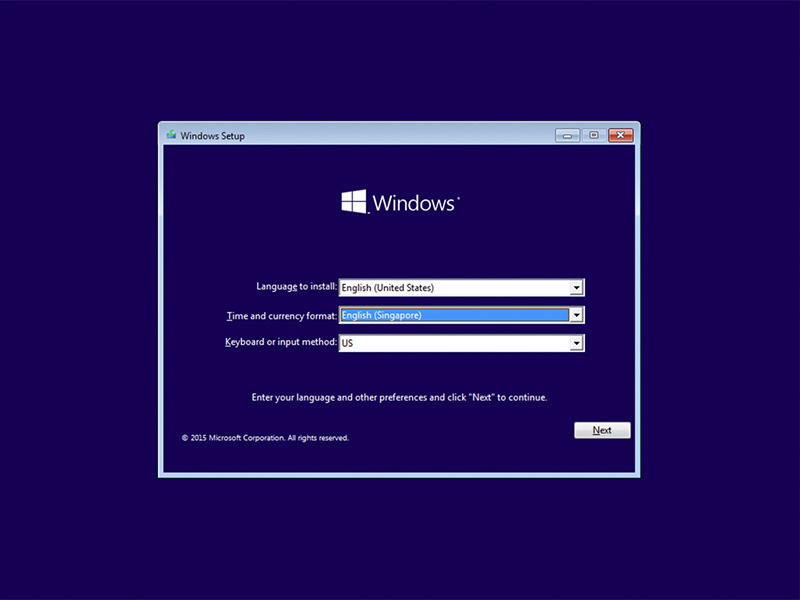
- Once your PC boots from the USB drive, you will see the Windows Setup screen. Select your language, time, and keyboard preferences, then click Next.
- Click Install now to start the installation process.
- Skip the Product Key:
- If prompted for a product key, click I don’t have a product key. Windows 10 will automatically activate once installed if you’re reinstalling on the same device.
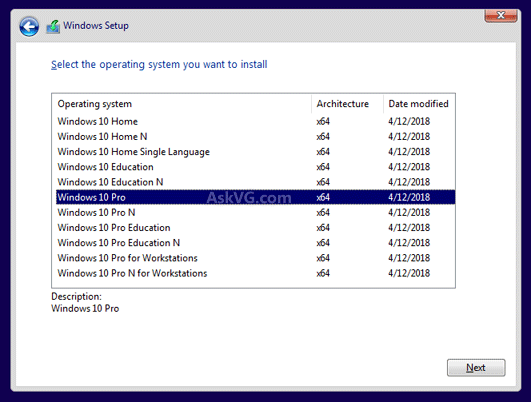
- Select 64-Bit Version:
- Choose the 64-bit version of Windows 10 from the list and click Next.
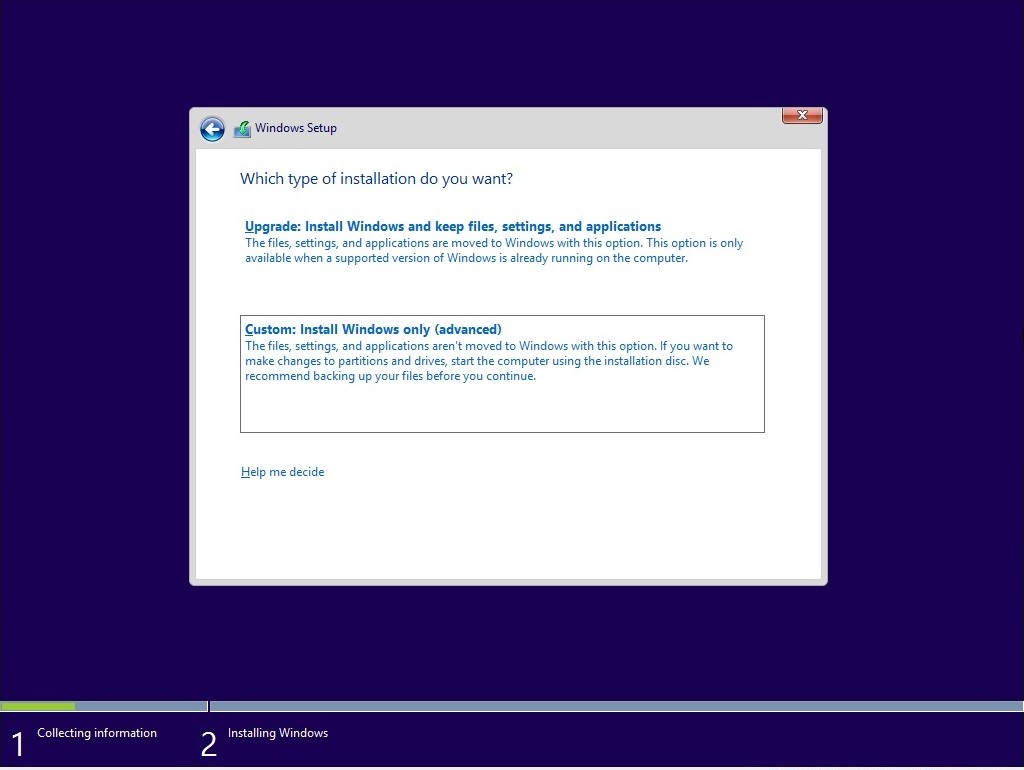
- Perform a Custom Installation:
- When prompted, choose Custom: Install Windows only (advanced). This option will allow you to perform a clean installation, which is necessary for upgrading from 32-bit to 64-bit.
- Select the Drive:
- Select the partition where you want to install Windows 10 (usually the primary drive) and click Next. The installation process will begin, and your PC will restart several times.
Step 5: Set Up Windows 10
After the installation is complete, you’ll need to go through the initial setup process:
- Choose Your Region and Keyboard Layout:
- Follow the on-screen instructions to choose your region, language, and keyboard layout.
- Sign In to Your Microsoft Account:
- If prompted, sign in with your Microsoft account to sync your settings.
- Complete Setup:
- Finish the rest of the setup steps, including privacy settings, and then you will be taken to your new Windows 10 desktop.
Post-Upgrade Checklist
Once the 64-bit version of Windows 10 is installed, there are a few things you should do:
1. Install Drivers:
- Download and install 64-bit drivers for your hardware. Check the manufacturer’s website for any necessary updates.
2. Reinstall Applications:
- You’ll need to reinstall all your applications because the clean installation removed them.
3. Restore Files:
- Copy back your files from the backup you created before starting the upgrade.
Conclusion
Upgrading from the 32-bit version to the 64-bit version of Windows 10 is an excellent way to improve your computer’s performance and take full advantage of its hardware capabilities. While the process requires a clean installation, following the steps in this guide will ensure that the upgrade goes smoothly. By backing up your data and ensuring your hardware supports 64-bit, you can make the transition quickly and enjoy the enhanced performance that comes with the 64-bit version of Windows 10.

