How to Set Up a Distribution List in Microsoft Outlook
Managing communication can be a lot easier when you can send an email to multiple people at once. Microsoft Outlook provides a feature called Contact Group, which lets you organize multiple email addresses into a single group. This saves time and simplifies the process of reaching out to colleagues, friends, or teams. In this guide, you will learn how to create and manage a contact group in Outlook.

What Is a Contact Group?
A Contact Group, also known as a distribution list, is a collection of email addresses grouped under one name. Instead of typing each email address individually, you can send an email to the contact group, and all members of the group will receive the message.
Steps to Create a Contact Group in Microsoft Outlook
Step 1: Open Microsoft Outlook
- Launch the Outlook application on your computer.
- Ensure you are logged into your email account.
Step 2: Access the People Section
- Navigate to the bottom left corner of the Outlook window.
- Click on the People icon (represented by a silhouette or two people). This will take you to the contacts section.

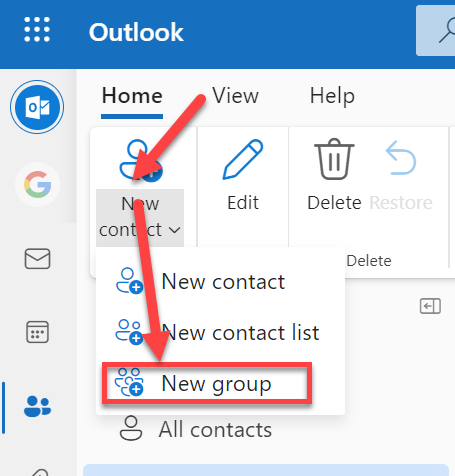
Step 3: Create a New Contact Group
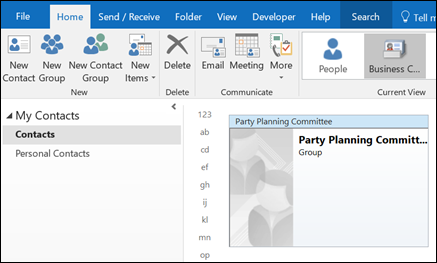
- In the toolbar at the top, click on New Contact Group. This will open a new window specifically for creating and naming your group.

Step 4: Name Your Contact Group
- At the top of the new window, there is a field labeled Name.
- Enter a descriptive name for your contact group. For example:
- Marketing Team
- Project A Members
- Family Contacts
Step 5: Add Members to the Group
- Click on the Add Members button in the toolbar. A dropdown menu will appear with three options:
- From Outlook Contacts: Add members from your existing Outlook contact list.
- From Address Book: Select email addresses stored in your organization’s directory or address book.
- New Email Contact: Add a person’s email address manually, even if they are not in your contacts.
- Select the appropriate option and add the desired members to your group.

Step 6: Save and Close
- Once you’ve added all the necessary members, click on the Save & Close button at the top left corner.
- Your contact group is now saved in your contacts list.

How to Use a Contact Group
Sending an Email to the Group
- Go to your inbox and click on New Email.
- In the To field, start typing the name of your contact group.
- Once the group appears, select it.
- Compose your message as usual and click Send. All members of the group will receive the email.
Editing the Contact Group
- Open the People section in Outlook.
- Locate your contact group in the list and double-click on it.
- To add or remove members:
- Use the Add Members button to include new contacts.
- Select a member and click Remove Member to delete them.
- Save the changes by clicking Save & Close.
Deleting a Contact Group
- In the People section, find the contact group you want to delete.
- Right-click on the group and select Delete.
- Confirm your action. The group will be removed from your contacts.
Tips for Managing Contact Groups
1. Keep Your Groups Updated
Regularly review your contact groups to ensure all members are current. Remove outdated addresses and add new ones as needed.
2. Use Descriptive Names
Choose names that clearly describe the purpose of the group. This makes it easier to locate the correct group when composing an email.
3. Test the Group
Send a test email to the contact group after creating it to ensure all members receive the message.
4. Use Categories
If you manage multiple groups, consider categorizing them (e.g., work, family, hobbies) to keep them organized.
Troubleshooting Common Issues
Problem: Group Members Not Receiving Emails
- Solution: Check if the members’ email addresses are entered correctly in the group. Also, confirm that the email wasn’t filtered into spam.
Problem: Unable to Add Members
- Solution: Ensure the contact or email address you’re trying to add exists in your Outlook contacts or address book.
Problem: Group Doesn’t Appear in Search
- Solution: Verify that the contact group is saved. Restart Outlook and search again.
Why Use Contact Groups?
- Time-Saving: Sending emails to multiple people becomes faster and more efficient.
- Improved Communication: Ensures all group members are kept in the loop with a single message.
- Simplified Organization: Reduces clutter and eliminates the need to remember every individual email address.
Conclusion
Creating a contact group in Microsoft Outlook is an essential skill for anyone who frequently communicates with teams, departments, or social groups. It streamlines the process of sending emails and helps you stay organized. By following the steps outlined in this guide, you can easily set up and manage contact groups to enhance your productivity. Whether you’re coordinating with coworkers or staying connected with friends and family, Outlook’s contact group feature is a tool worth mastering.

